

My Store:
Find a Store near you
wallet
DIY Art Supply Organizer
Level of difficulty: Beginner
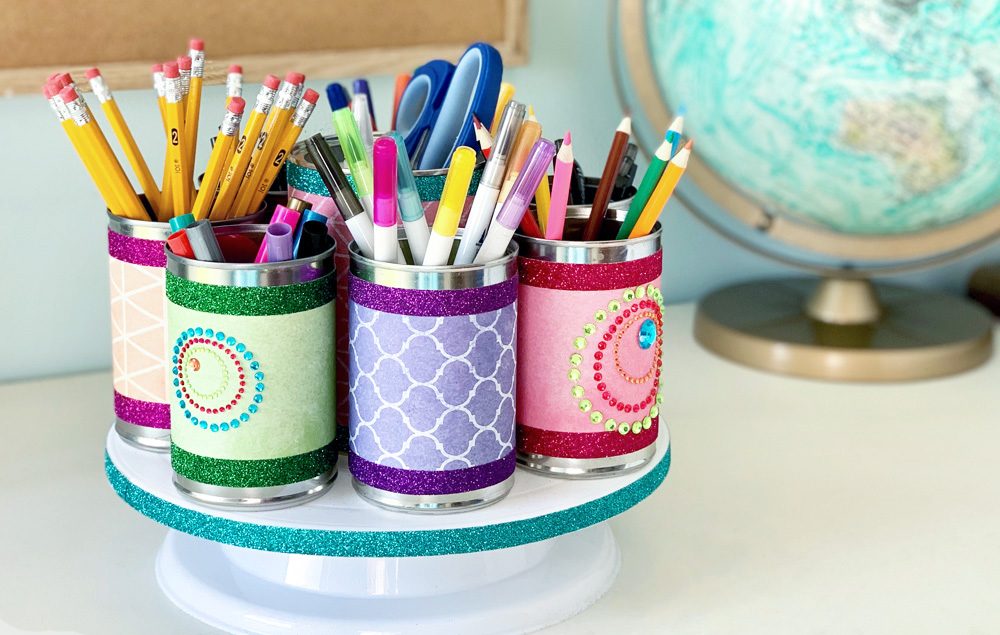
Keep all your homework supplies handy and easily accessible with this fun organizational system.
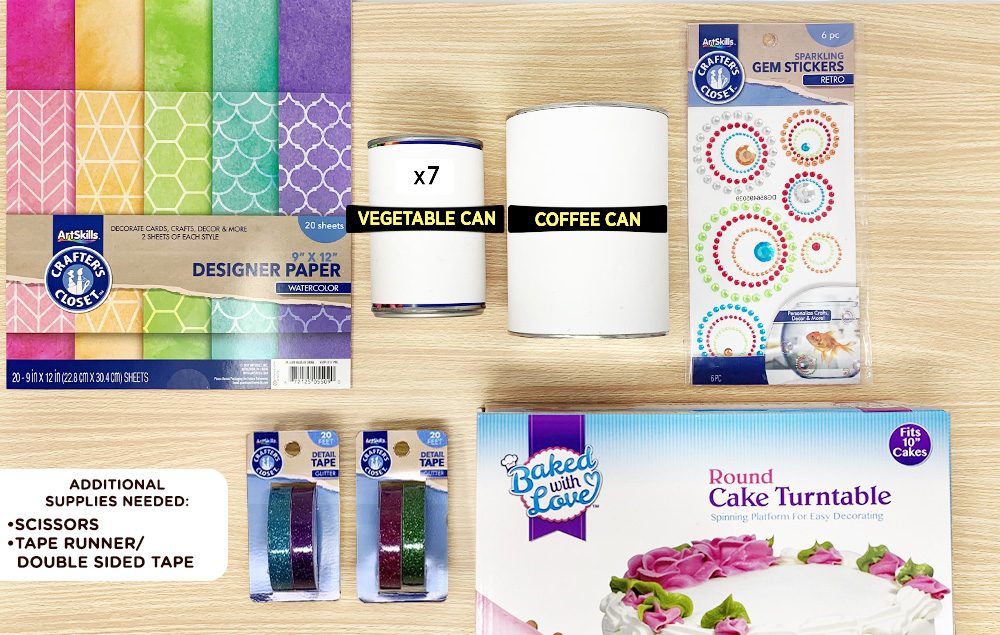
What You'll Need:
- 15 oz. Metal Cans
- Crafter’s Closet Sparkling Gem Stickers Retro
- Baked with Love Round Cake Turntable
- Crafter’s Closet Detail Glitter Tape
- Crafter's Closet Precision Scissors
- Crafter’s Closet Tape Runner
- 11.5 oz. Metal Coffee Can
Let's Do This!
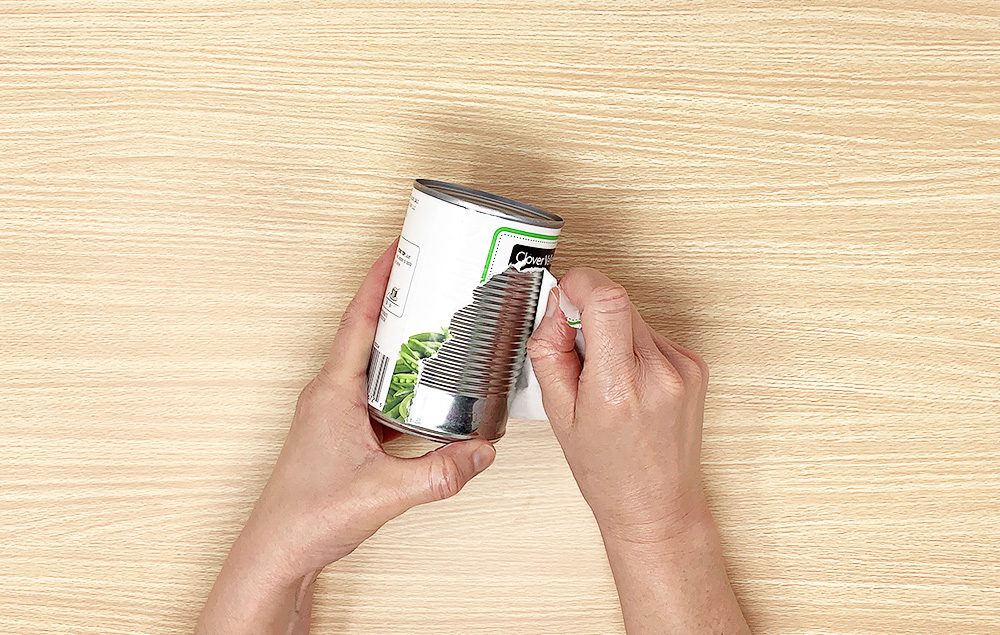
Step 1:
- To decorate the outer cans: Remove labels from seven 15 oz. (4 3/8" high by 3” wide) empty metal cans.
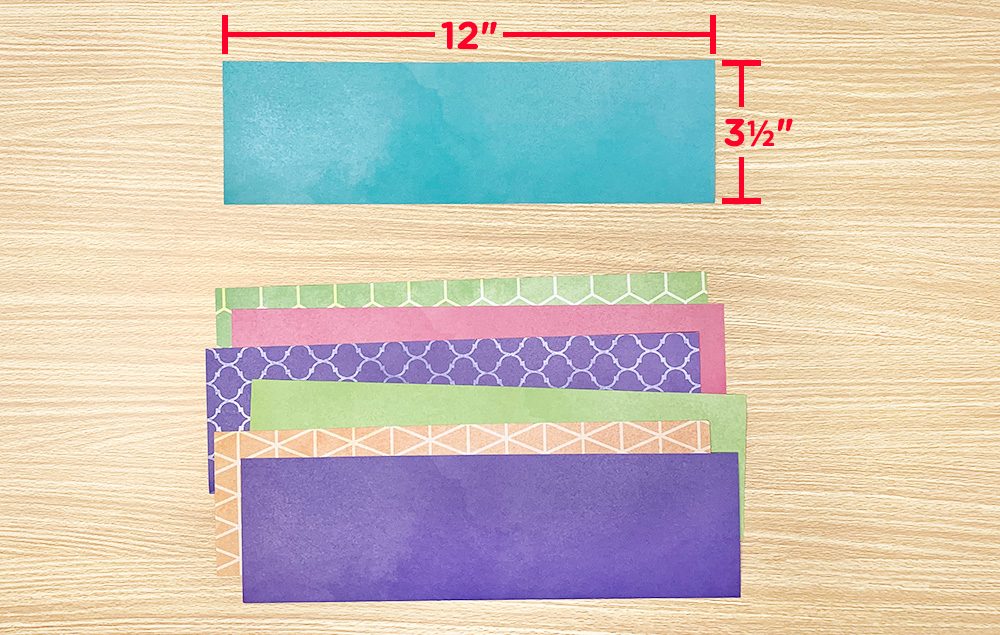
Step 2:
- Cut seven 3 ½" x 12" strips of paper. Tip: Alternate solid and patterned papers for a fun look!
Step 3:
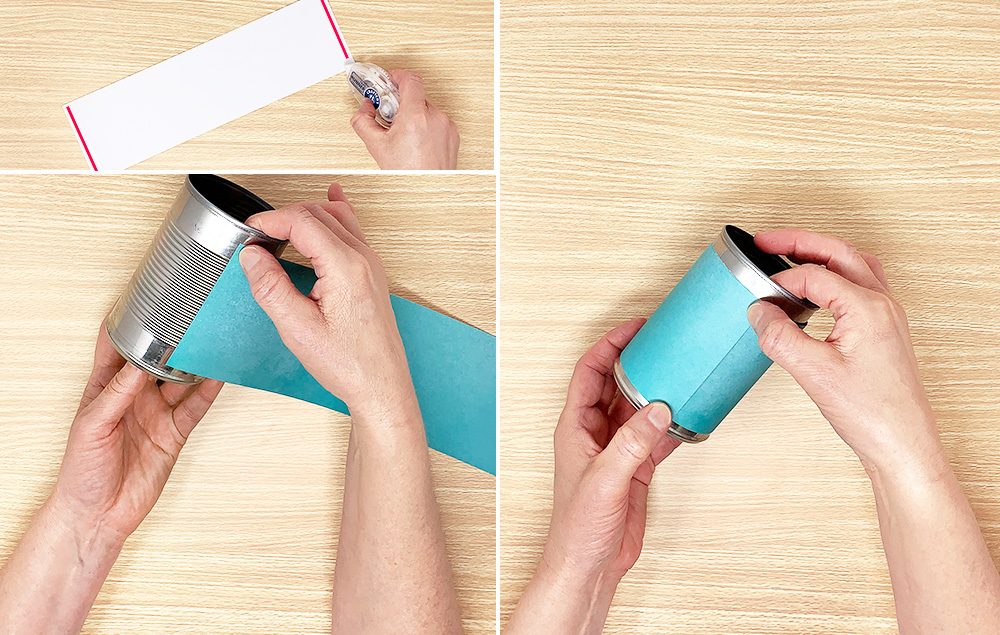
- Apply adhesive on the back of the paper strip along both 3 ½" ends.
- Adhere the paper strip to the metal can, centering the paper between the top and bottom of the can (some metal will show on the top and bottom edge).
- Wrap the paper strip around the can and adhere the other end at the seam. Repeat this process for all seven cans.
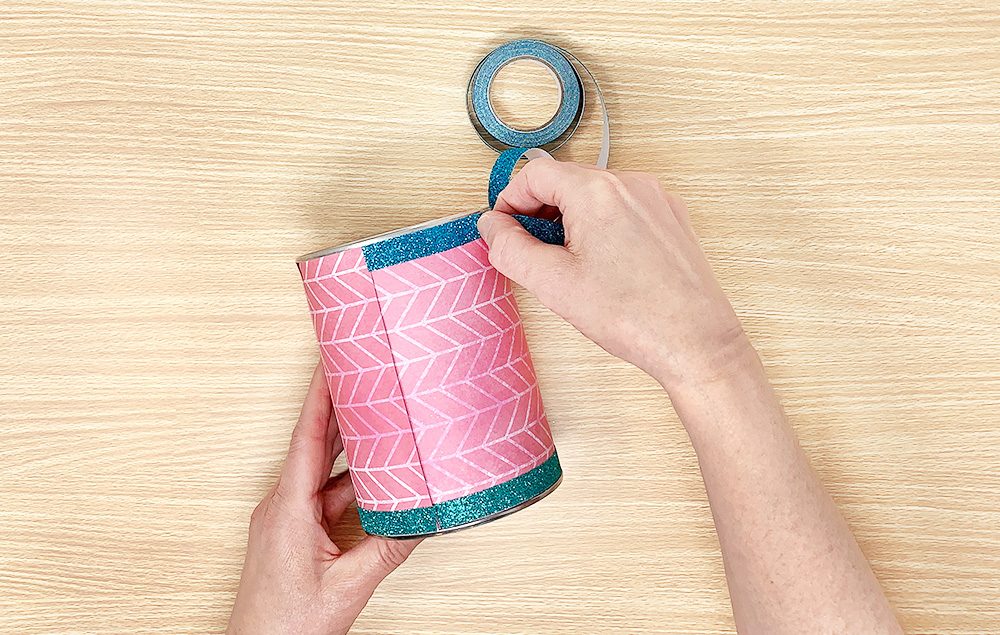
Step 4:
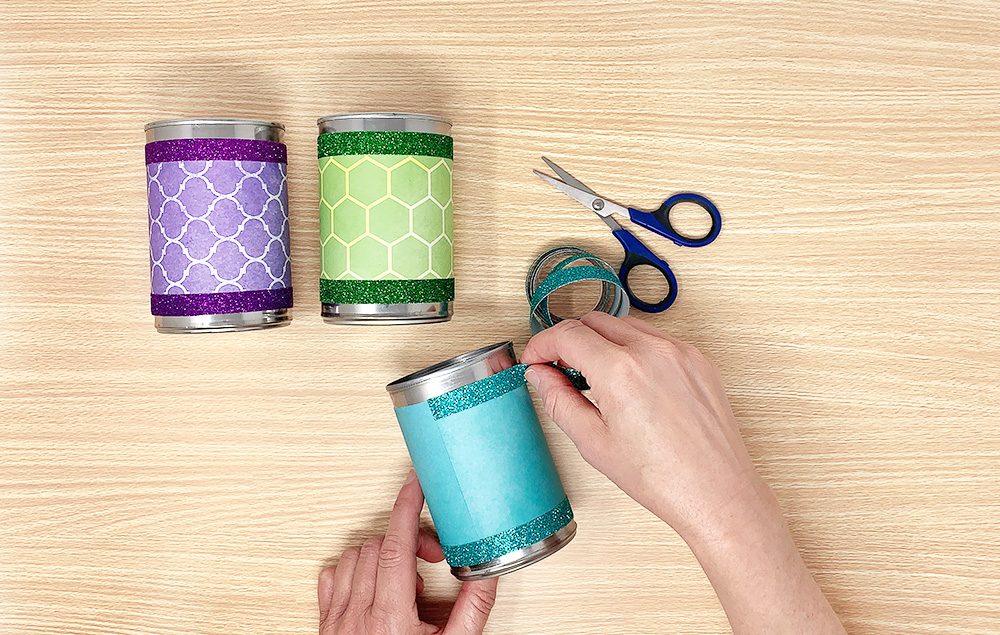
- Wrap decorative tape around the top and bottom edge of the paper. Match tape seams on back of can with paper seam. Repeat for all seven cans. Tip: Coordinate color of tape with paper color when possible.
Step 5:
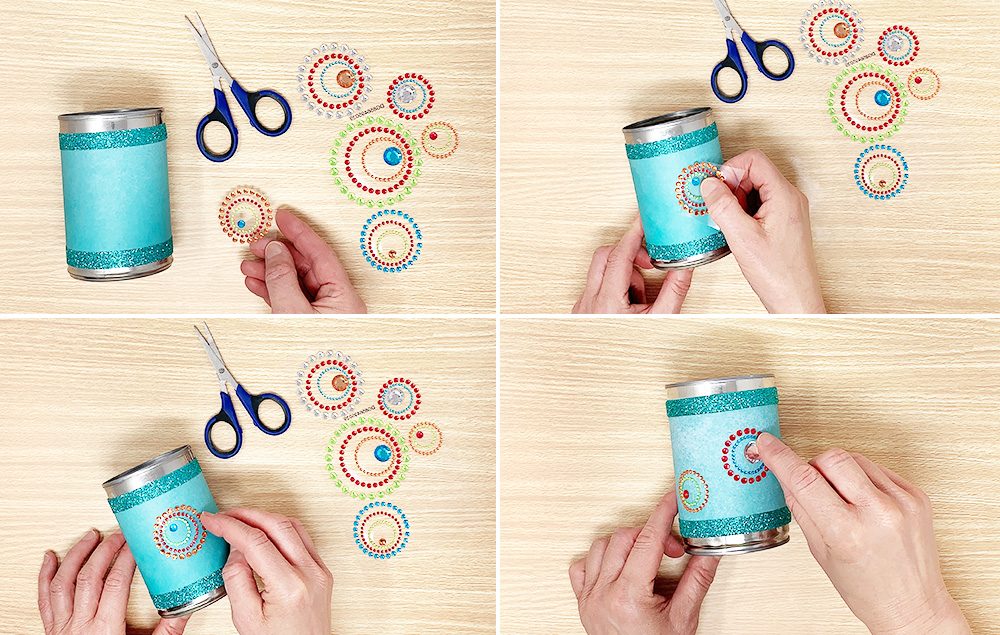
- Apply gem stickers to the solid colored paper strip on the can. Note: Be sure to apply the stickers on the front of the can, opposite the seam on the back.
Tip: To make sticker application easier, cut out the sticker you’d like to use. Fold the backing away on the side where the gems join together. Press the sticker gems to the can and carefully remove the rest of the backing. Press the rest of the sticker gems onto the can.
Step 6:
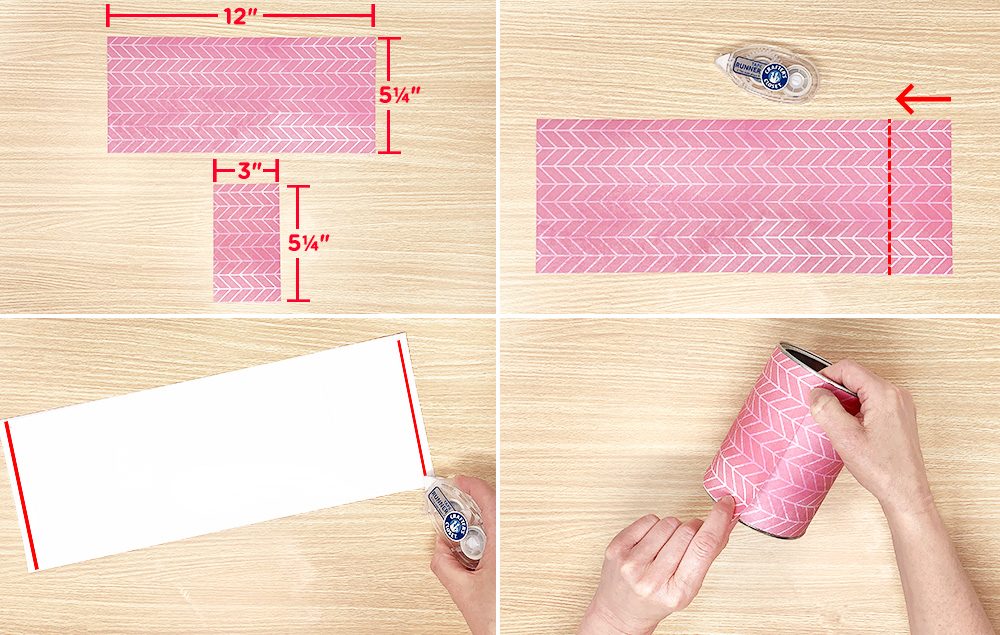
- To decorate the center 11.5 oz. (5 3/8" high by 4" wide) empty coffee can: Cut a 5 ¼" x 12" and a 5 ¼" x 3" piece of paper. Note: If you’re using patterned paper for this can, be sure to match the pattern design on the two pieces so they’ll match up when placed together.
- Place the two pieces of paper side by side and tape them together on the back to make one long piece.
- Apply adhesive to the back of the paper strip along both 5 ¼" ends.
- Adhere one end of the paper strip to the can, wrap the paper around the can, and adhere the other end at the seam.
Step 7:
- Wrap decorative tape around the top and bottom edge of the can. Match seams of tape on back of can with the patterned paper seam.
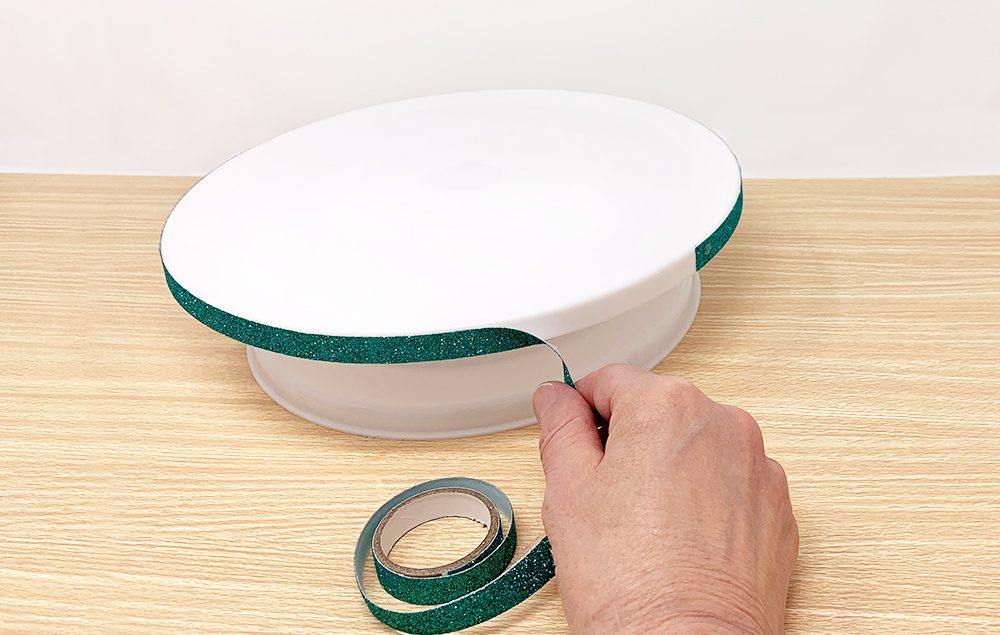
Step 8:
- Apply decorative tape to the lip edge of the cake turntable.
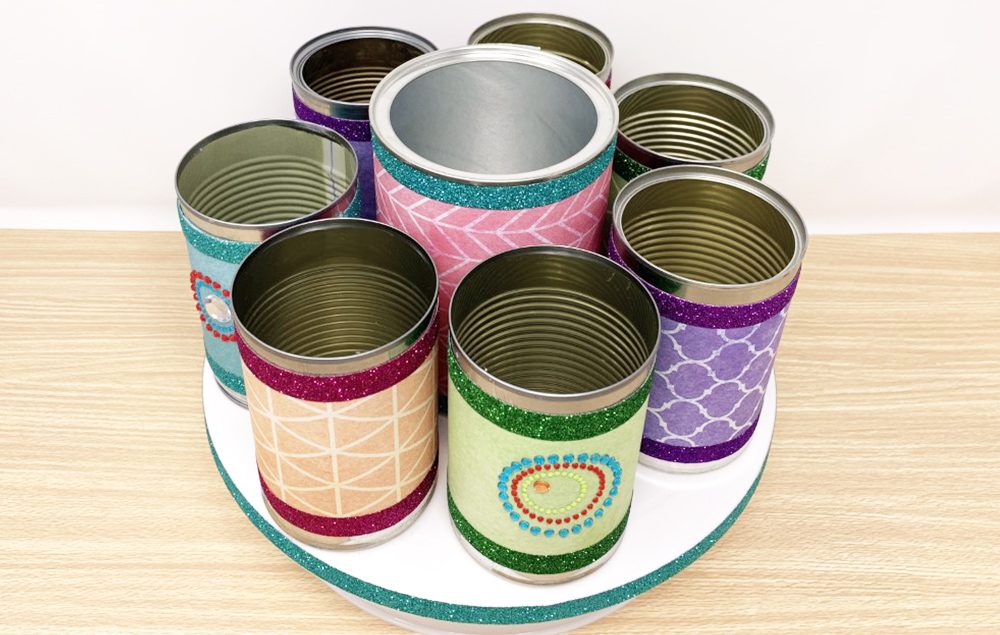
Step 9:
- Place coffee can on the center of the turntable and then place the seven metal cans around the outside.