

My Store:
Find a Store near you
wallet
DIY Clay Earth Project
Level of difficulty: Beginner
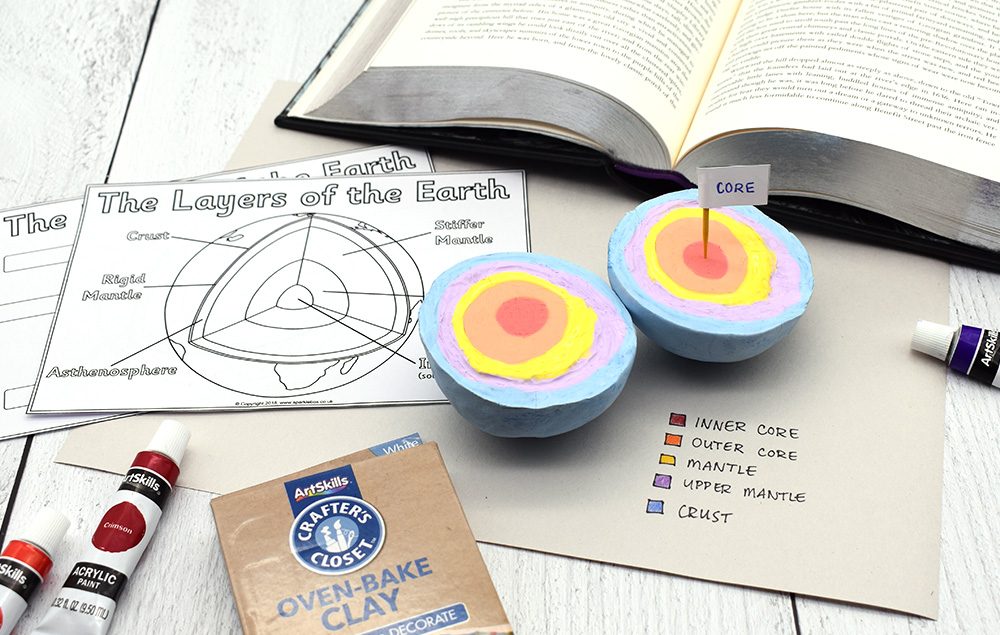
Get your science on! Show off your knowledge of the different layers of the Earth with this clay craft. Great for science fairs or classroom lessons!
What You'll Need:
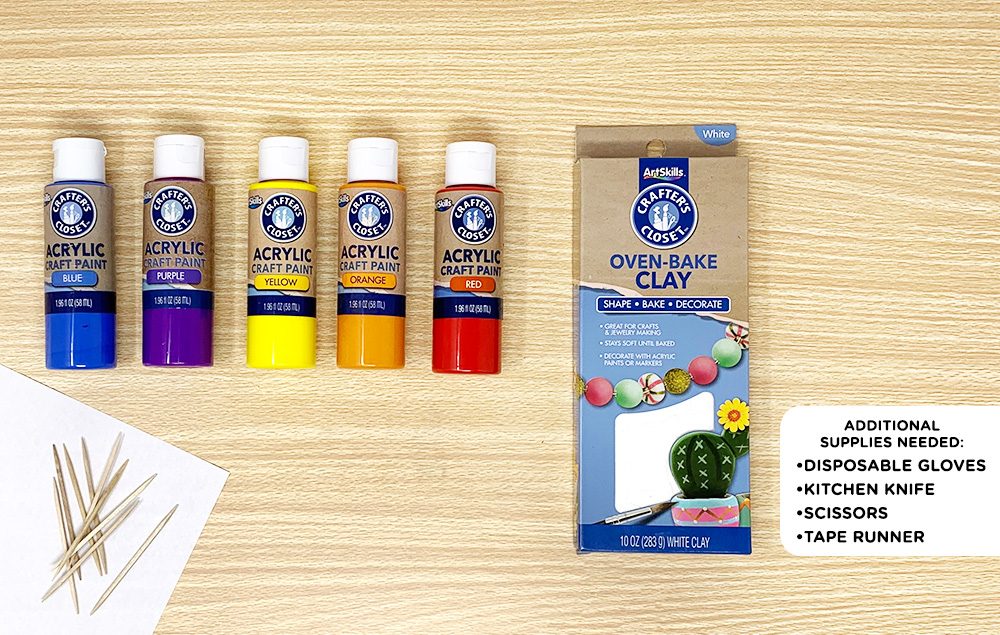
- Crafter’s Closet Oven Bake Clay
- Crafter’s Closet Acrylic Paint
- Disposable Gloves (optional)
- Toothpicks
- Sheet of White Paper
- Crafter’s Closet Tape Runner
- Crafter’s Closet Precision Scissors
- Pen
Let's Do This!
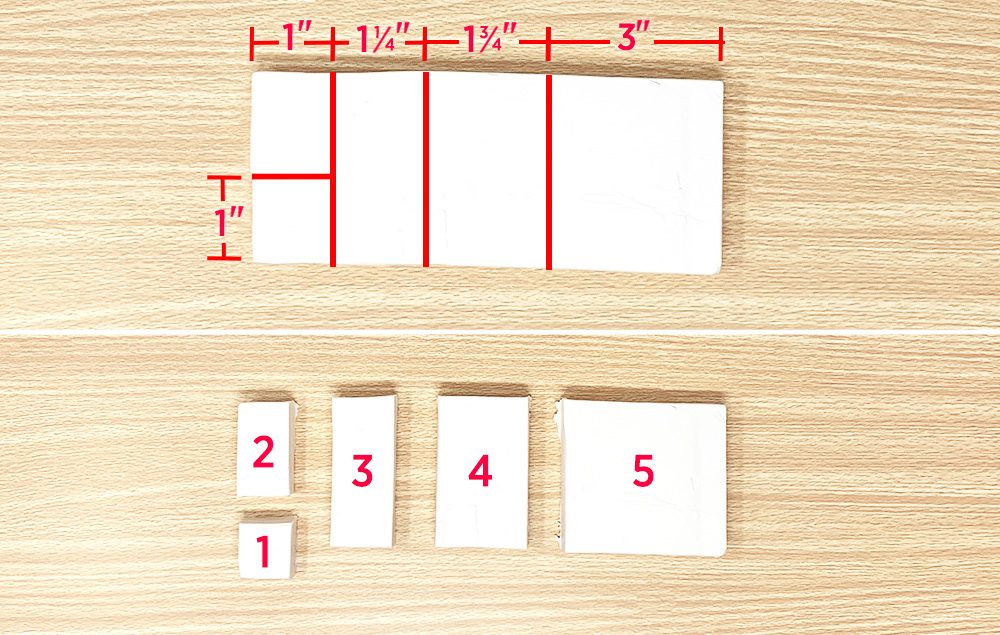
Step 1:
- Place rectangle block of clay horizontally on a cutting surface. Measure and cut strips from the clay block. Measuring across the top of the rectangle: 1", 1 1/4", 1 3/4", and 3". Cut a 1" x 1" cube from the end of the 1" strip.
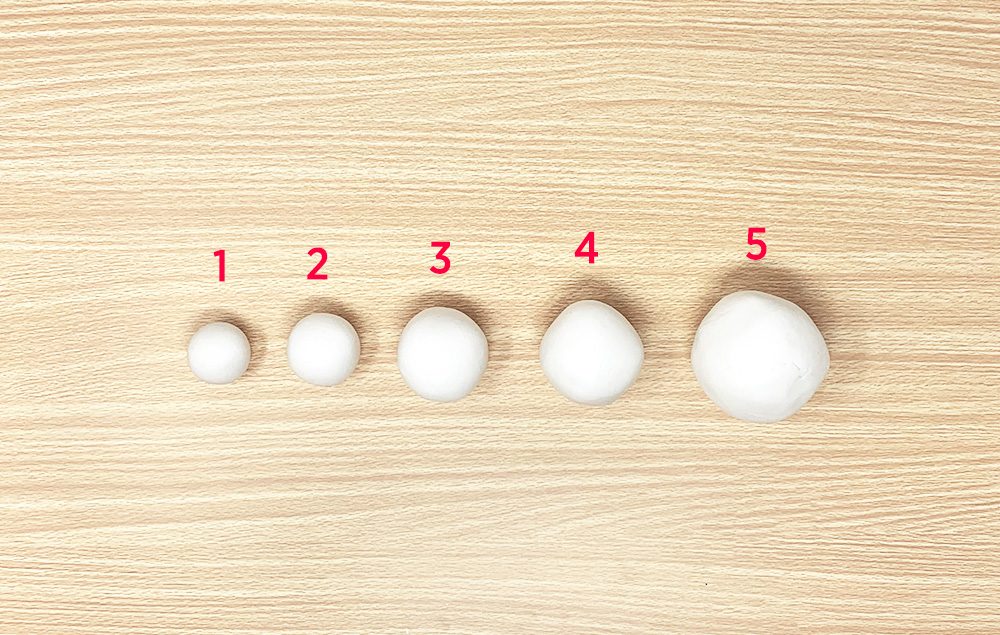
Step 2:
- Roll the clay strips into 5 balls. The clay balls should gradually go up in size.
Step 3:
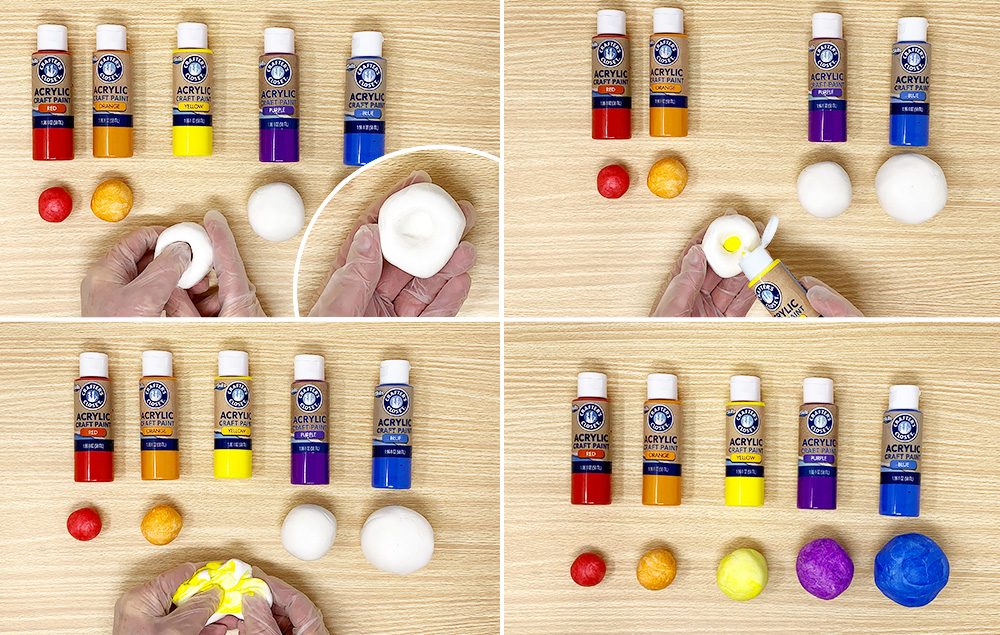
- Collect 5 different acrylic paint colors for the Earth’s layers. We used: red, orange, yellow, purple, and blue.
- Wearing gloves, add paint to the balls. Tip: Press your thumb into the center of the ball to make a placeholder for the paint.
- As in kneading dough, thoroughly work the paint into the balls.
Step 4:
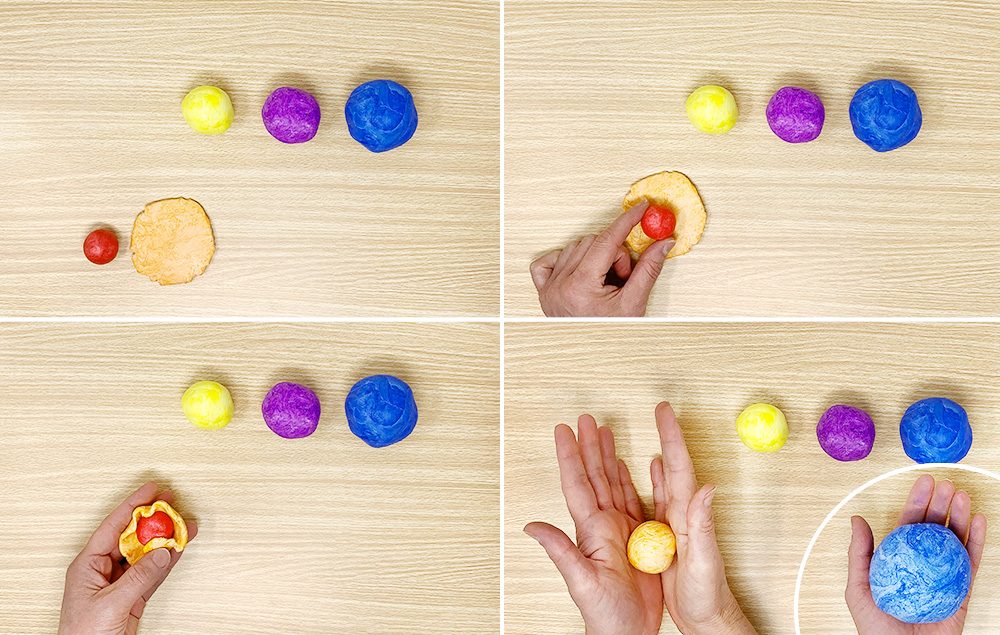
- Have the smallest pile of clay rolled into a ball.
- Flatten out the next biggest color ball and wrap it around the smallest ball. Tip: Place the smaller ball in the center of the flattened ball.
- Roll this back into a ball shape.
- Repeat steps B) and C) until all layers are completed.
Step 5:
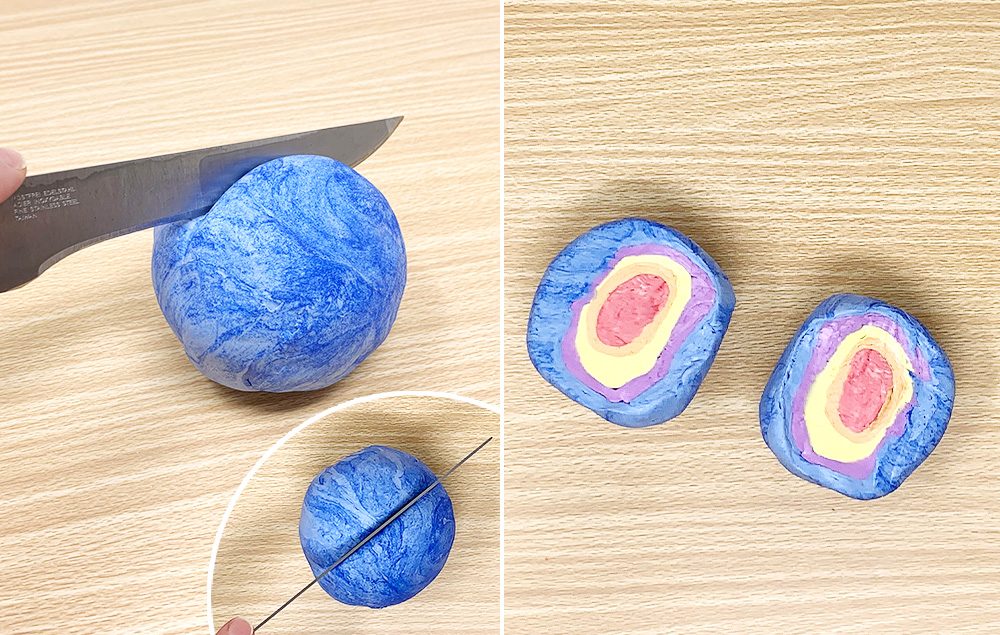
- Have an adult help cut Earth clay ball in half.
- Smooth out any spots on the layers with your fingers. Tip: Add texture to the layers by using a toothpick or pencil for a more realistic look.
Step 6:
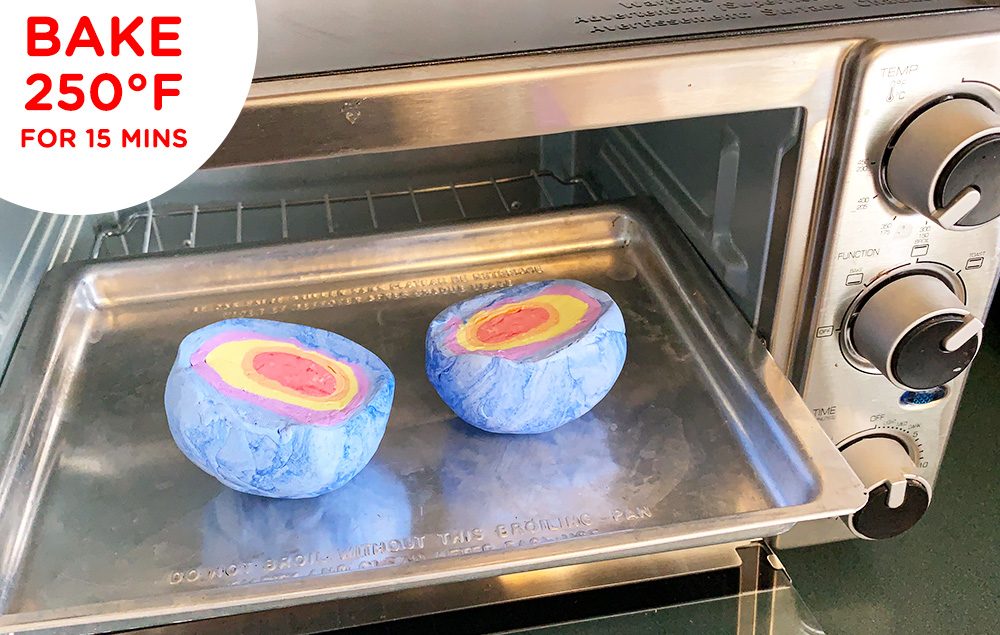
- Bake clay Earth at 250° F for approximately 15 minutes. Periodically check the Earth to watch for any cracking in the clay.
- Remove from oven and let cool.
Extra Step:
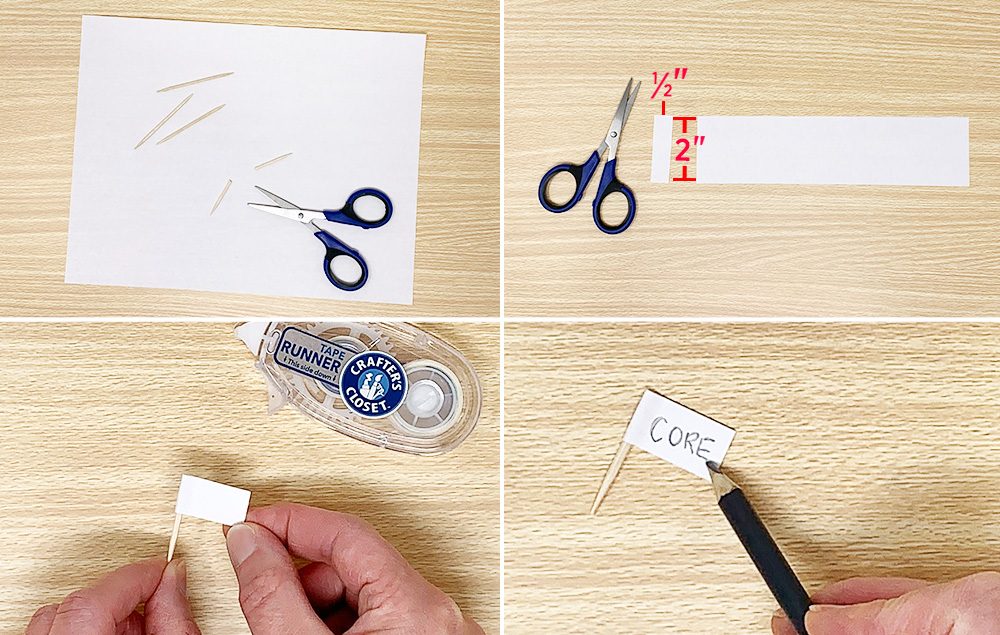
- Label the Earth’s layers with fun flags! Cut toothpicks in half for the poles.
- Cut approximately 1/2" x 2" rectangles from white paper.
- Fold a paper rectangle in half around the top of each toothpick. Adhere with glue or tape runner.
- Label flags with a pen.