

Valentine Box Ideas
Level of difficulty: Beginner
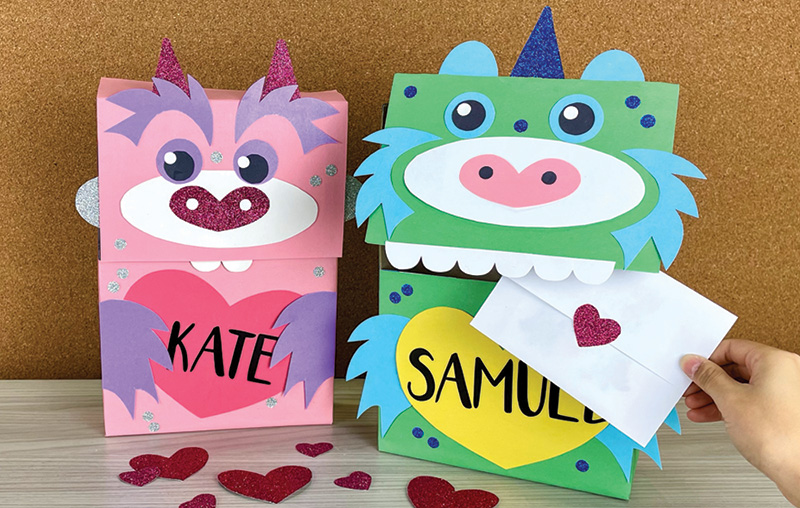
Turn an ordinary cereal box into a super-cute character who can gobble up classroom valentines! Kids can customize their characters with colors and designs. Personalize each box with your child’s name!

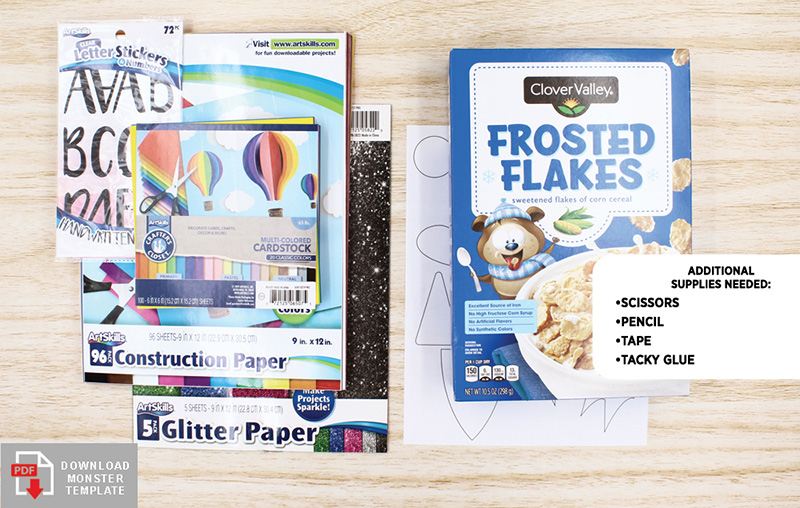
What You'll Need:
Let's Do This!
Step 1:
- Cut the side flaps off the top of the cereal box, making sure to leave the front and back flaps.
- Cut out a rectangle on the front of the box. To do this, follow the corner fold of the box to cut almost halfway down the front on one side. Then cut straight across to the other side and back up the opposite corner fold as shown. Remove that section and save for the next step.
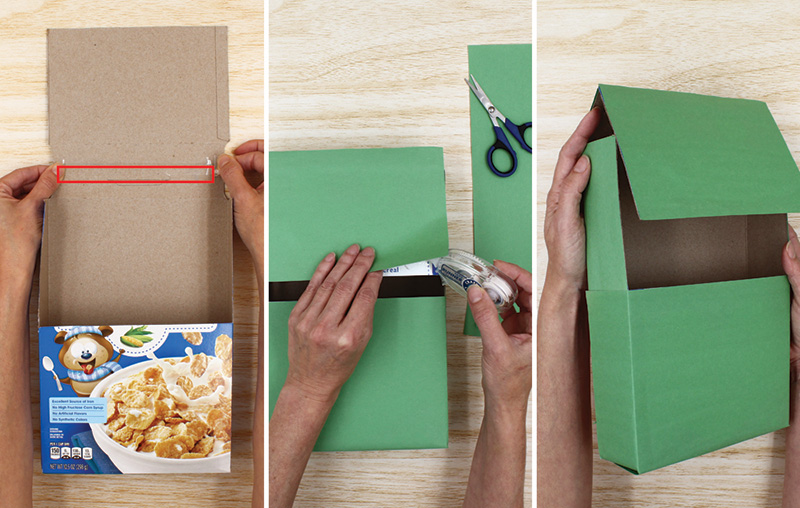
Step 2:
- Tape the front panel from Step 1 to the back flap of the box. You will be creating one giant flap.
- Choose a construction paper color to cover the box. Adhere to secure.
Make sure the flap can still be opened.
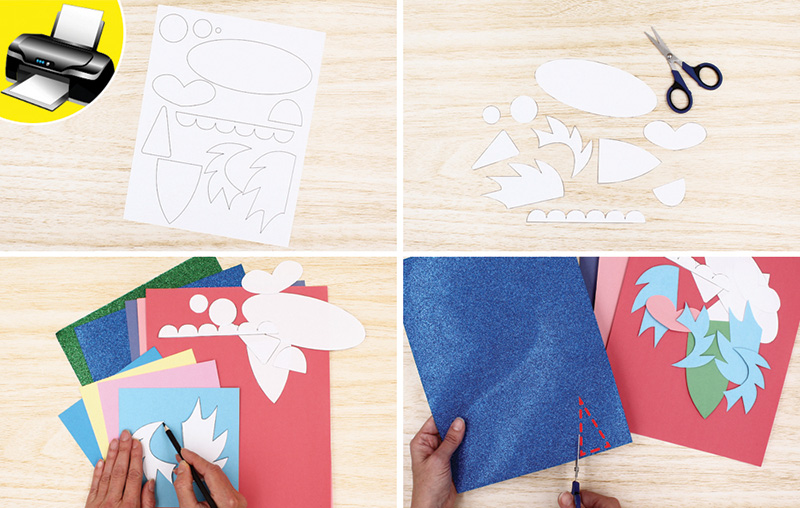
Step 3:
- Print out the template.
- Cut out the template pieces. Note: You can use the templates to create more than one box!
- Trace the template pieces onto your choice of accent papers.
Cut out the accent pieces.
Step 4:
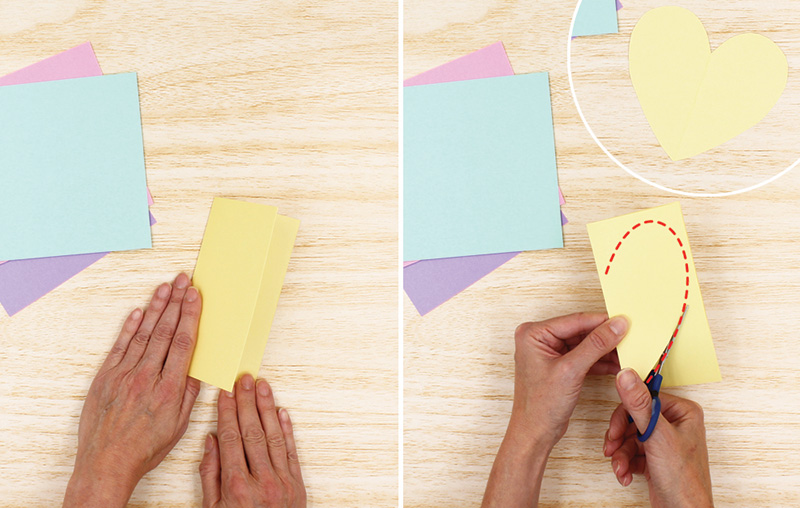
- Fold a square piece of paper in half.
- Cut out half of a heart shape. Open to reveal the full heart shape.
Step 5:
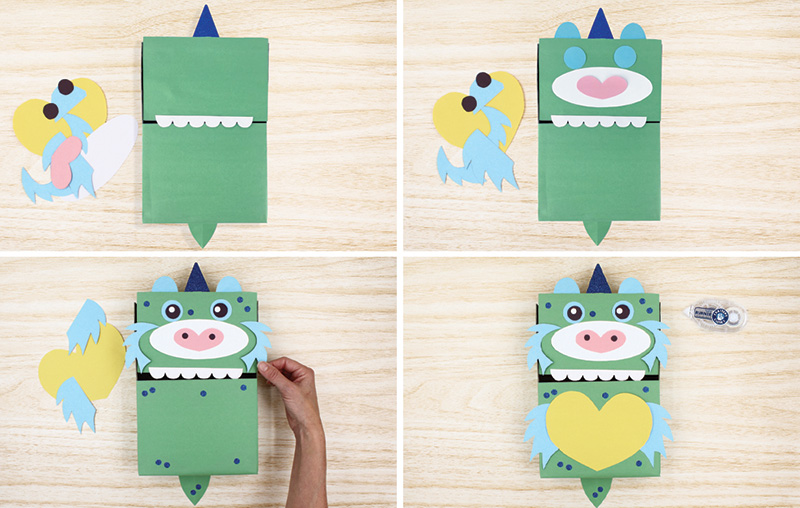
- Begin adding your accent pieces to the front of the cereal box.
- When you’re happy with the placement, adhere the pieces to the cereal box.
Step 6:
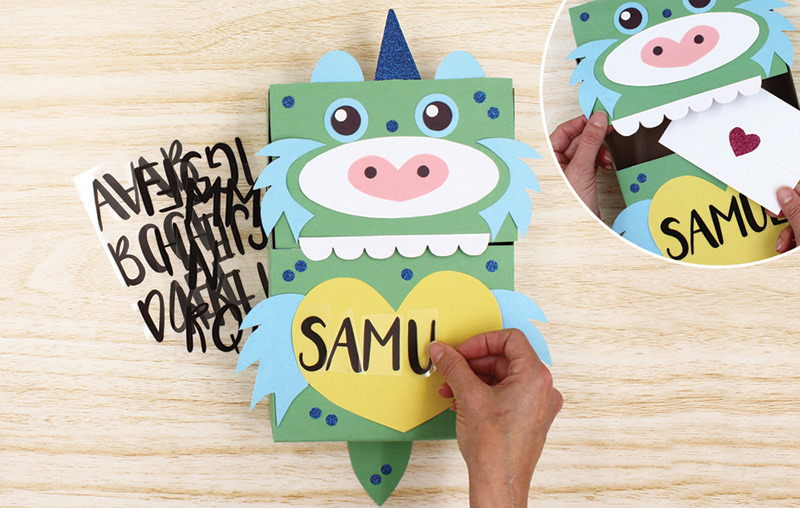
- Add a name to the heart with letter stickers. Your mailbox is ready for valentines!
- Filename
- monster_valentine_box-ideas.pdf
- Size
- 52 KB
- Format
- application/pdf


