

Wood Slice Sign
Level of difficulty: Beginner

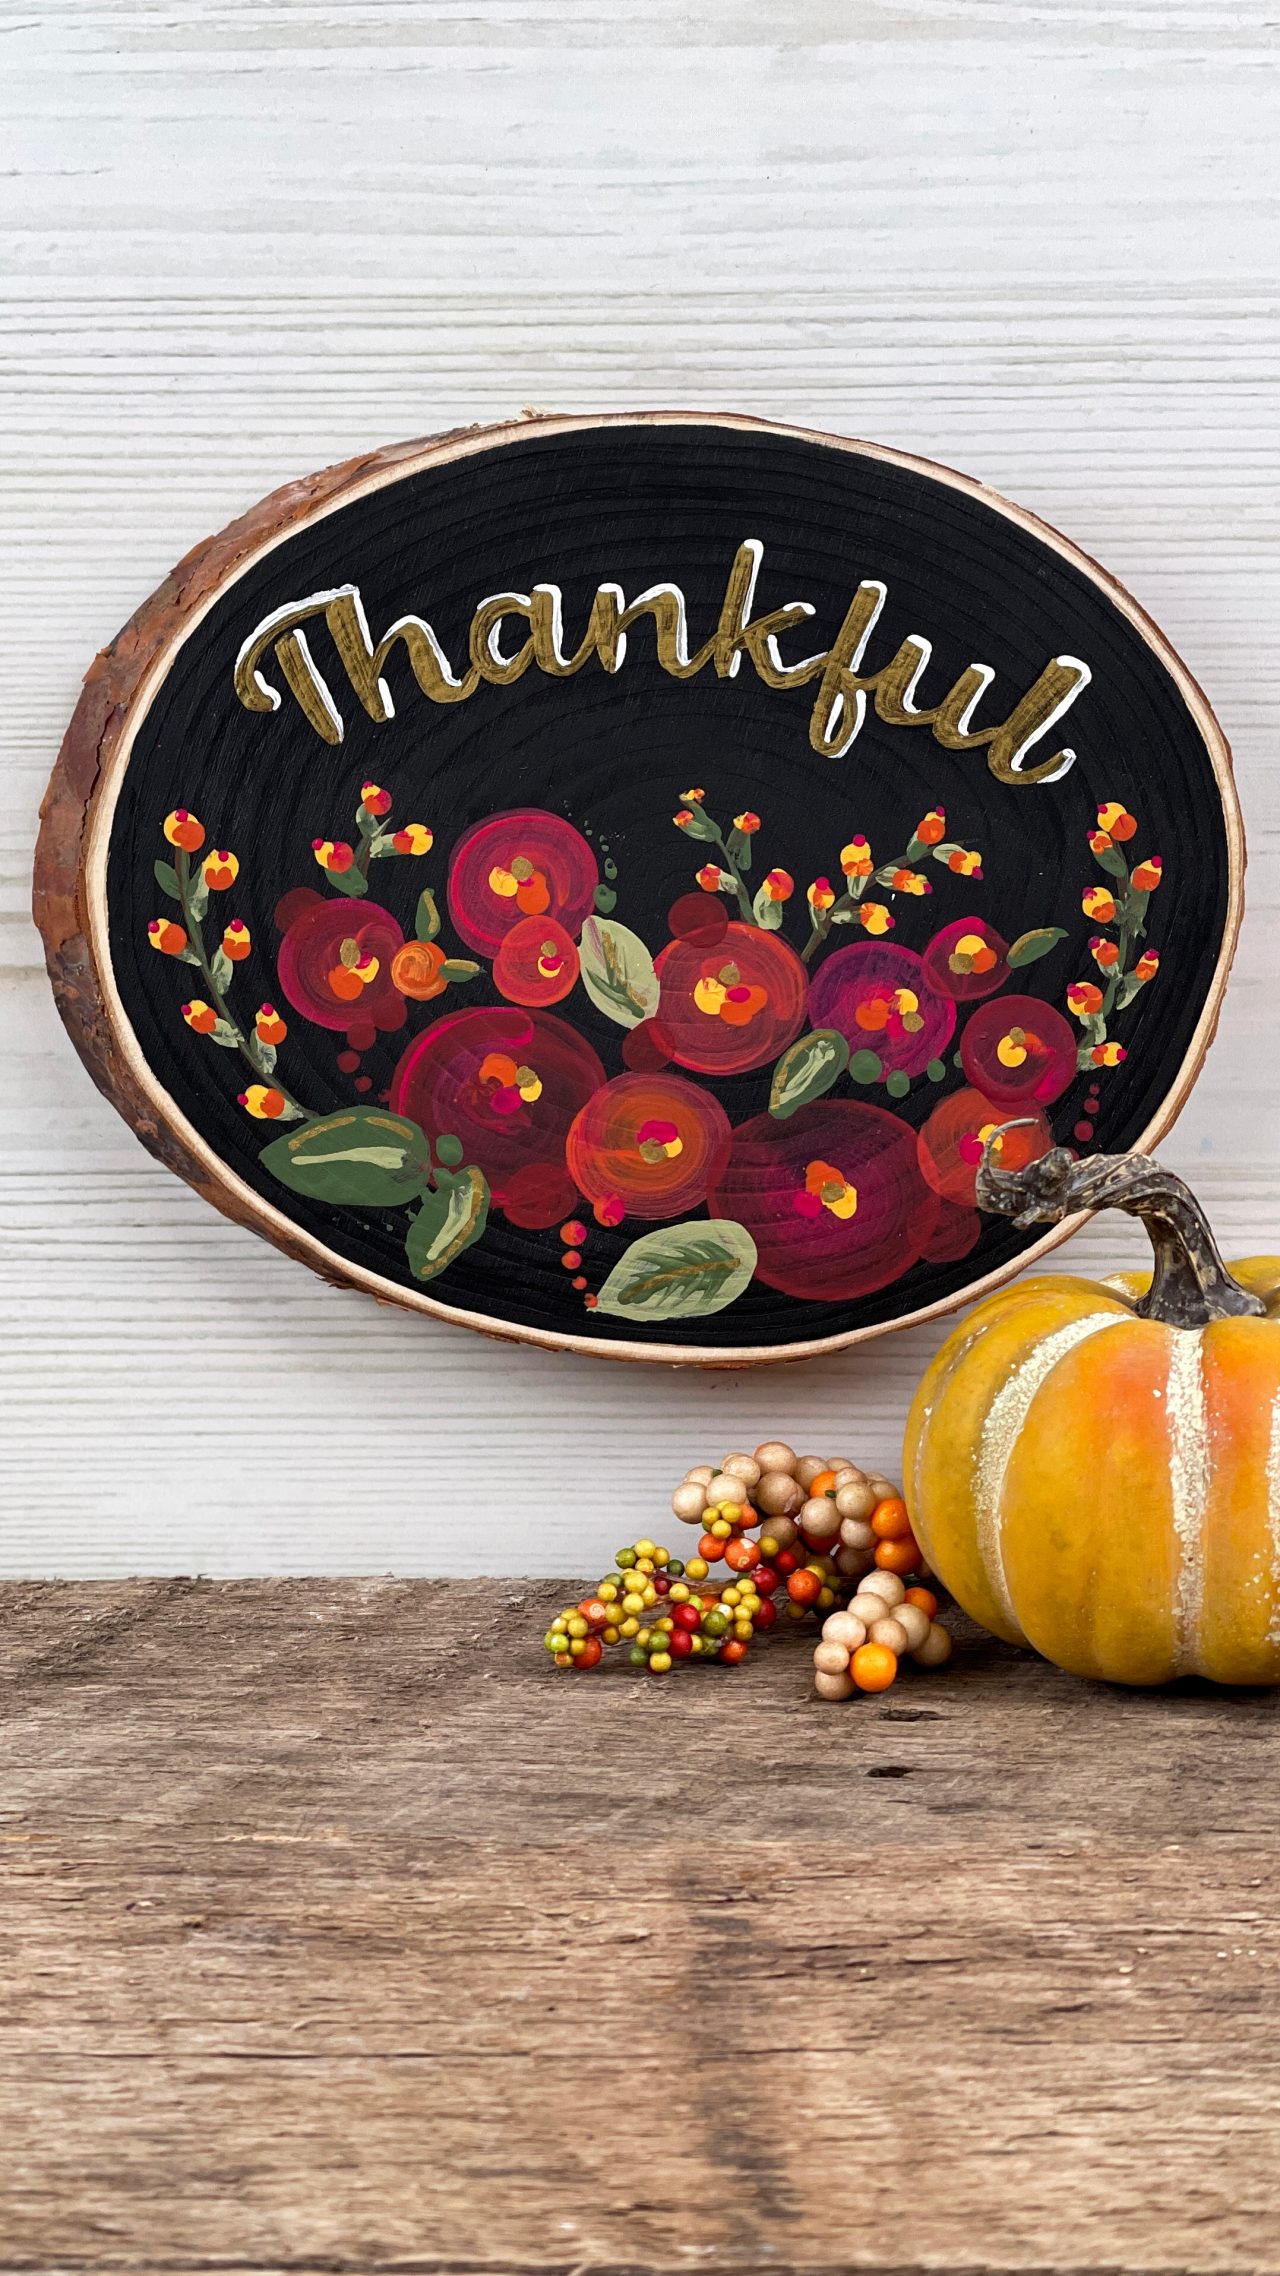
Create a charming wood slice sign for autumn! Simple painting techniques create colorful flowers and leaves, while gold highlights add a warm glow.
What You'll Need:
- Crafter’s Closet Wood Round
- Crafter’s Closet Chalkboard Black Craft Paint
- Crafter’s Closet White Acrylic Paint
- Crafter’s Closet Red Acrylic Paint
- Crafter’s Closet Orange Acrylic Paint
- Crafter’s Closet Yellow Acrylic Paint
- Crafter’s Closet Pink Acrylic Paint
- Crafter’s Closet Gold Paint Marker
- Crafter’s Closet Fabric Scissors
- Crafter’s Closet Premium Paint Brush Set, 6 Ct
- Chalk
- Painter’s Tape
- Pencil
- Templates
Let's Do This!

Step 1:
A) Paint the wood round with black chalkboard paint. Let dry.

Step 2:
A) Print out the templates.
B) Cut out the word “thankful.”
C) Flip the word “thankful” over to the backside of the paper.
D) Rub chalk on the back of the paper.

Step 3:
A) Place the word “thankful” on the wood round with the printed side up. Tape the paper in place.
B) Trace the outline of the word “thankful” with a pencil to transfer the chalk to the wood round.
C) Remove the paper and tape.

Step 4:
A) Use the gold metallic marker to fill in the word “thankful,” using the chalk markings as a guide. Let dry.
B) Add highlights to the word “thankful” with white paint. Let dry.

Step 5:
A) Use the template as a reference for placement of the painted flowers. Use the painting guide for tips and tricks. Have fun and be creative!

Step 6:
A) Use the gold metallic marker to add highlights to the leaves and flowers. Let dry.
- Filename
- Template_for_Wood_Sign_Placement.pdf
- Size
- 71 KB
- Format
- application/pdf
- Filename
- Template_PaintingGuide_Wood_Slice_Sign.pdf
- Size
- 460 KB
- Format
- application/pdf


