No Carve Pumpkin
Level of difficulty: Beginner
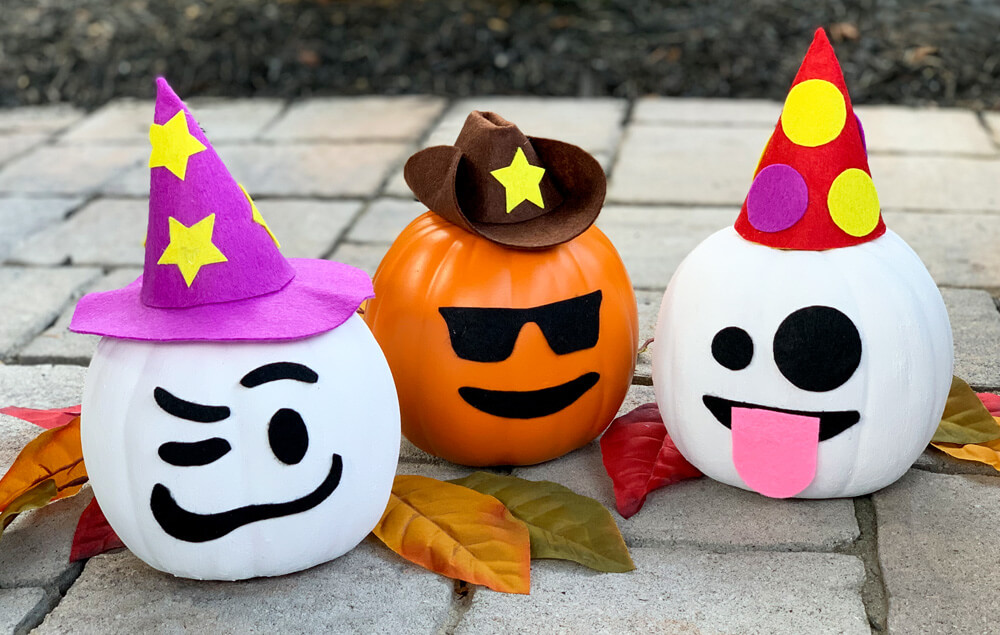
Create these cute mix and match Emoji Pumpkins just in time for Halloween fun! You can switch hats on the pumpkin faces to get unique looks!
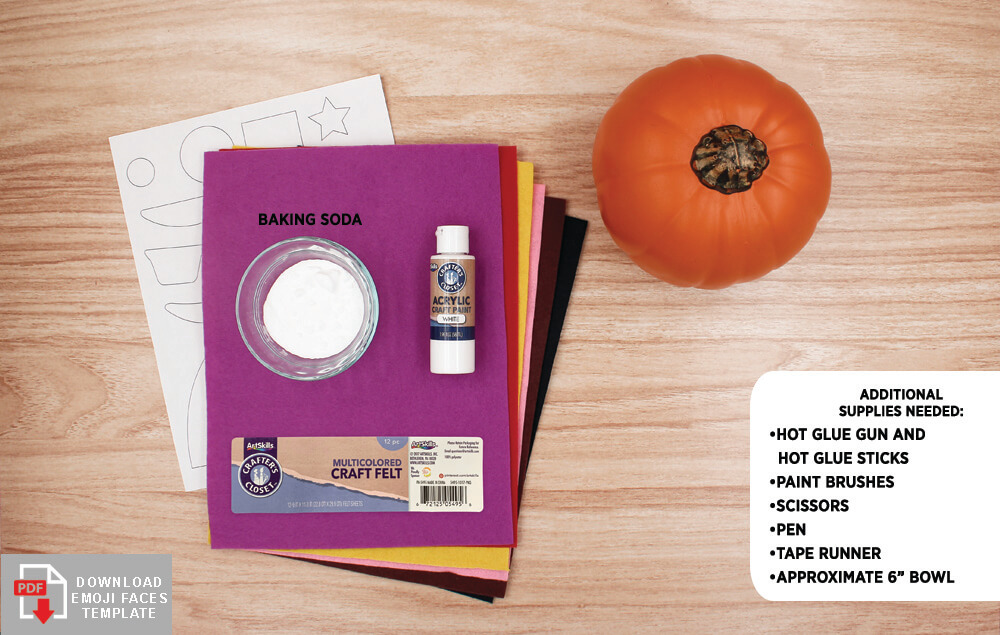
What You'll Need:
- Pumpkins (real or fake)
- ArtSkills Crafters Closet Acrylic Paint White
- ArtSkills Crafters Closet Paint Brush Premium
- ArtSkills Crafters Closet Palette
- ArtSkills Crafter's Closet Multi-Colored Felt Pack
- ArtSkills Crafters Closet Hot Glue Gun
- ArtSkills Crafters Closet Hot Glue Sticks
- ArtSkills Crafters Closet Precision Scissors
- ArtSkills Crafter's Closet Permanent Tape Runner
- Printed Template
- Bowl (Approx 6”) Cereal bowl works best
- Pen
Let's Do This!
Witch Emoji Pumpkin
Step 1: Painting the pumpkins
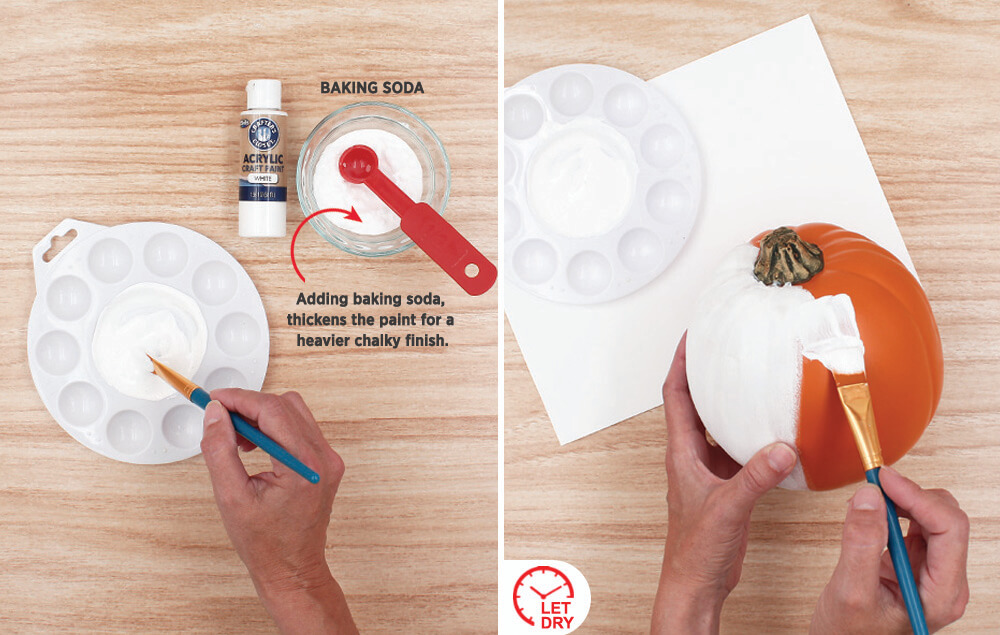
- Squeeze two large dollops of white paint onto a paint palette. Mix in small scoops of baking soda, a little at a time, until you get a thick, smooth icing consistency. TIP: Mixing baking soda into acrylic paint thickens the consistency and gives a heavier, chalky finish.
- Paint the pumpkin. Let dry. Add additional coats if needed.
Step 2: Preparing the hat pieces
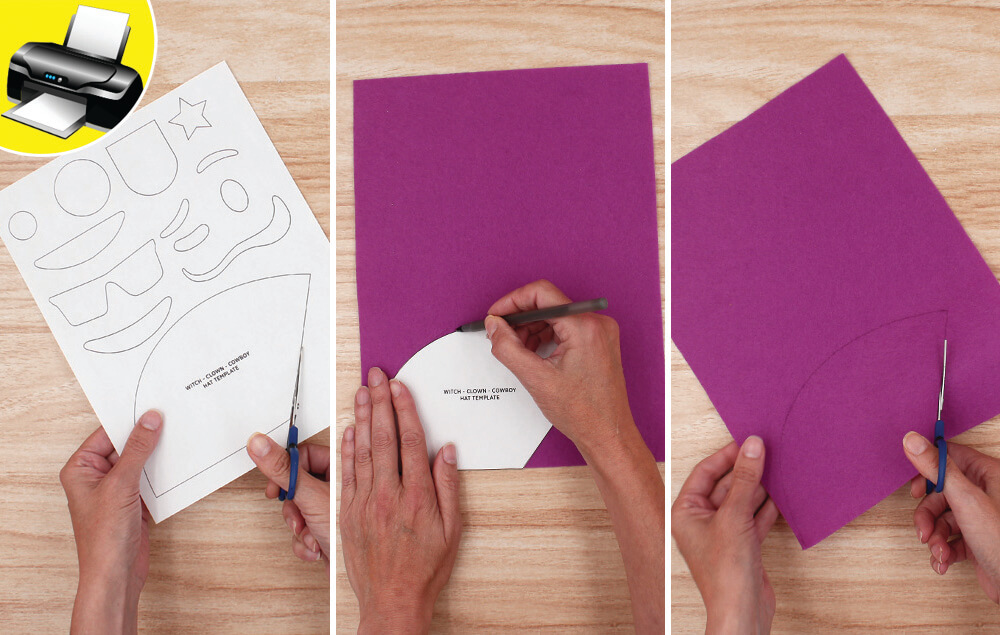
- Print and cut out the hat template.
- Trace hat template onto purple felt. TIP: trace your template pieces close to the edges of the felt. This will help save room for additional hat pieces.
- Cut out the hat piece.
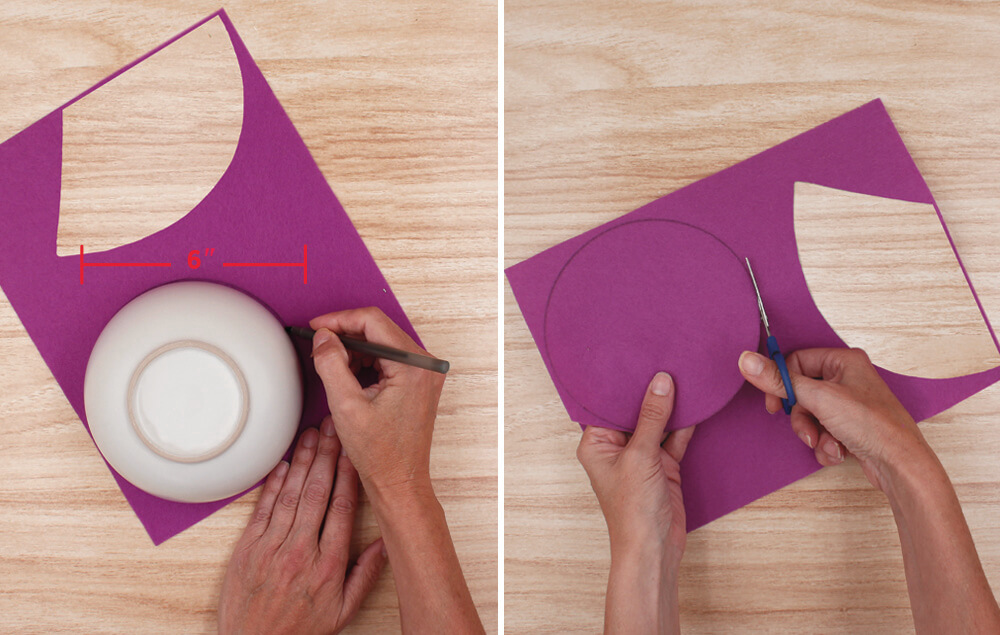
Step 3: Preparing the hat brim
- Use a bowl to trace a 6” (approximate) circle onto the remaining purple felt.
- Cut out the circle.
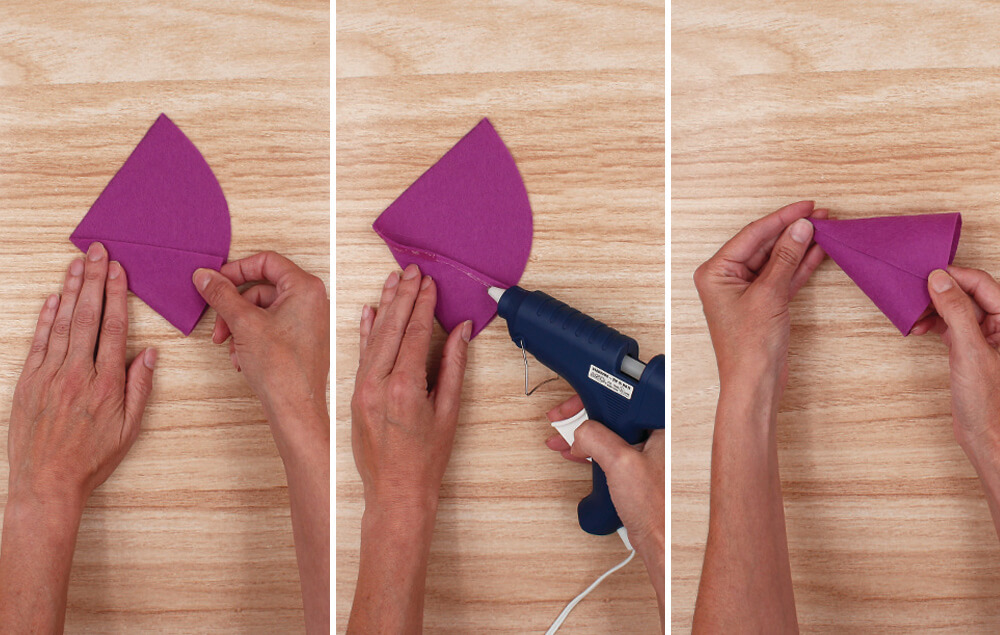
Step 4: Assemble the top portion of the hat
- Fold in one third of the first hat piece.
- Run a line of hot glue down the folded edge.
- Fold over the other third and press into the seam of hot glue to make a cone shape.
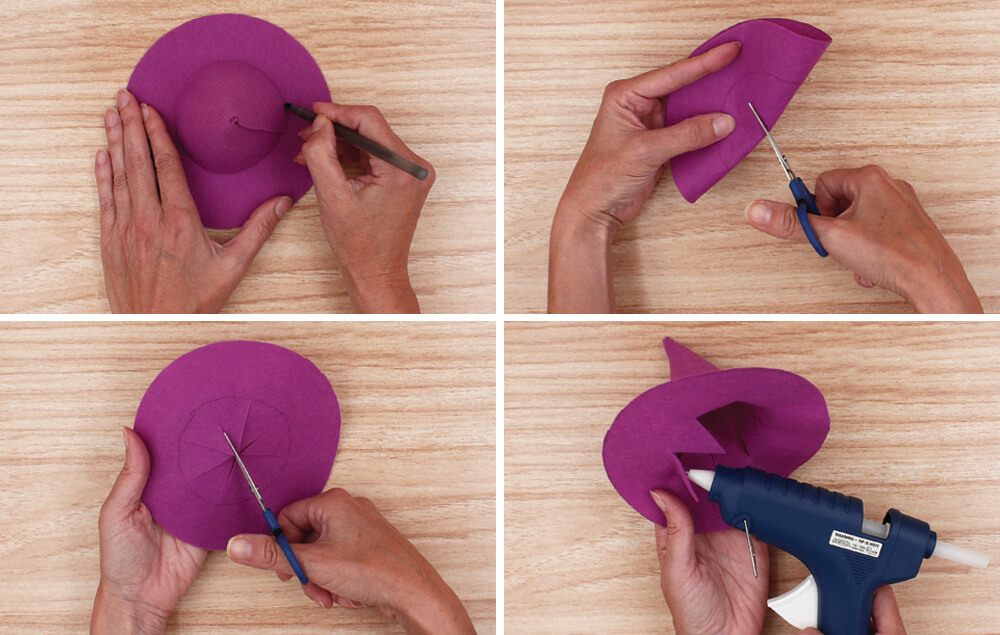
Step 5: Assembling the hat
- Set the cone shape in the center of the circle and trace around the cone.
- Remove the cone and fold the circle in half and snip a slit.
- Open the circle and begin cutting the circle into 8 wedges. TIP: Do not cut past the circle you have traced.
- Using hot glue, attach the wedges to the inside of the cone-shaped hat.
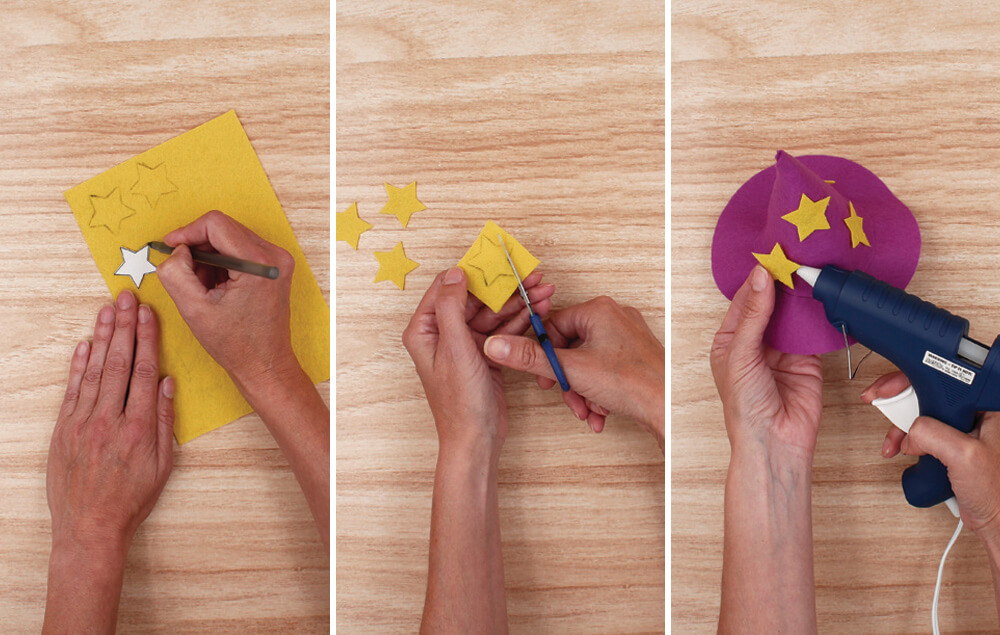
Step 6: Embellishing your hat
- Trace four stars onto yellow felt.
- Cut out the stars.
- Glue the stars to your hat.

Clown Emoji Pumpkin
Step 1: Painting the pumpkins
- Squeeze two large dollops of white paint onto a paint palette. Mix in small scoops of baking soda, a little at a time, until you get a thick, smooth icing consistency. TIP: Mixing baking soda into acrylic paint thickens the consistency and gives a heavier, chalky finish.
- Paint the pumpkin. Let dry. Add additional coats if needed.
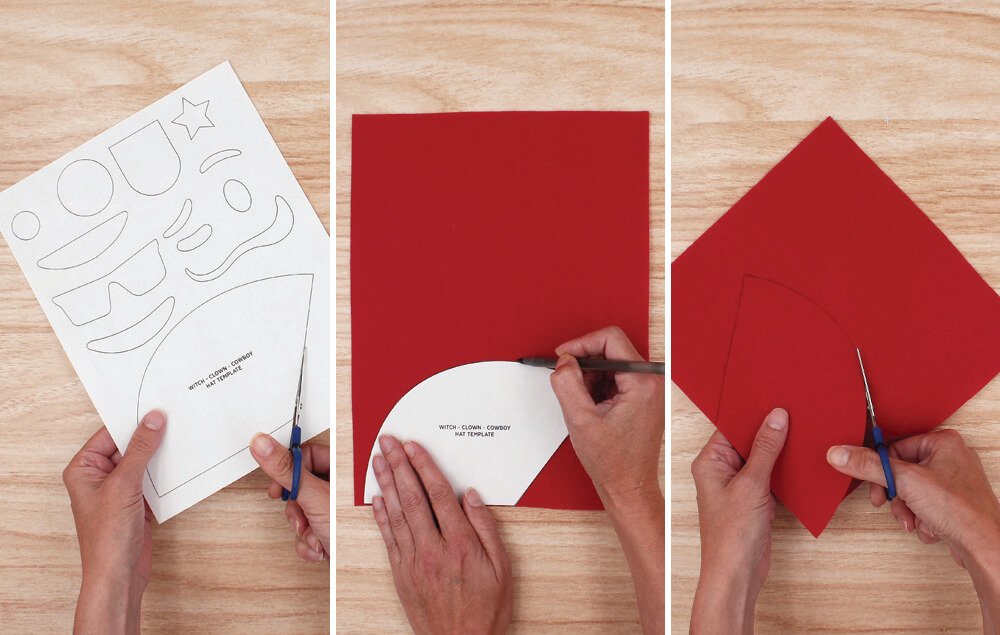
Step 2: Preparing the hat pieces
- Print and cut out the hat template.
- Trace hat template onto red felt. TIP: trace your template pieces close to the edges of the felt. This will help save room for additional hat pieces.
- Cut out the hat piece.
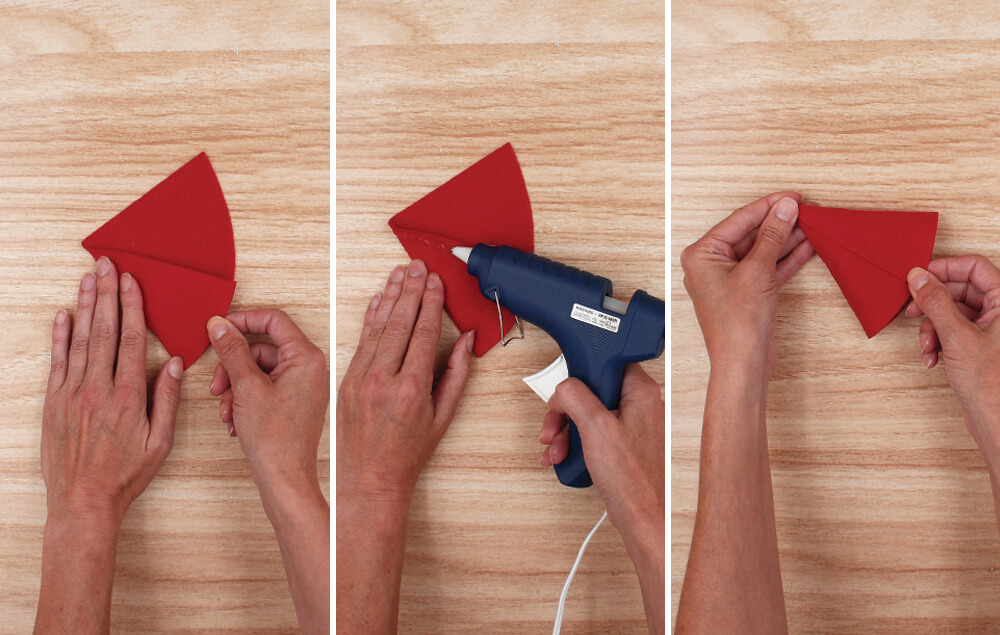
Step 3: Assemble the hat
- Fold in one third of the hat piece.
- Run a line of hot glue down the folded edge.
- Fold over the other third and press into the seam of hot glue to make a cone shape.
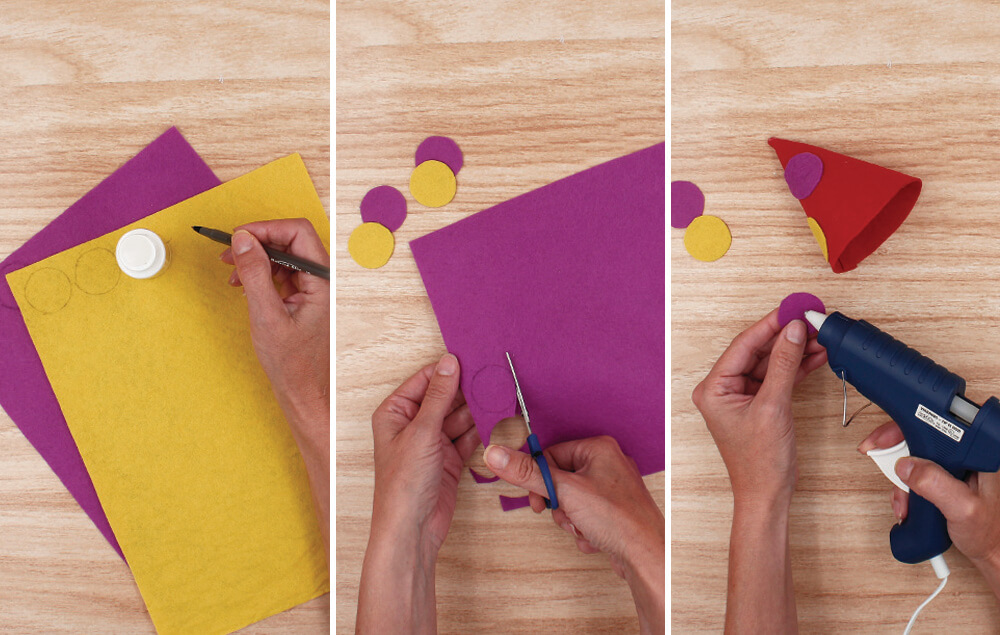
Step 4: Embellishing your hat
- Trace five circles onto felt using the bottom of the paint bottle as a template.
- Cut out the circles.
- Glue the circles to your hat.
Cowboy Emoji Pumpkin
Step 1: Preparing the hat
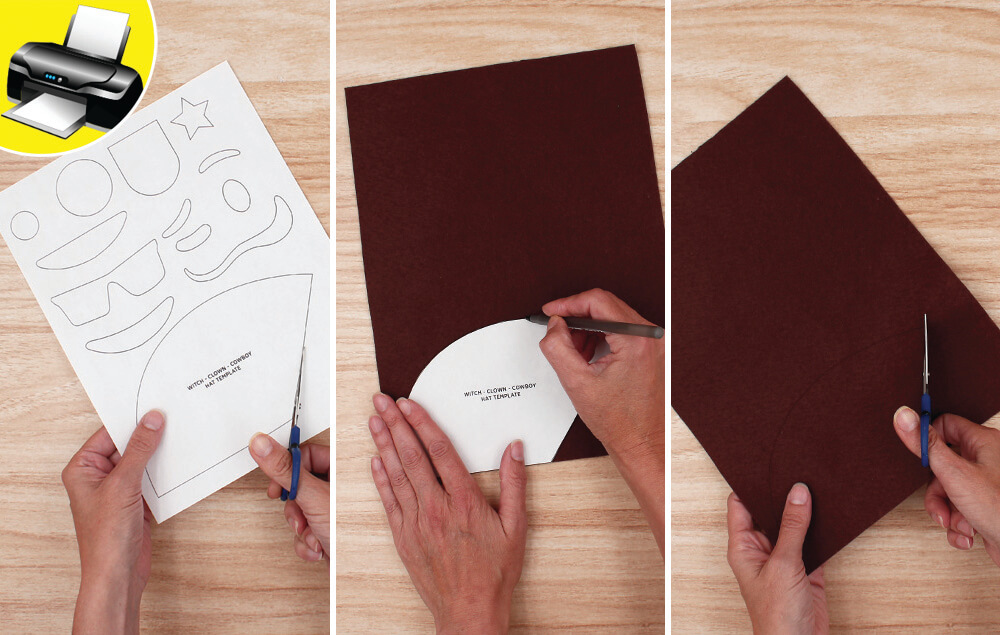
- Print and cut out the hat template.
- Trace hat template onto brown felt. TIP: trace your template pieces close to the edges of the felt. This will help save room for additional hat pieces.
- Cut out the hat piece.
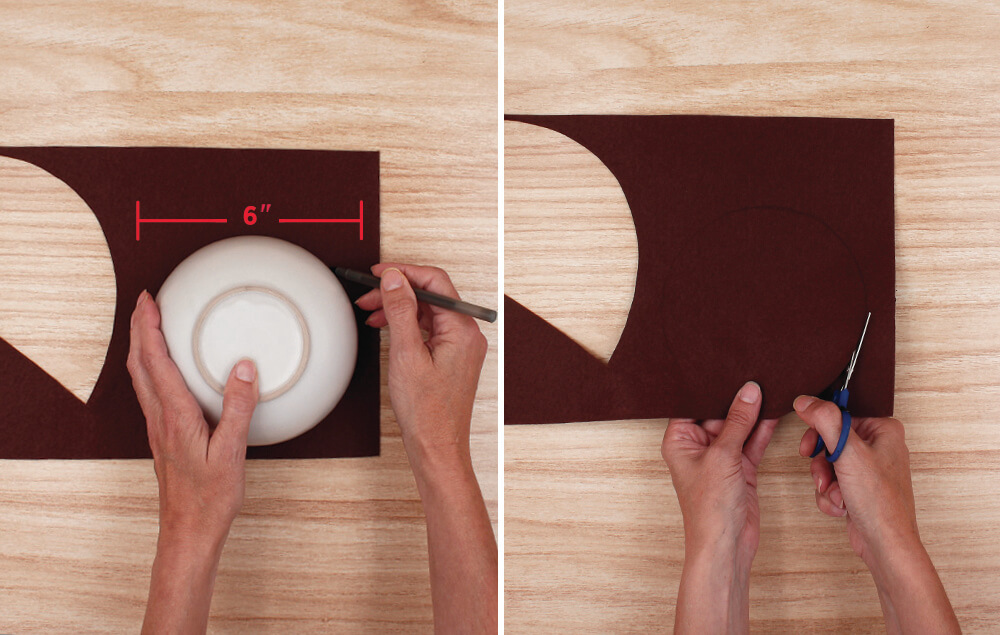
Step 2: Preparing the hat brim
- Use a bowl to trace a 6” (approximate) circle onto the remaining brown felt.
- Cut out the circle.
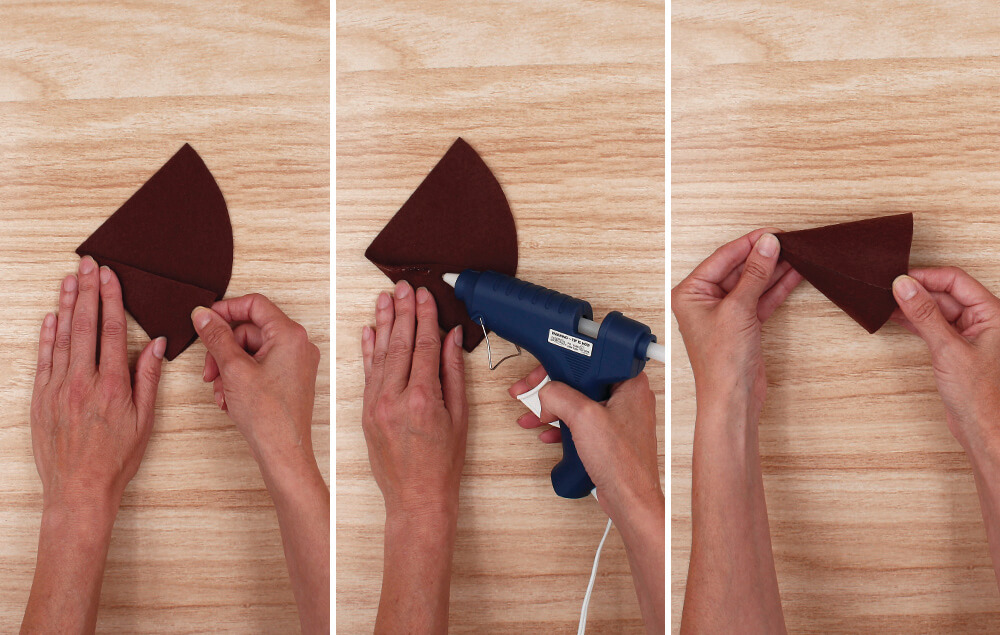
Step 3: Assemble the top portion of the hat
- Fold in one third of the first hat piece.
- Run a line of hot glue down the folded edge.
- Fold over the other third and press into the seam of hot glue to make a cone shape.
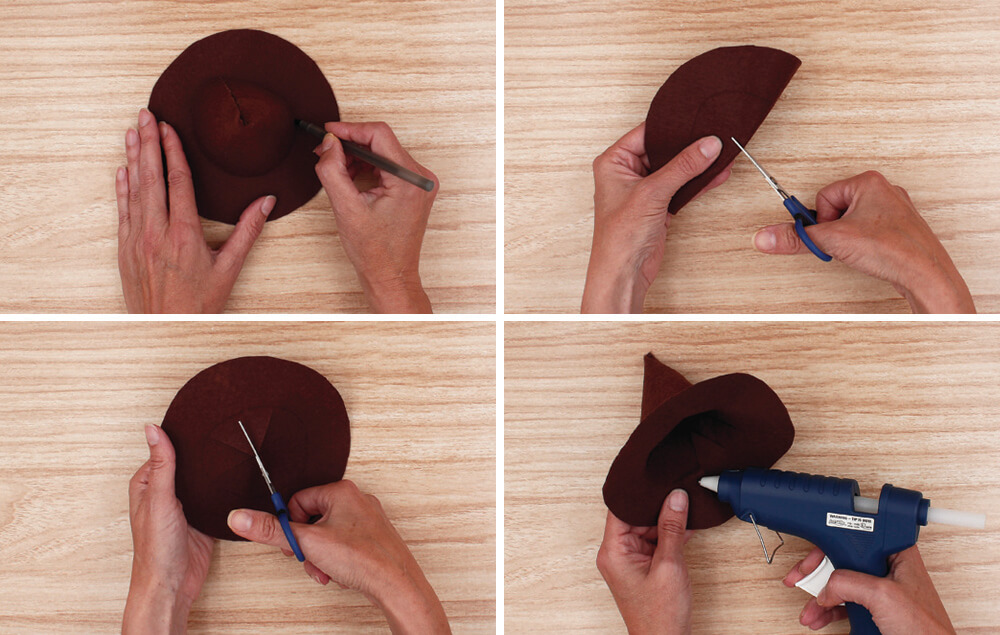
Step 4: Assembling the hat
- Set the cone shape in the center of the circle and trace around the cone.
- Remove the cone and fold the circle in half and snip a slit.
- Open the circle and begin cutting the circle into 8 wedges. TIP: Do not cut past the circle you have traced.
- Using hot glue, attach the wedges to the inside of the cone-shaped hat.
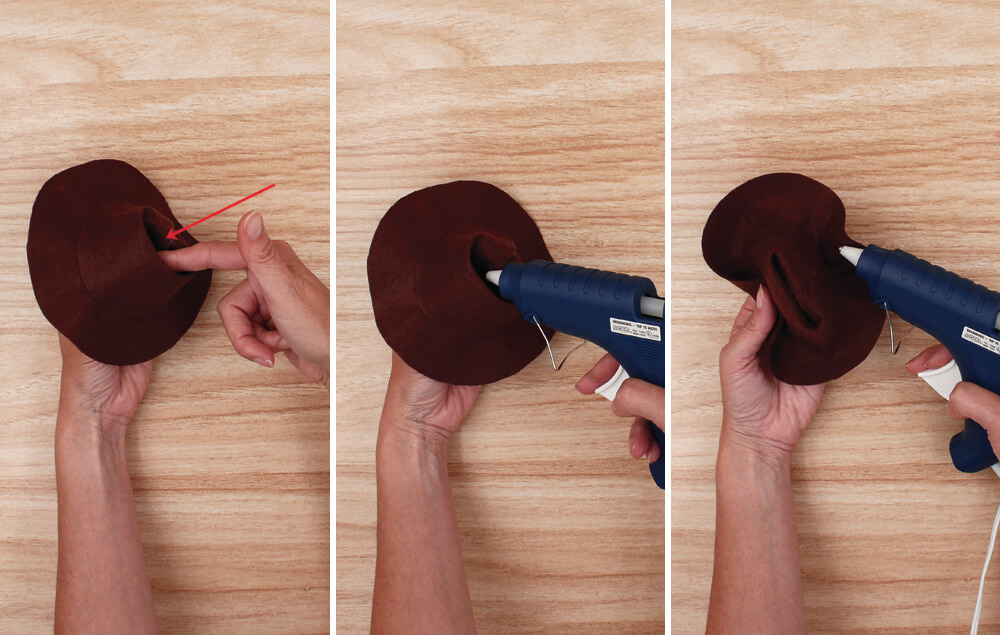
Step 5: Adding details on the hat
- Once the cowboy hat is assembled, take your finger and poke the tip of the cone piece into the hat to make a crease.
- Add hot glue down into the crease and pinch together.
- Fold the brim up on one side and secure it with hot glue. Repeat on the other side.
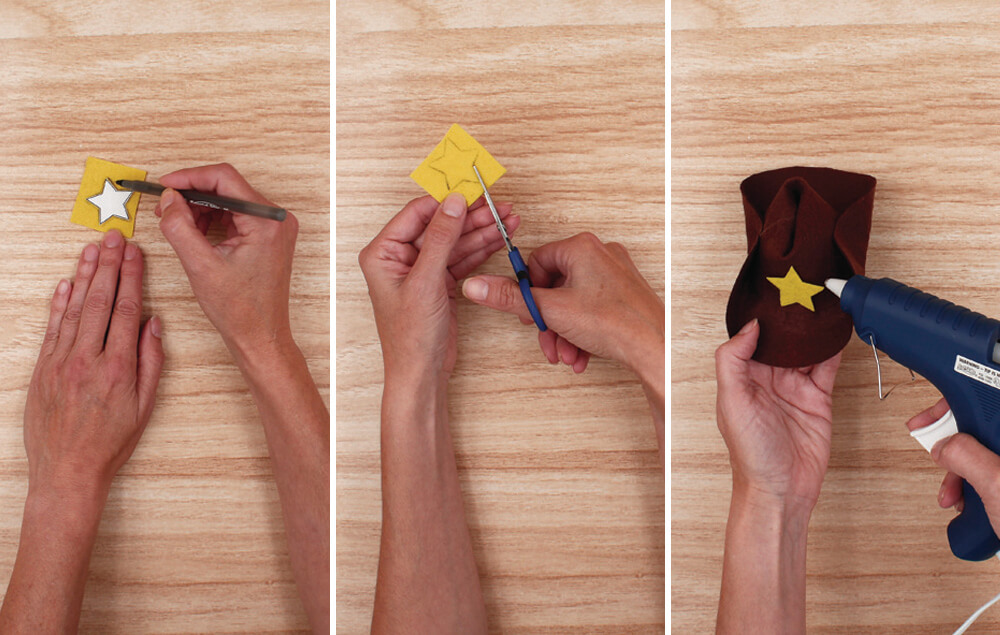
Step 6: Embellishing your hat
- Trace a star onto yellow felt.
- Cut out the star.
- Glue the star to your hat.
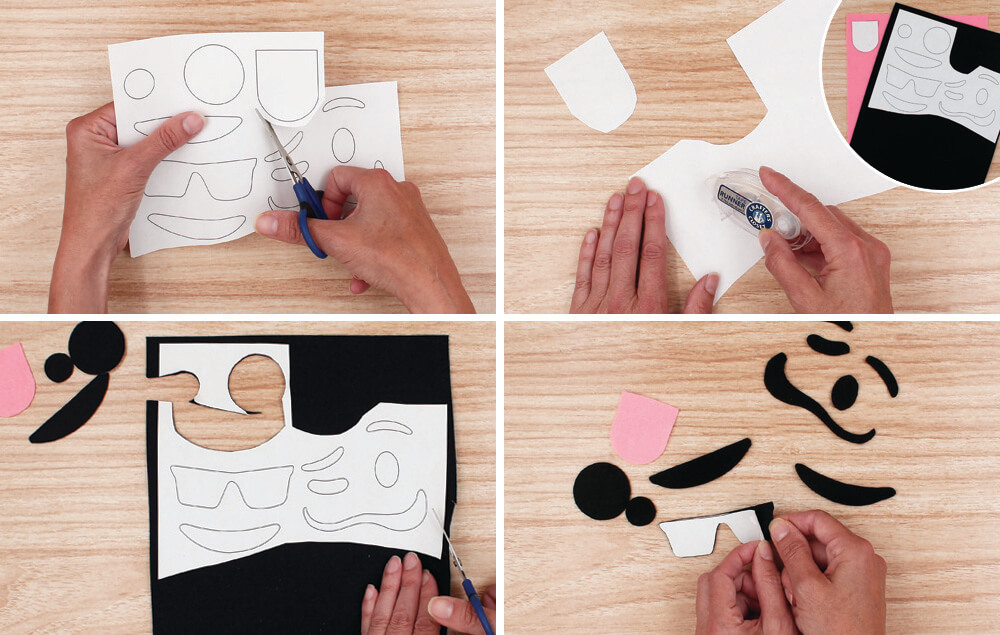
Creating the Emoji Faces
Step 1:
- Cut the tongue from the face template sheet.
- Use a tape runner and run multiple lines of tape on the back of the emoji face template pieces. Stick the faces to black felt and the tongue to pink felt.
- Cut the out the faces. TIP: Cut through the paper and felt together. This is the easiest way to cut felt.
- Remove the paper templates from the felt pieces.
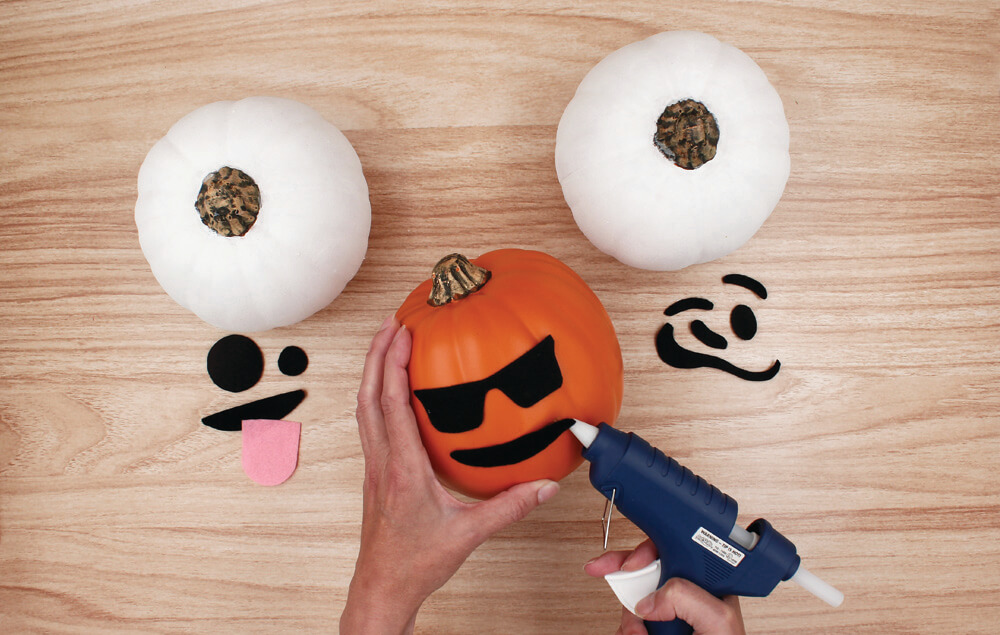
Step 2:
- Hot glue the faces onto the pumpkins.
- Filename
- Template_emoji_faces.pdf
- Size
- 56 KB
- Format
- application/pdf

