

DIY Meal Planner Board
Level of difficulty: Beginner
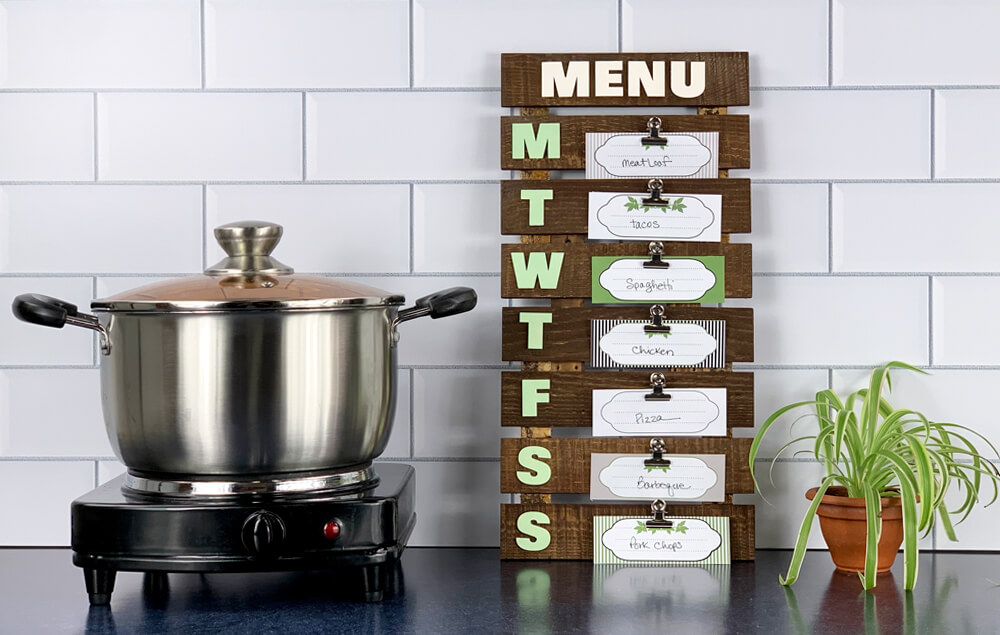
Keep your meals on track with this stylish menu board for your kitchen. There won’t be anymore “what’s for dinner” questions from your family. Replace menu cards every week to change the menu.
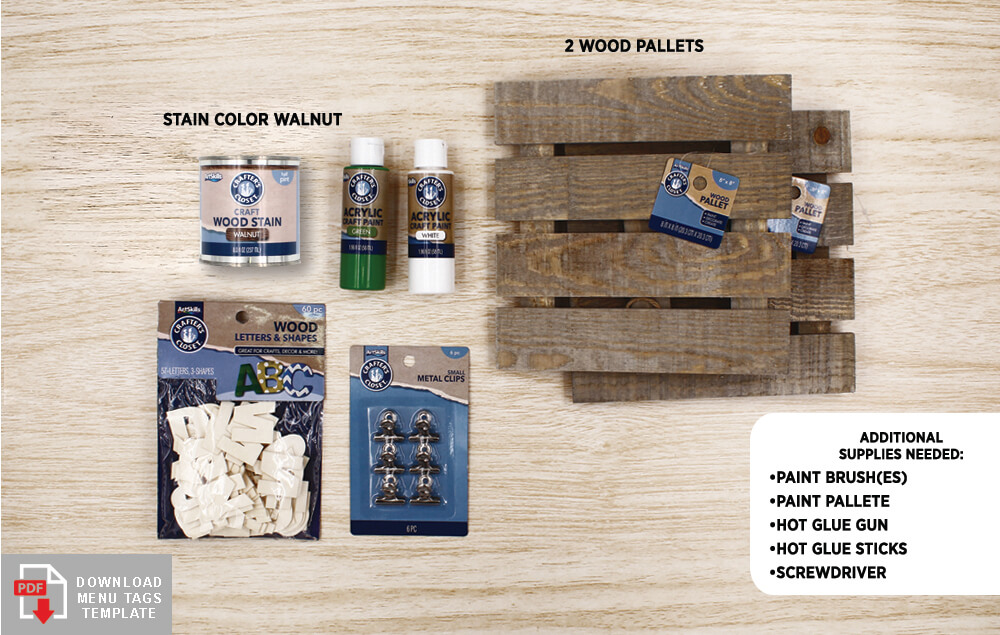
What You'll Need:
- Crafter’s Closet Pallet Wood
- Crafter’s Closet Wood Letters Crafter’s Closet Small Metal Clips
- Crafter’s Closet Acrylic Paint Green
- Crafter’s Closet Acrylic Paint White
- Crafter’s Closet Hot Glue Gun SKU
- Crafter’s Closet Hot Glue Sticks
- Crafter’s Closet Wood Stain (Walnut)
- Crafter’s Closet Paint Brush SKU
- Crafter’s Closet Paint Pallet SKU
- Crafter’s Closet Precision Scissors
- Screwdriver
Let's Do This!
Step 1:
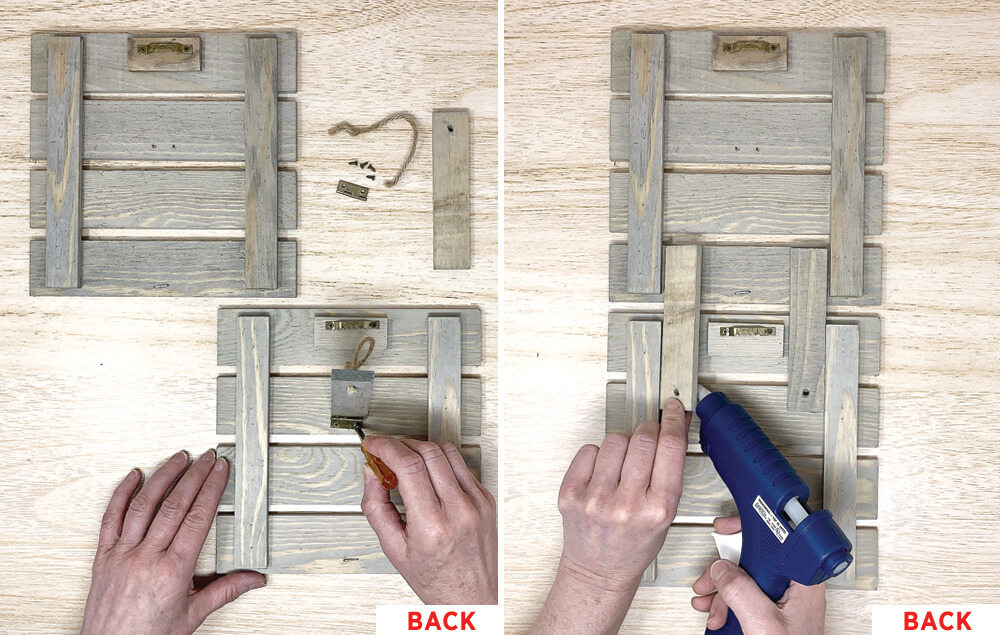
- Remove the hinges that attach the stand on two wood pallets. Note: Keep the wood but discard the hinges and rope.
- Flip over your wood pallets so the slats run horizontally. Position them in front of you on a flat surface, one above the other. Hot glue the wood pieces that you removed from the hinge in the previous step to the back of the pallets, joining the two pallets together as shown. Note: Keep the spacing the same between the two pallets and the spacing of the wood slats on the pallets themselves.
Step 2:
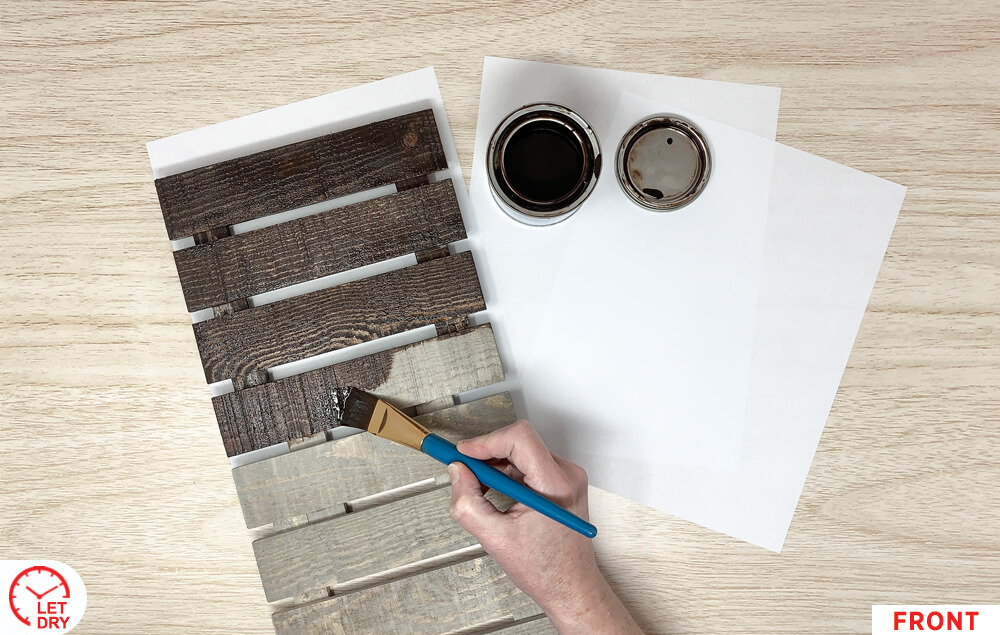
- Stain the front and sides of the menu board. Let dry. Note: The stain is not water based, so clean your brush with paint thinner or mineral spirits.
Step 3:
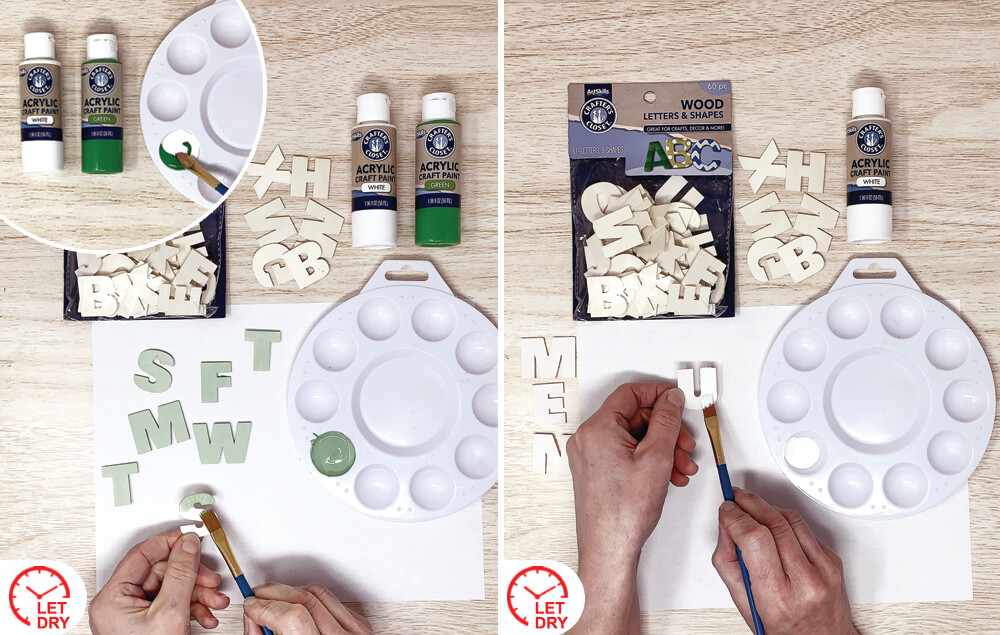
- Mix a teaspoon of white paint with a small dot of green paint. Paint the light green paint onto the wood letters M, T, W, T, F, S, S. (These will be for the days of the week.) Let dry.
- Paint the wood letters M, E, N, U with white paint. Let dry.
Step 4:
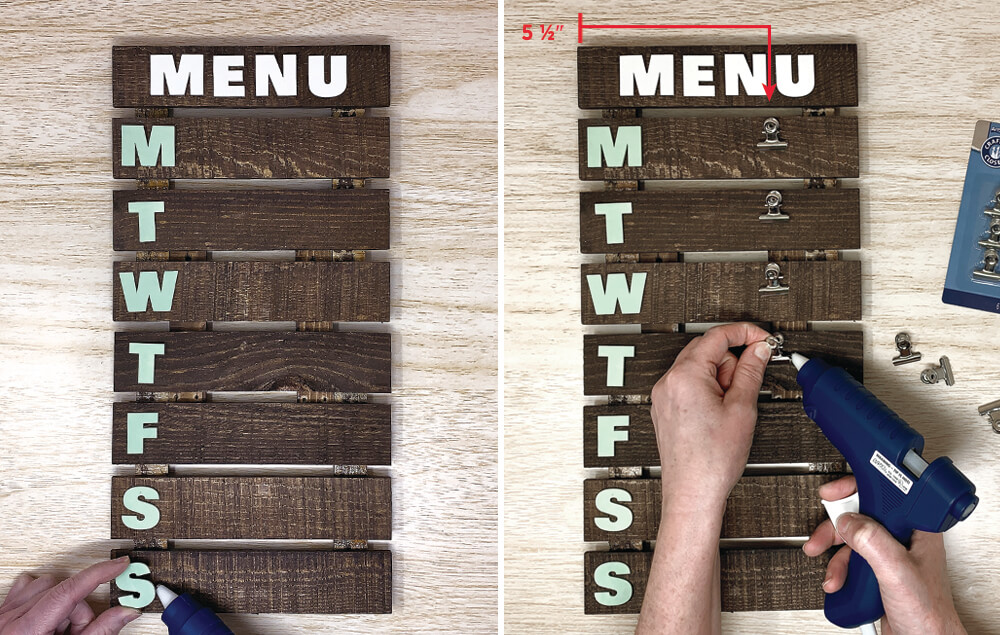
- Hot glue MENU across the top. Tip: Lay out the letters first before you glue to make sure the spacing is correct. Hot Glue the letters M, T, W, T, F, S, S down the left side, starting on the second slat. Tip: Lay out the letters first before you glue to make sure the spacing is correct.
- Starting on the second slat, hot glue metal clips to your menu board approximately 5 ½” from the left edge of the board.
Step 5:
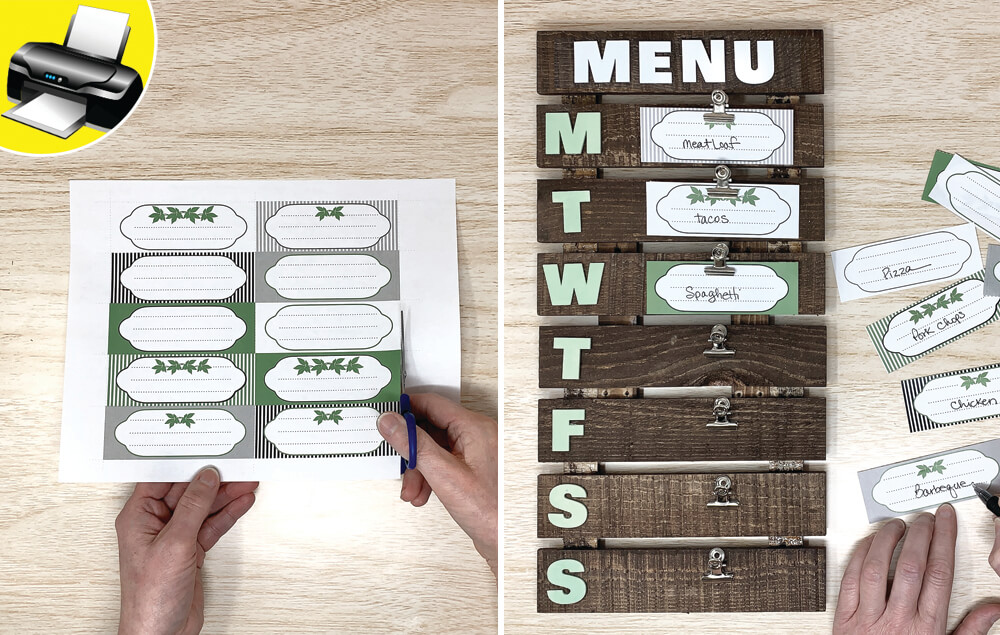
- Print out the template and cut cards on dotted line. Tip: Print multiple copies to change out your menu weekly.
- Write your dinner selections for the week on the cards and place into the clips.
- Filename
- _menu_tags.pdf
- Size
- 661 KB
- Format
- application/pdf


