

Nesting Rope Baskets
Level of difficulty: Beginner
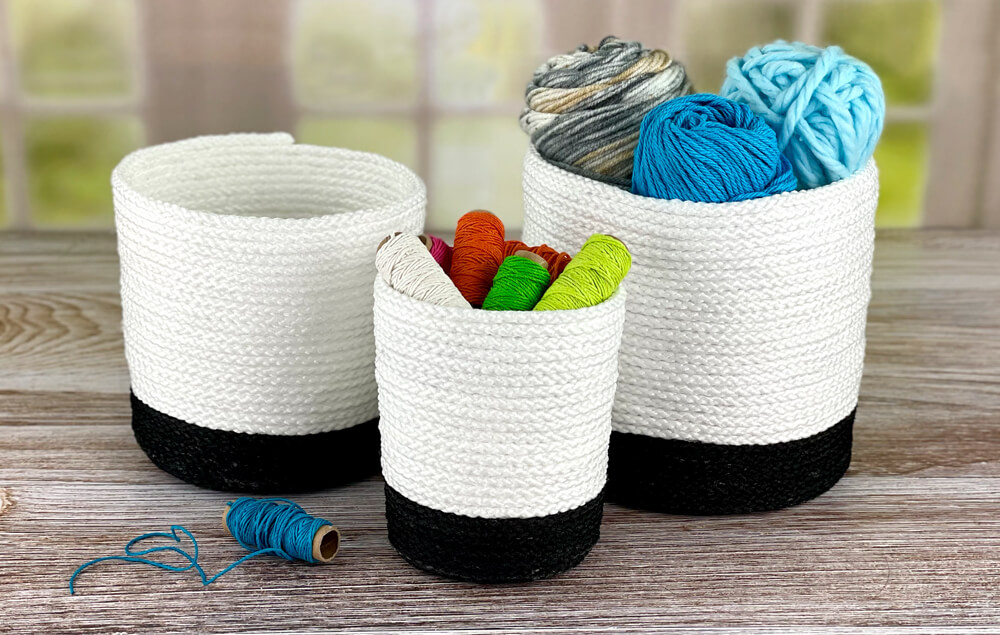
Use this simple, no-sew technique to make different-sized baskets, perfect for organizing! They are great for holding craft supplies, kitchen utensils, or even using as decorative planters.
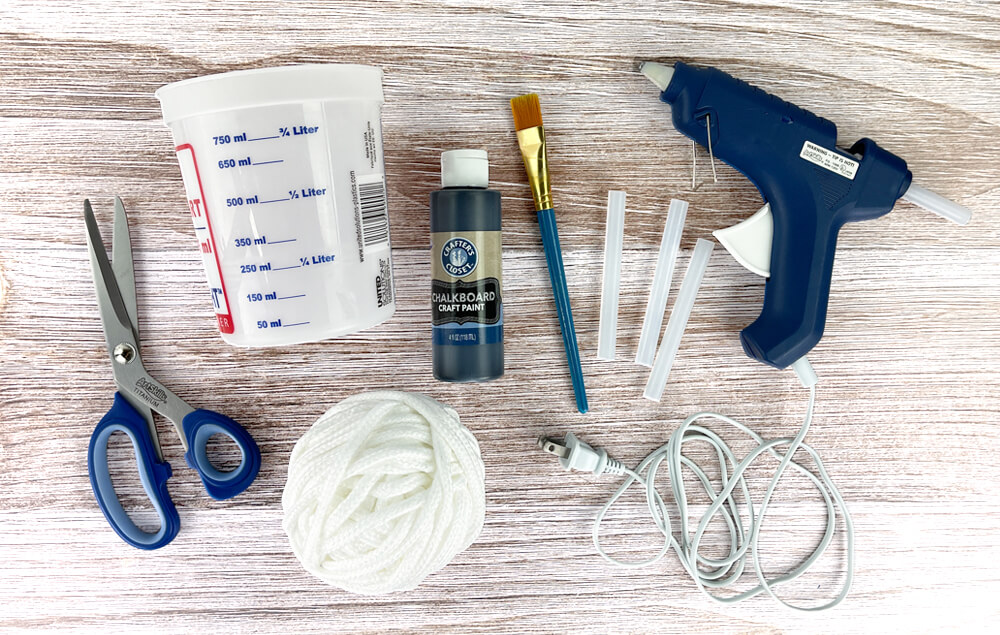
What You'll Need:
Let's Do This!
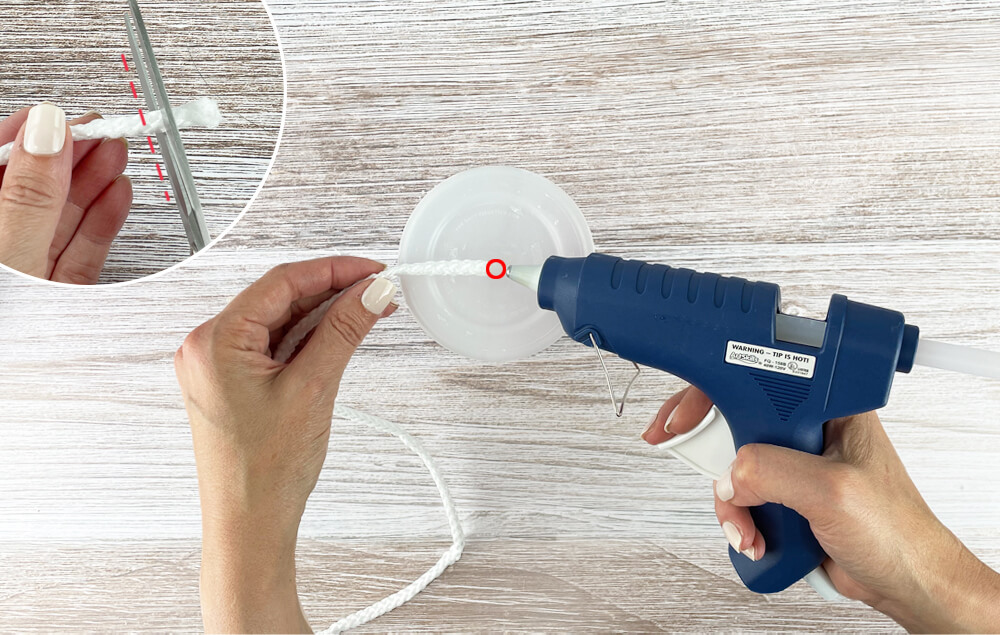
Step 1:
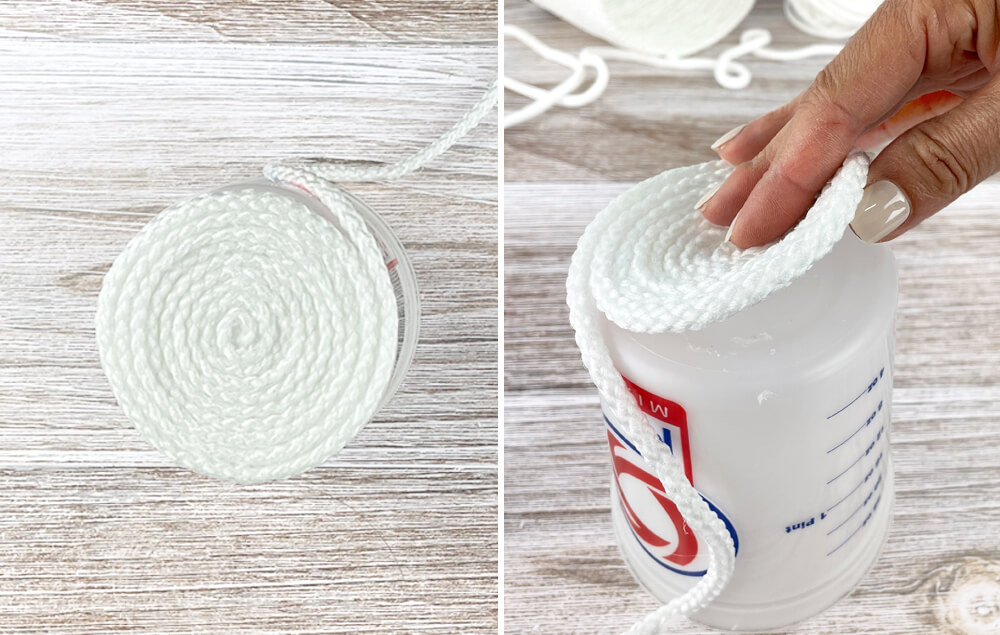
A) Cut the end of the rope to make a clean edge. Hot glue the end of the rope to the bottom center of a plastic container. Note: Plastic containers work best, as the glue will pop off easily.
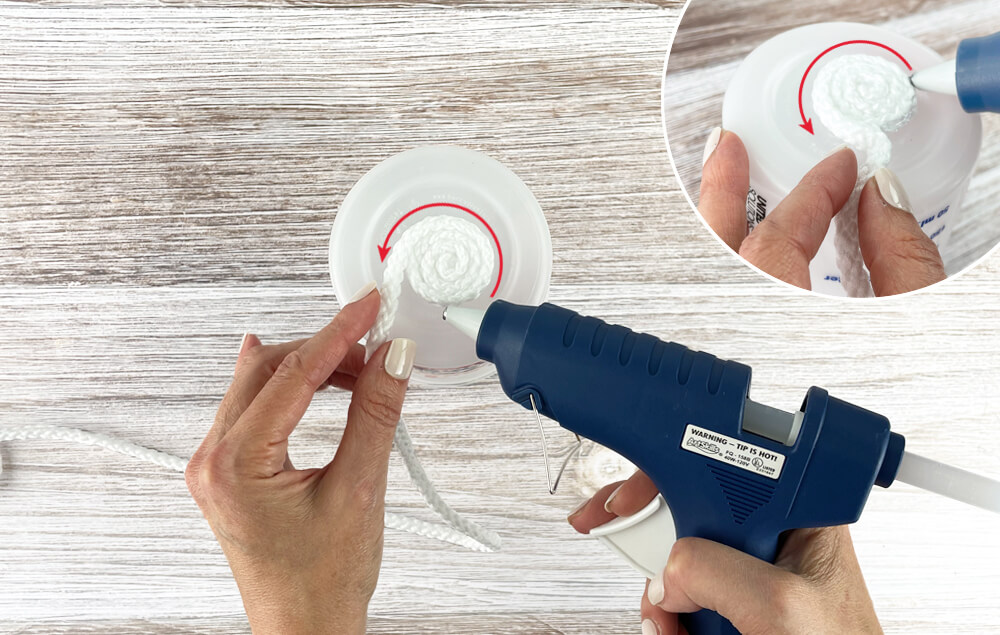
Step 2:
A) Begin coiling the rope around the central starting point, hot gluing as you go.
Step 3:
A) Completely cover the bottom of the container. Tip: Once it’s covered, pop off the rope so it doesn’t stick to the container.
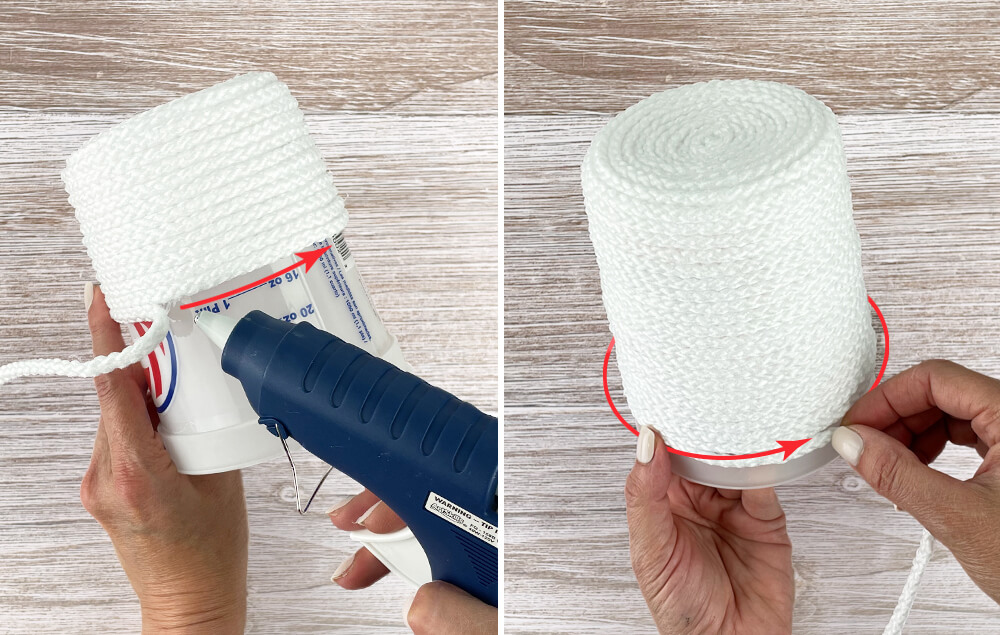
Step 4:
A) Continue wrapping the rope around the side of the container, gluing as you wrap.
B) Continue wrapping until you reach the top.
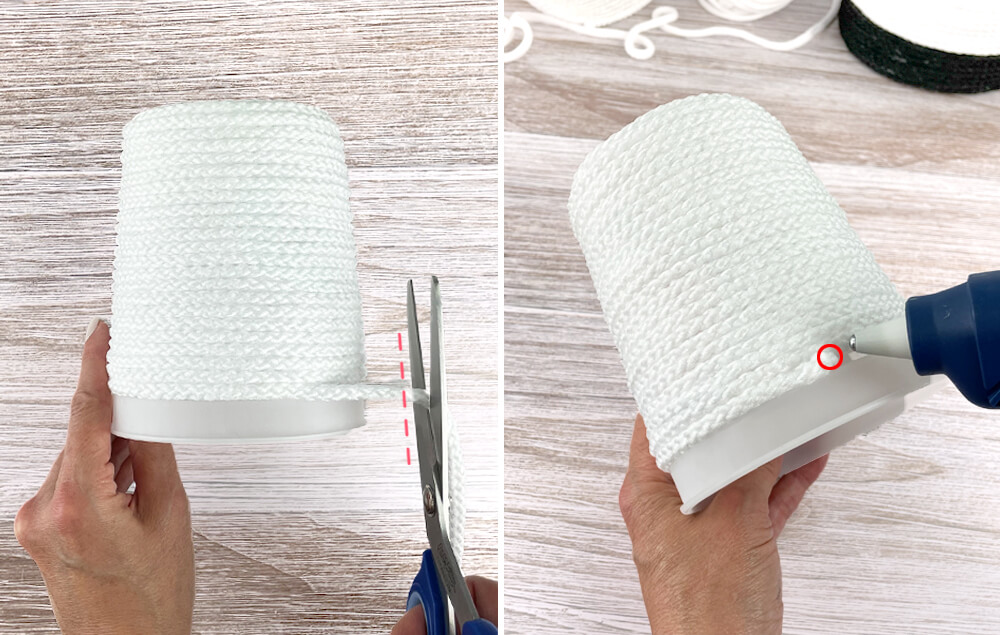
Step 5:
A) When you reach the top, cut the rope.
B) Glue the loose end in place.
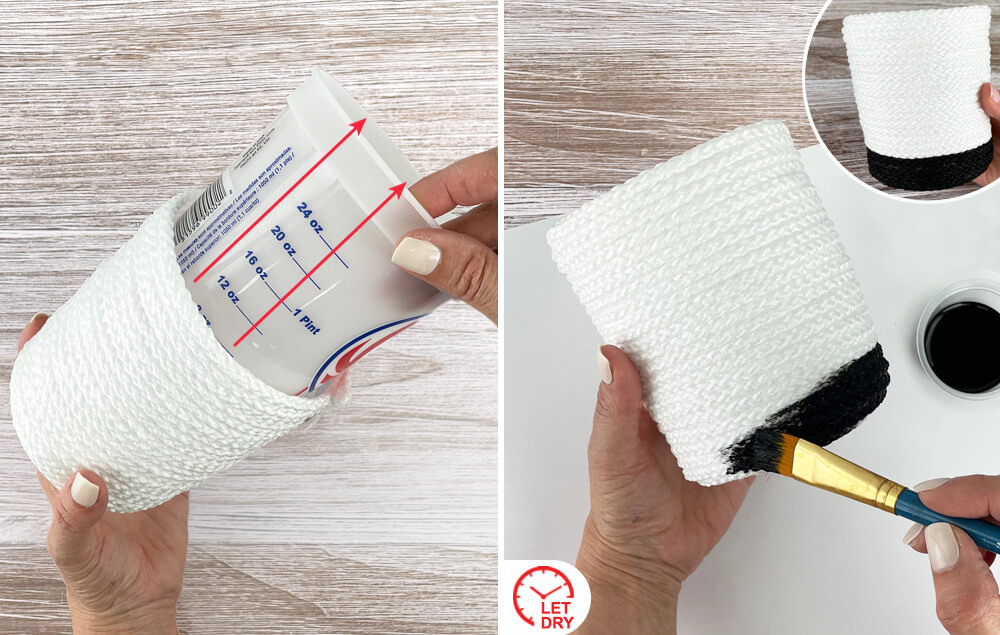
Step 6:
A) Remove the rope basket from the bucket.
B) Paint a section of the basket. Let dry. Repeat this process to create different-sized baskets!


