

DIY Father's Day Keychains & Crafts
Level of difficulty: Beginner
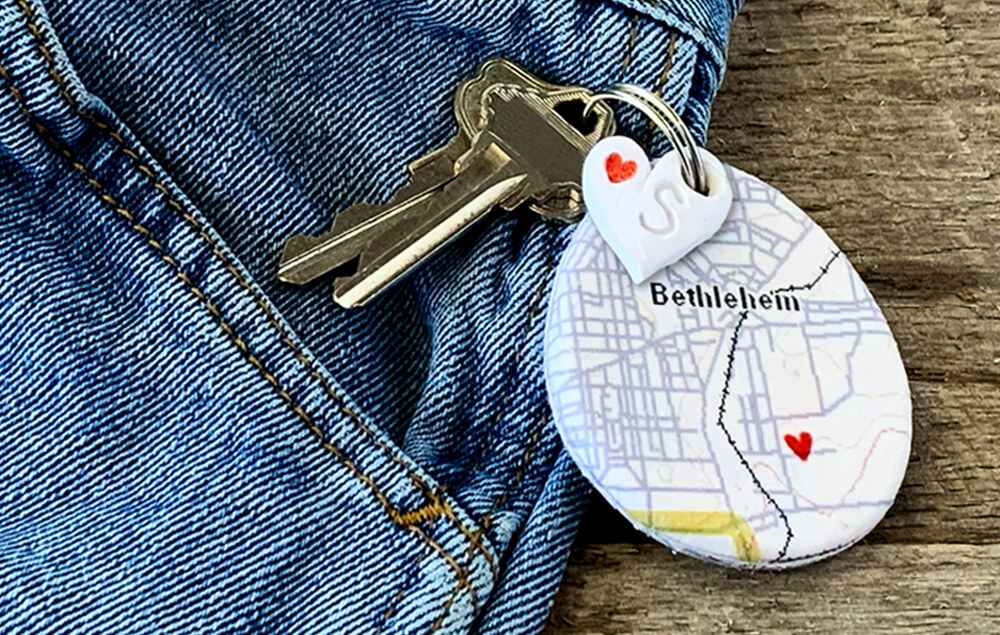
Personalized Father's Day Keychain
Project overview/ description
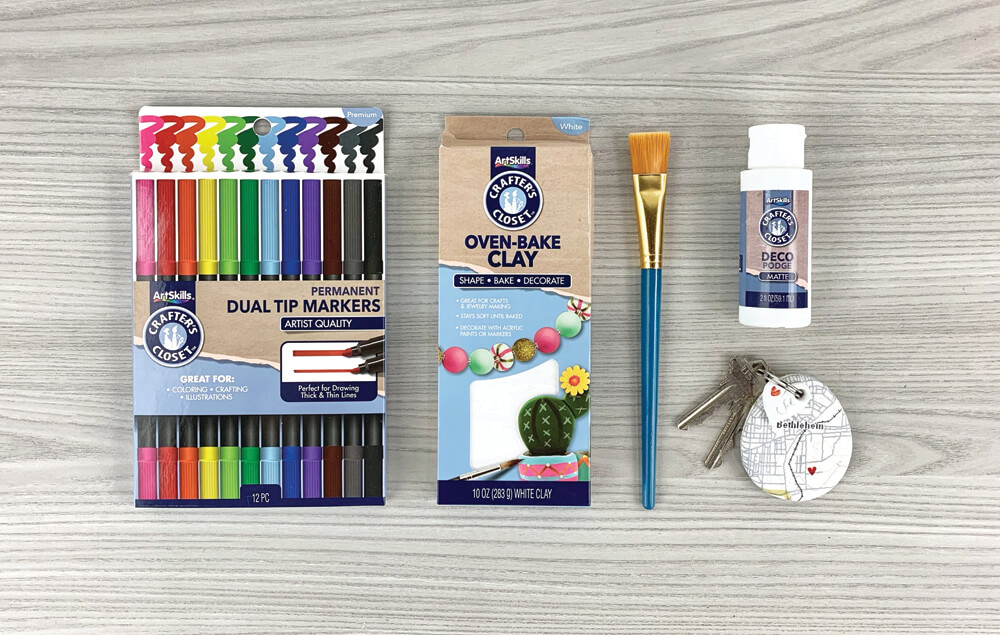
What You'll Need:
- Crafter's Closet Oven Baked Clay
- Crafter's Closet Deco Podge Matte
- Crafter's Closet Precision Scissors
- Crafter's Closet Premium Paint Brush
- Crafter's Closet Dual Tip Markers
- Straw
- Map
- Parchment
- Key Ring
- Oil (Baby or Cooking)
- Water
- Oven
Let's Do This!
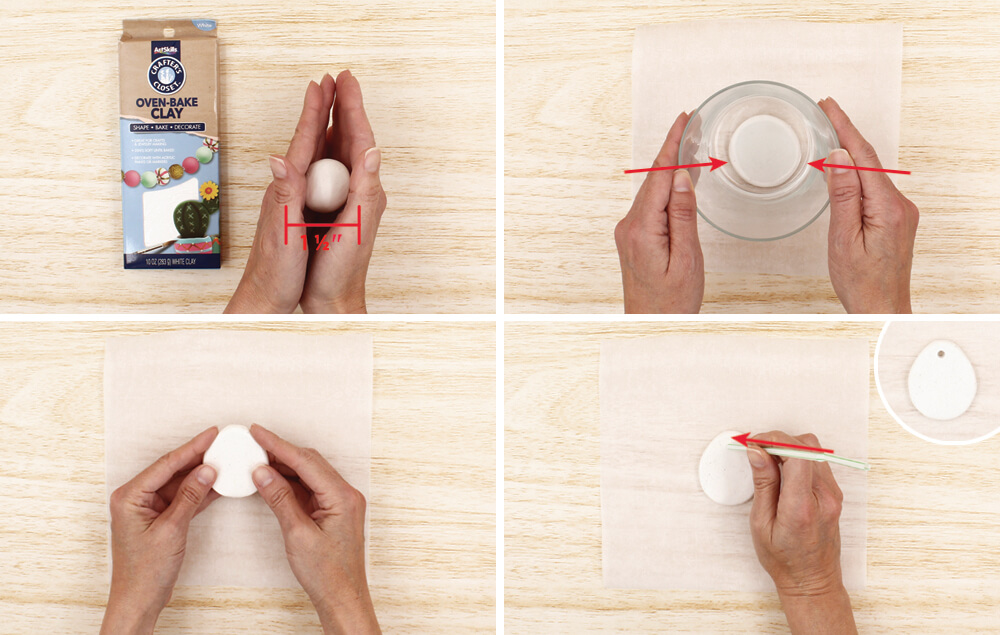
Step 1:
- Roll a piece of clay into a smooth 1 ½" ball.
- Lay the ball on a piece of parchment paper and flatten it with the bottom of a bowl until it’s approximately ¼" thick.
- Use your fingers to shape the flattened clay into a “rock” shape.
- Use a straw to punch a hole through the top of the clay.
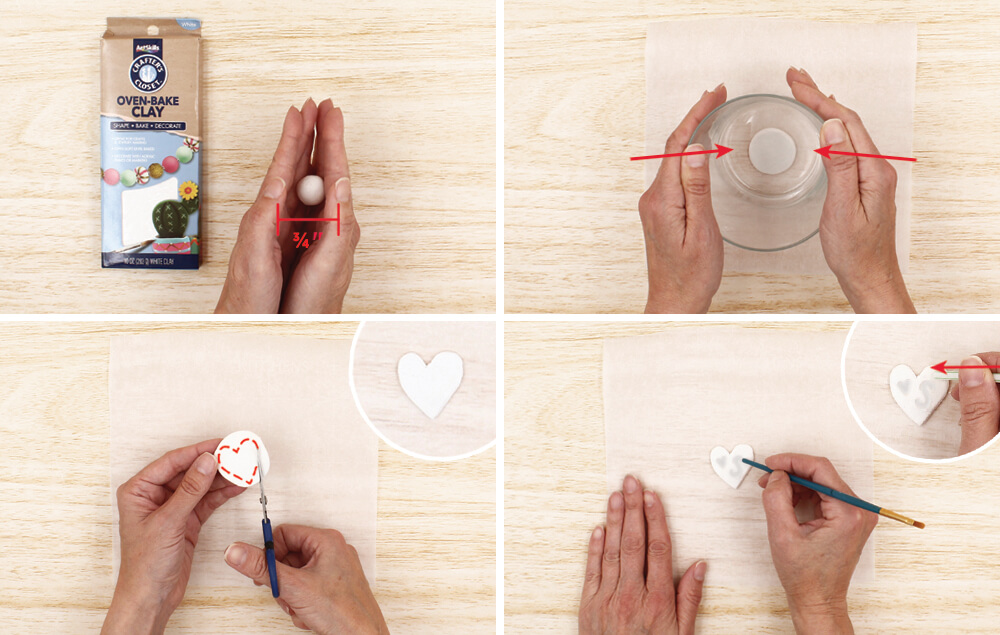
Step 2:
- Roll another piece of clay into a smooth ¾" ball.
- Lay the ball on a piece of parchment paper and flatten it with the bottom of a bowl until it’s approximately 1/8" thick.
- Use scissors to cut a heart shape from the flattened clay piece.
- Use the end of a paint brush to carve an initial and a small heart into the clay heart. Use a straw to punch a hole through the top of the heart.
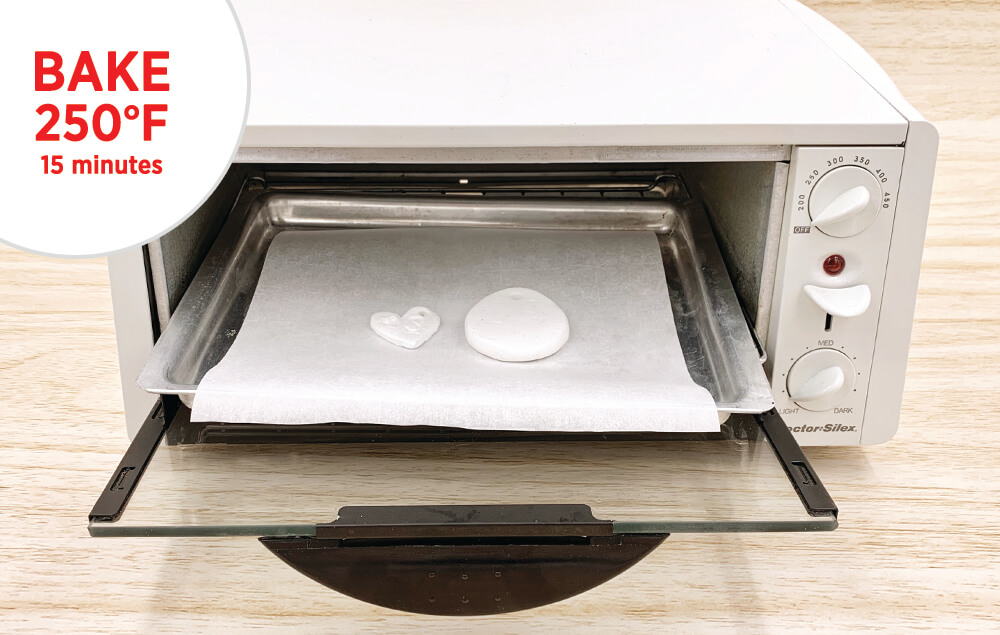
Step 3:
- Bake the clay pieces at 250°F for 15 minutes. Let cool.
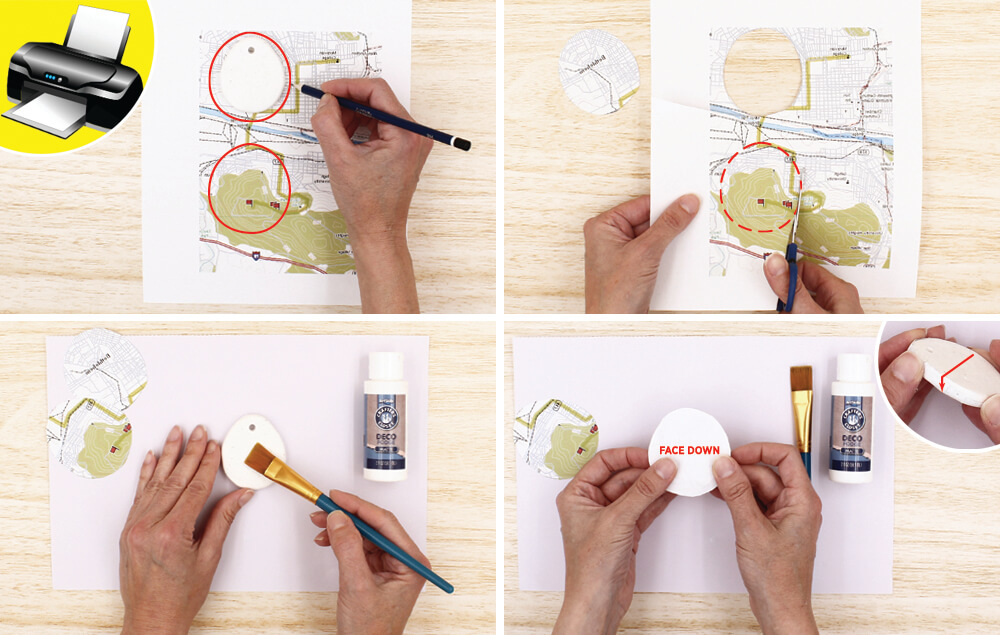
Step 4:
- Find a free map on the internet and print it out in reverse. Lay your clay rock on the printed map and trace around it, leaving a ¼" margin. Trace again in another area on the map, leaving a ¼" margin. You will need two traced map pieces. Tip: Place your clay rock on an area of the map that displays a town name.
- Cut out the two traced map pieces.
- Brush deco podge onto the front and sides of the clay rock. Tip: Work quickly so the deco podge doesn’t dry.
- Press one of the map pieces face down onto the wet deco podge. Press the map around the sides of the clay rock and smooth out the surface.
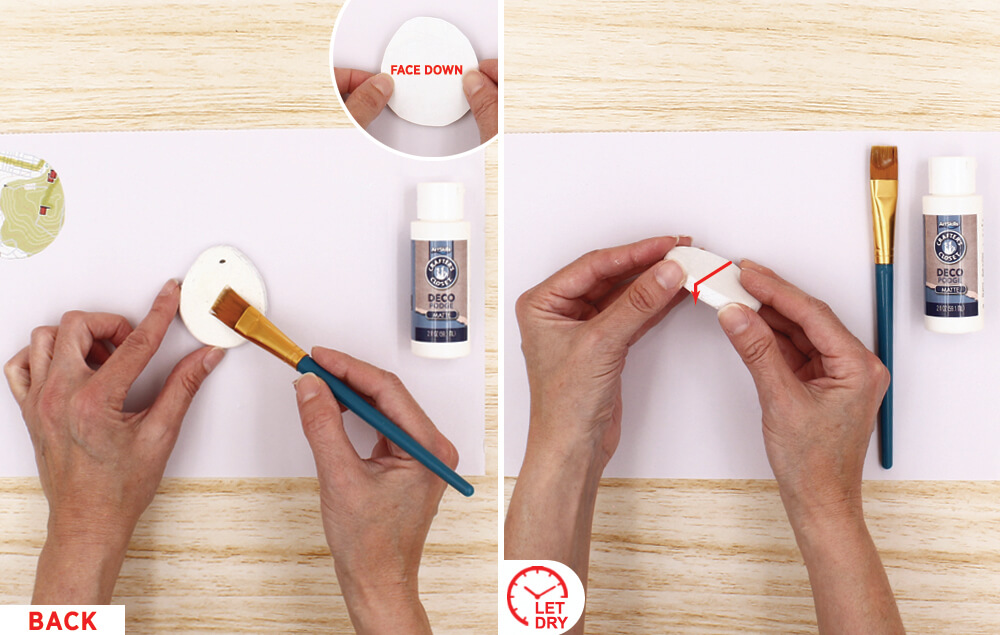
Step 5:
- Flip over the clay rock and brush deco podge onto the back and sides. Tip: Work quickly so the deco podge doesn’t dry. Press the other map piece face down onto the wet deco podge.
- Press the map around the sides of the clay rock and smooth out the surface. Let dry.
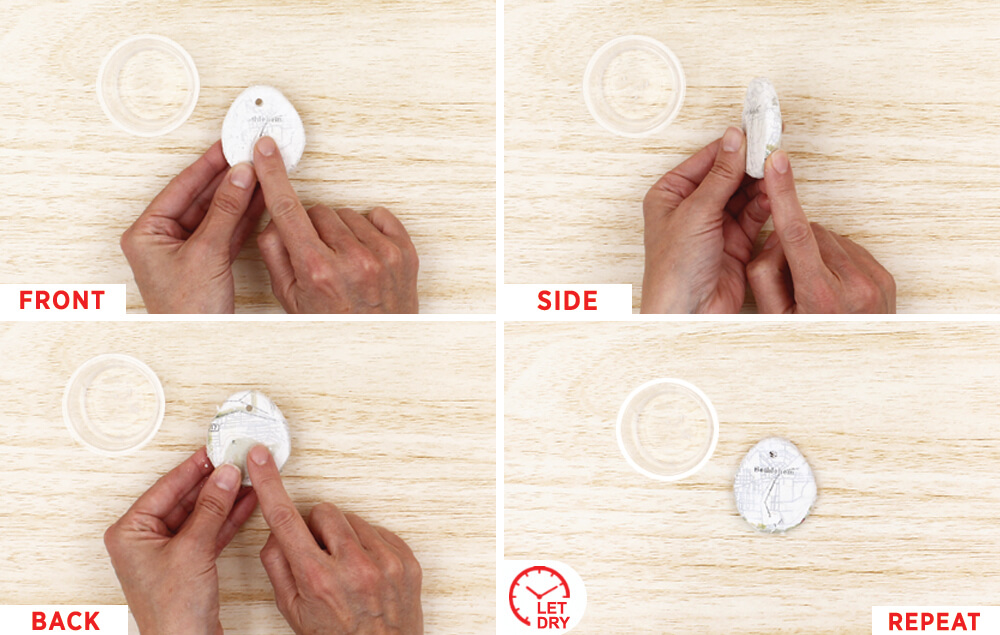
Step 6:
- Dip a finger into water and gently rub the paper to remove the top layer on the front of the clay rock.
- Dip a finger into water and gently rub the paper to remove the top layer on the sides of the clay rock.
- Dip a finger into water and gently rub the paper to remove the top layer on back of the clay rock.
- Repeat this process a second time on all sides of the clay rock to remove a second layer of paper. Let dry.

Step 7:
- Dip a finger into oil and massage the oil onto the clay rock. Do the front, back, and sides. Let dry. Note: This technique will remove fuzz and enhance the color.
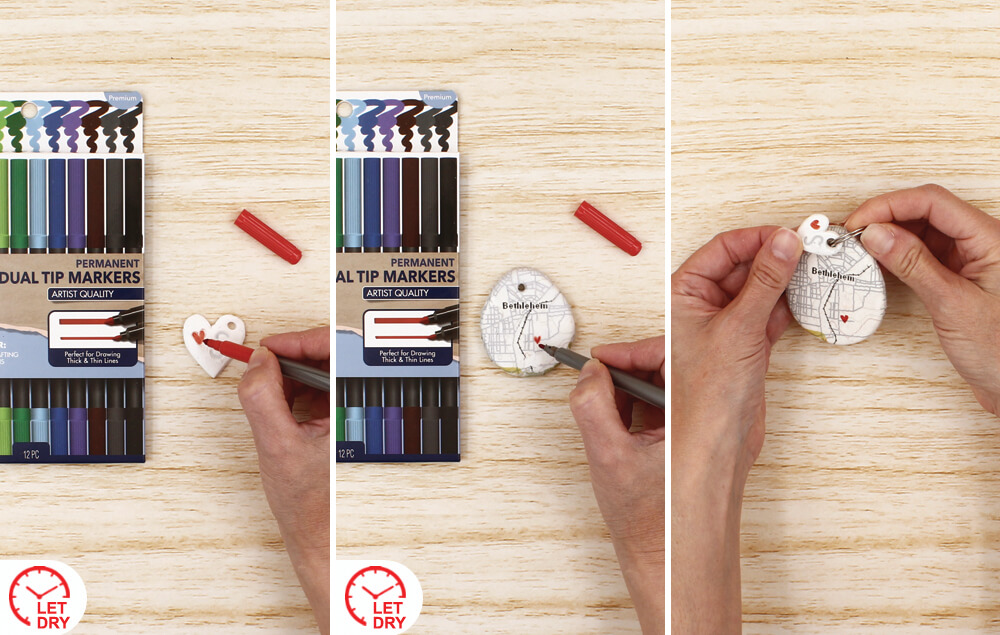
Step 8:
- Use a permanent marker to color the small heart indent on the heart charm. Let dry.
- Use a permanent marker to draw a heart on the map location of your choice on the clay rock. Let dry.
- Place the clay rock and heart charm on a key ring.


