
Teacher's Desk Organizer

Level of difficulty:  Beginner

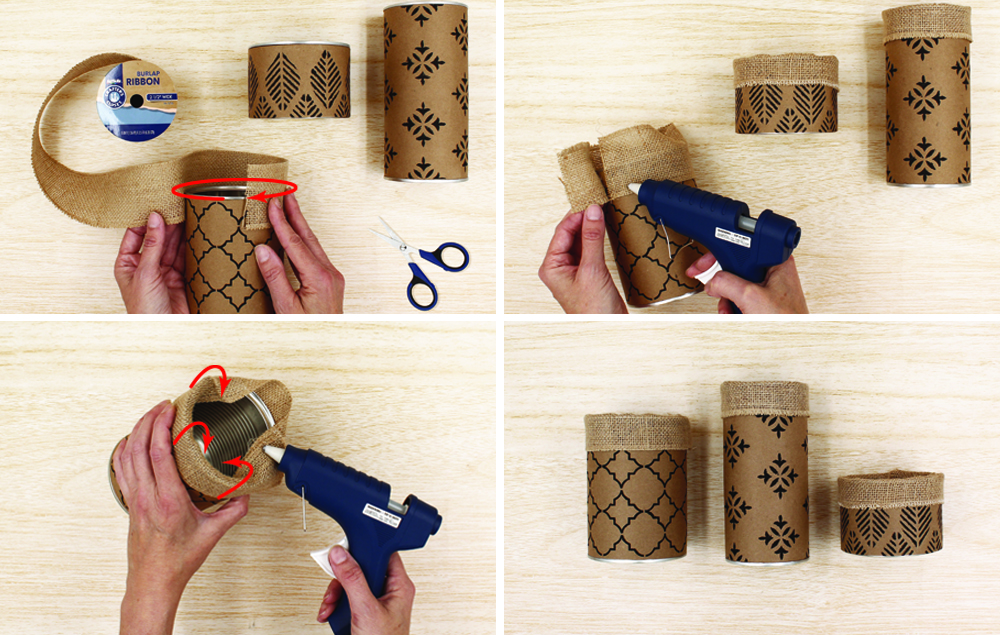
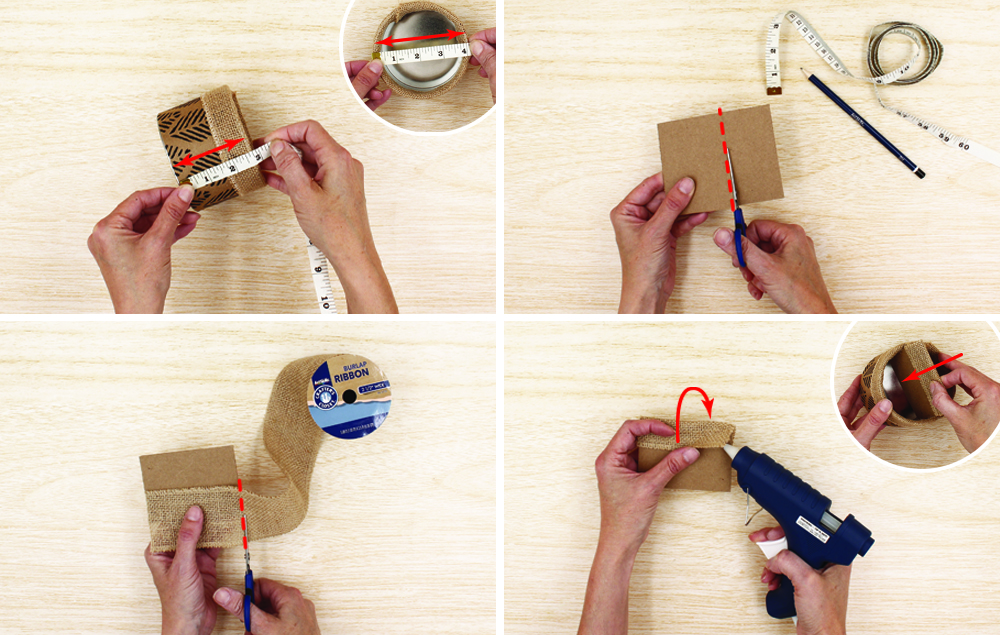
Create this organizer to keep your desk tidy and to help students put away classroom materials neat and orderly. This easy to make craft uses recycled containers. This is an inexpensive project and a solution to classroom organization!

What You'll Need:

Let's Do This!


Step 1:

  1. Pick 3 recycled cans or containers and clean them out.


Step 2:

  1. Measure around the can (circumference) and measure the height. TIP: Leave about ½ inch extra width for overlap.
  2. With a pencil and ruler, draw these measurements onto kraft paper.
  3. Cut kraft paper to size.
  4. Choose a stencil pattern and paint with black paint. Let dry.


Step 3:

  1. Repeat Step 2a – 2d to complete the other two cans.
  2. Wrap cans with stenciled kraft paper and hot glue into place.


Step 4:

  1. Measure around the top of the can (circumference) for the burlap ribbon. TIP: Leave about ½ inch extra width for overlap.
  2. Hot glue burlap half the height to the top of the can.
  3. Tuck the extra burlap down into the inside of the can. Secure with hot glue.
  4. Repeat Step 5a-5c to complete the other 2 cans.


Step 5:

  1. For a divider, measure across the top of the can (diameter) and the height of the can.
  2. With a pencil and ruler, draw then cut these measurements onto cardboard.
  3. Cut burlap to size.
  4. With hot glue, secure half the height of the burlap to one side of the cardboard. Fold over and secure with hot glue on the opposite side. Put divider into the can.


Step 6:

  1. Paint wood plaque with black paint. Let dry.
  2. Hot glue cans/containers to the plank.

Suggested Products

Related Articles