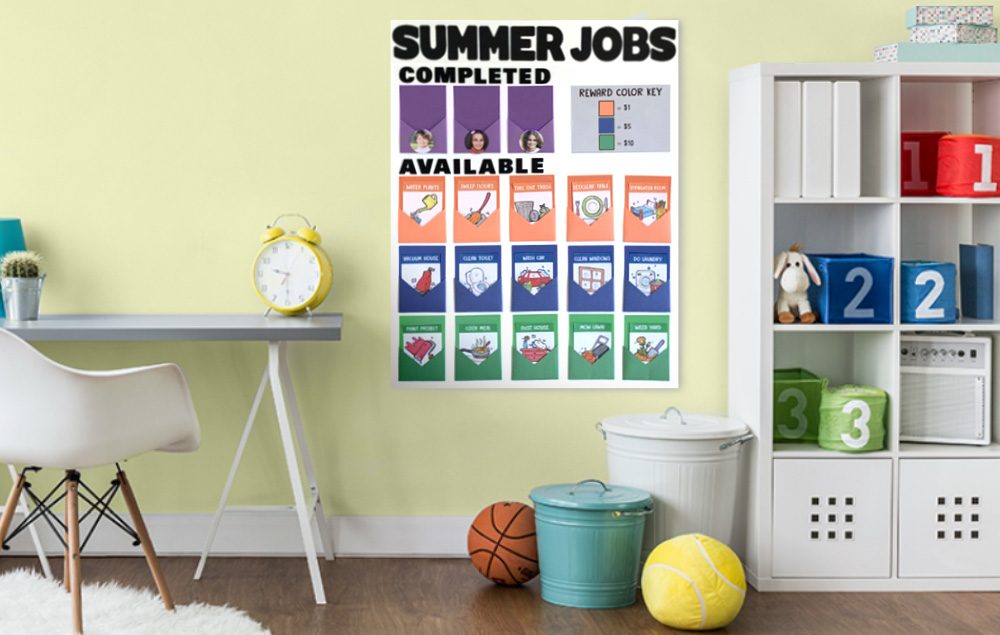
DIY Budget Tracker Clipboard

Level of difficulty:  Beginner

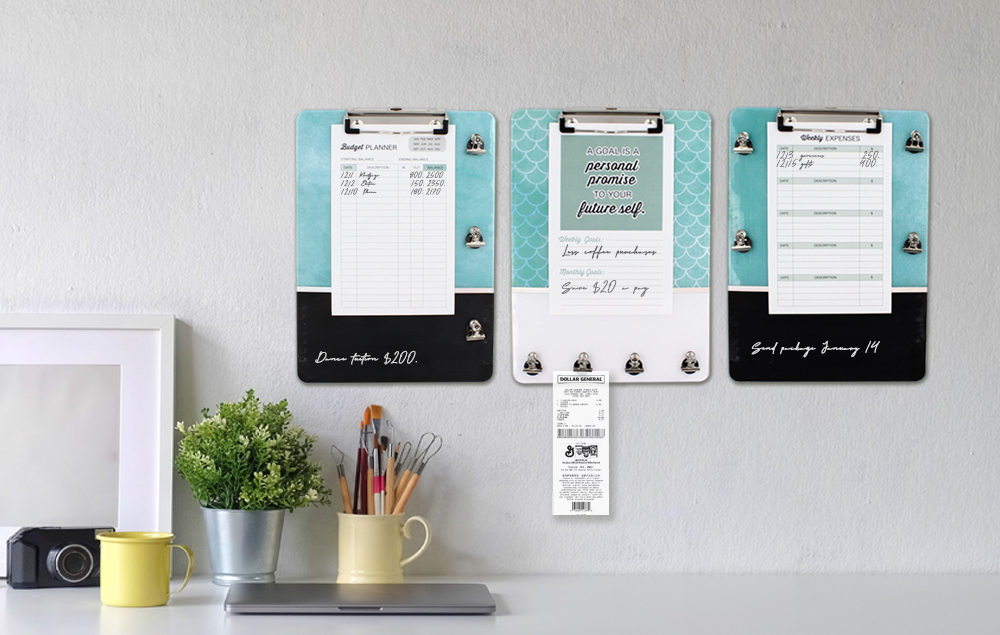
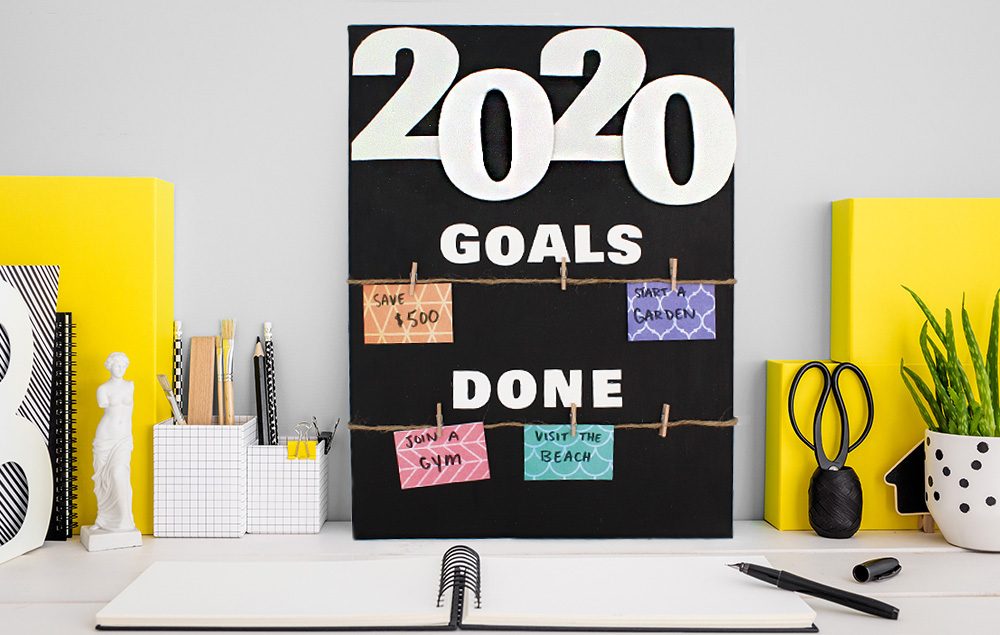
Begin the new year with organization in mind! Create a command center with trackers for weekly expenses, budget planning, and goal setting. Chalkboard and write-on, wipe-off areas are great for adding quick notes, and the magnets can hold metal clips to attach receipts. 

What You'll Need:

  • Clear Plastic Clipboards
  • Crafter’s Closet Deco Podge
  • Crafter’s Closet Watercolor Designer Paper
  • Crafter’s Closet Washi Tape Foil Detail
  • Crafter’s Closet Small Metal Clips
  • Crafter’s Closet Adhesive Magnets
  • Crafter’s Closet Chalkboard Craft Paint
  • Crafter’s Closet Paint Brush Premium
  • Crafter’s Closet Precision Scissors
  • Crafter’s Closet Project Knife
  • Painter’s Tape
  • Crafter’s Closet Palette
  • Ruler 
  • White Paper

Let's Do This!

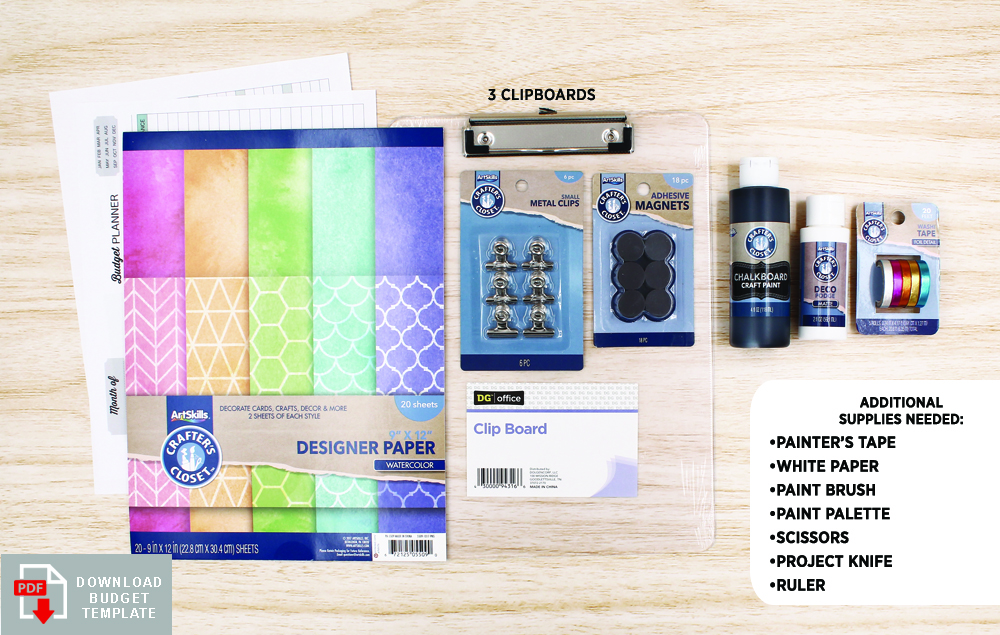
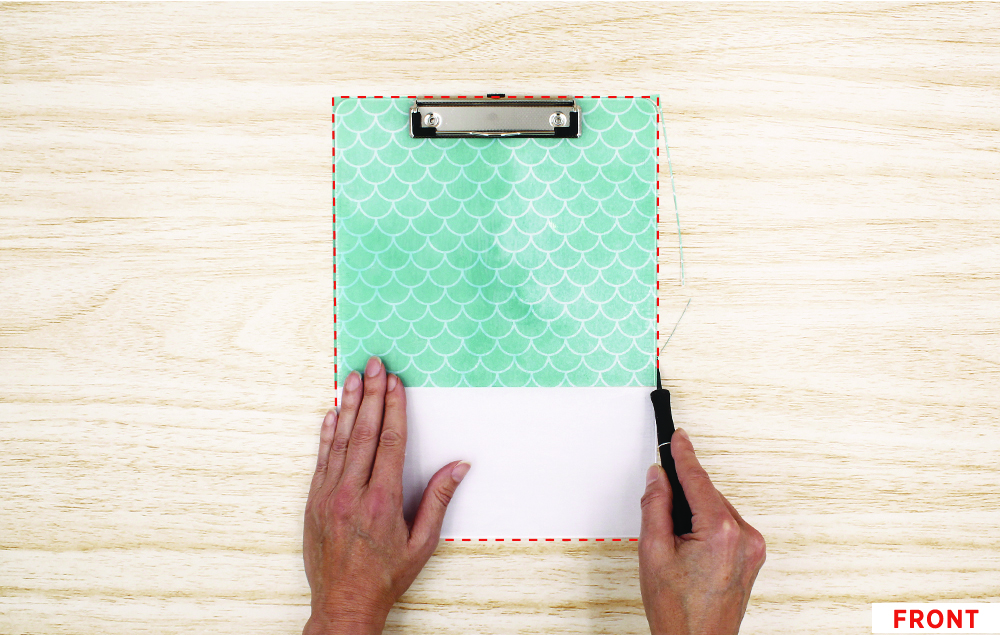
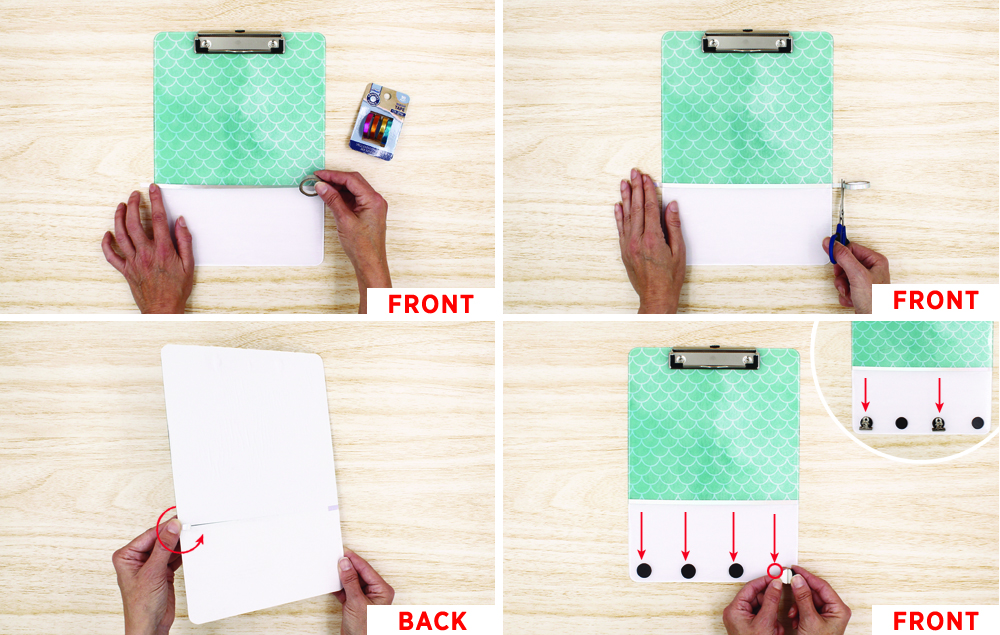
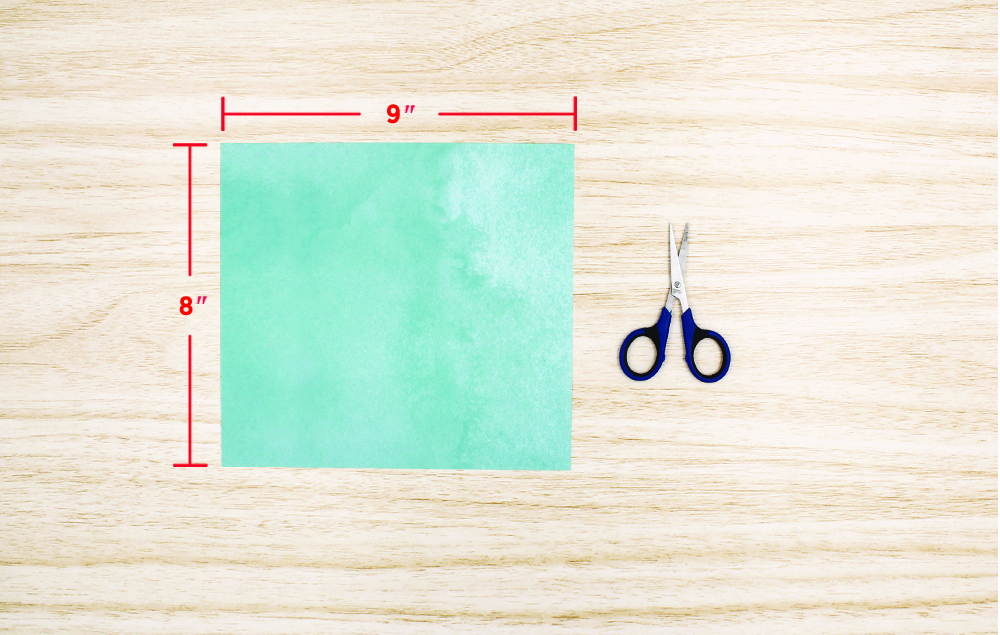
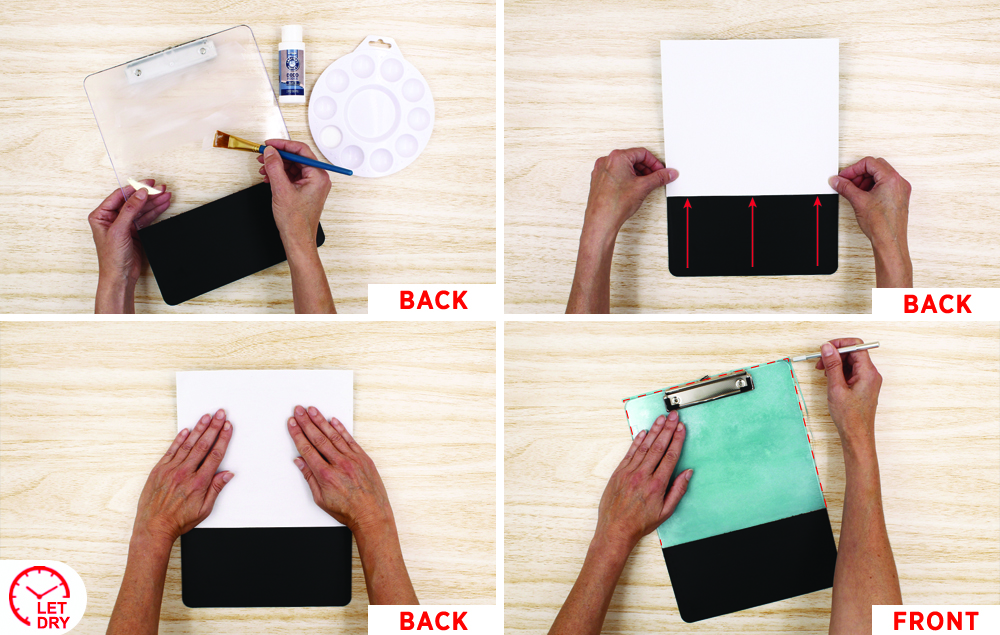
Follow steps 1 through 5 to decorate two of the clipboards. 

Step 1:

  1. Place painter’s tape 4 ¼" from the bottom on both the front and back of the clipboard.
  2. Paint two coats of black chalkboard paint on the bottom of the clipboard on the back side. Let dry between coats.
  3. Paint two coats of black chalkboard paint on the bottom of the clipboard on the front side. Let dry between coats.
  4. Remove tape. 


Step 2:

  1. Cut a 9” x 8” piece of patterned paper.


Step 3:

  1. Brush a generous coat of deco podge on the back of the clipboard, above the painted area. Tip: Work quickly, as the deco podge dries very fast.
  2. While the deco podge is still wet, line up the paper at the painted edge of the clipboard on the back, making sure it’s centered between the sides. Note: The patterned side of the paper should be facing the front of the clipboard.
  3. Smooth the wrinkles and air pockets out of the paper. Let dry.
  4. Use a knife to trim the excess paper from around the edges to make the paper flush with the clipboard.


Step 4:

  1. Apply washi tape to the front of the clipboard to cover the seam where the paint meets the paper. Note: Leave a little extra tape on both ends before you begin adhering the washi tape to the clipboard.
  2. Trim the washi tape just beyond the edges of the clipboard and fold the ends over to the back side.


Step 5:

  1. For one of the clipboards, remove the paper backing from three magnets and adhere them down the right side, as shown.
  2. For the second clipboard, remove the paper backing from four magnets and adhere two of them on the right side and two on the left side, as shown. 

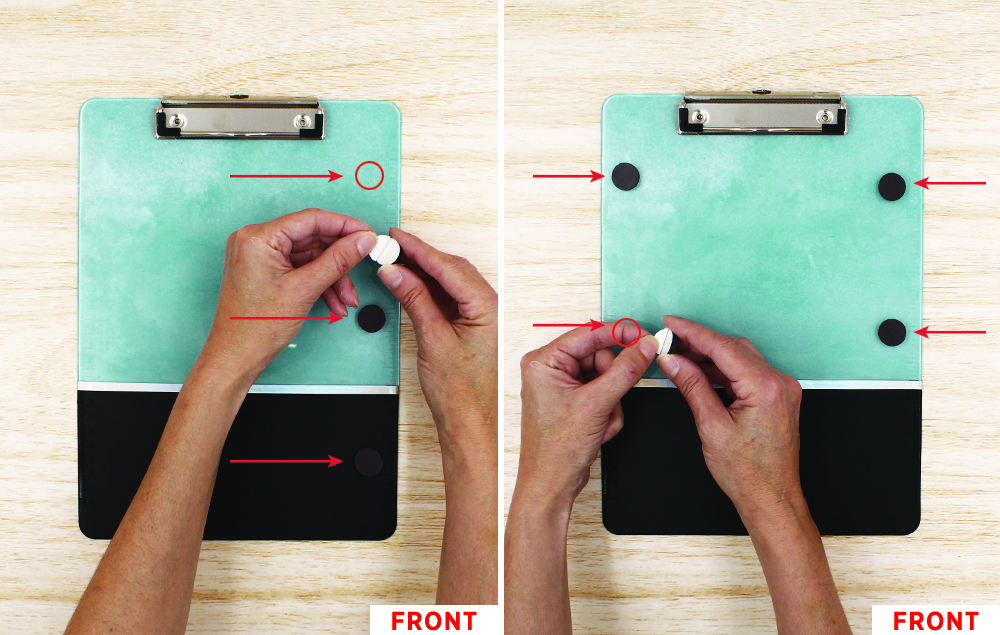
Follow steps 6 through 9 to decorate the remaining clipboard:

Step 6:

  1. Before you begin decorating the remaining clipboard, cut a 9" x 8" piece of patterned paper and a 9" x 4 ¼" piece of white paper.


Step 7:

  1. Brush a generous amount of deco podge across the bottom of the back of the clipboard. Tip: Work quickly, as the deco podge dries very fast.
  2. While the deco podge is still wet, line the white paper up on the bottom of the clipboard, making sure to center it between the sides. Smooth the wrinkles and air pockets out of the paper. Let dry.
  3. Brush a generous amount of deco podge across the top of the back of the clipboard. Tip: Work quickly, as the deco podge dries very fast.
  4. While the deco podge is still wet, line up the patterned paper at the top edge of the white paper, making sure it’s centered between the sides. Smooth the wrinkles and air pockets out of the paper. Let dry. Note: The patterned side of the paper should be facing the front of the clipboard.


Step 8:

  1. Use a knife to trim the excess paper from around the edges to make the paper flush with the clipboard.


Step 9:

  1. Add washi tape on the front of the clipboard to cover the seam where the papers meet. Note: Leave a little extra tape on both ends before you begin adhering the washi tape to the clipboard.
  2. Trim the washi tape just beyond the edge of the clipboard.
  3. Fold the ends of the washi tape over to the back side.
  4. Remove the paper backing from four magnets and adhere them across the bottom, as shown. Optional: Metal clips can be used with the magnets.


Step 10:

  1. Print out the budget templates and cut them in half to fit on the clipboards. Tip: You can print out as many of the budget templates as you want, so you always have extra on hand.

Filename
budget_template.pdf
Size
894 KB
Format
application/pdf

Suggested Products

Related Articles