

Candy Pencil & Eraser
Level of difficulty: Beginner
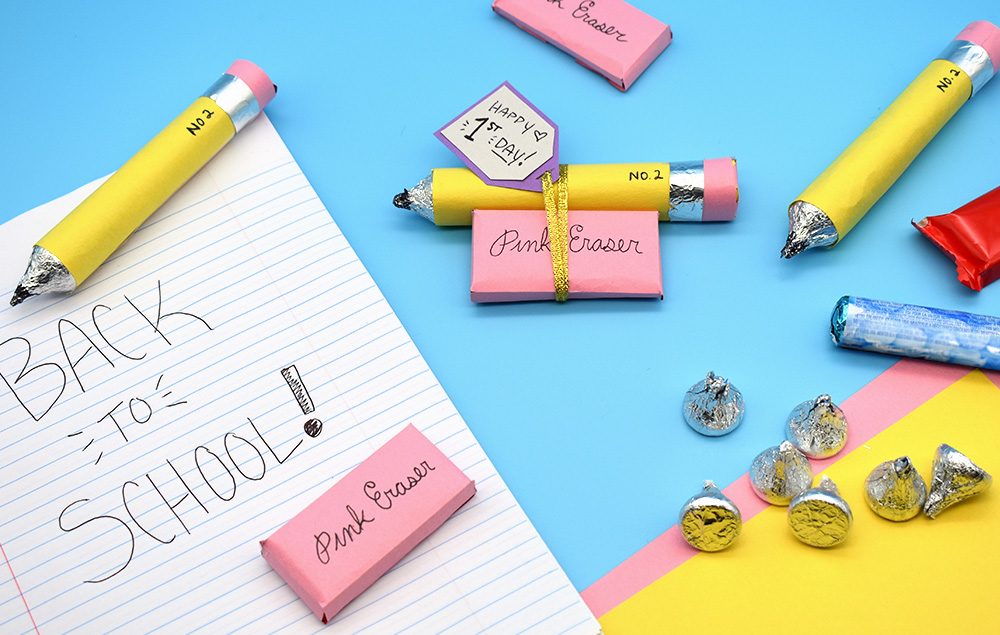
Celebrate the first day of school with these adorable candy pencils and erasers. There’s always room for dessert!
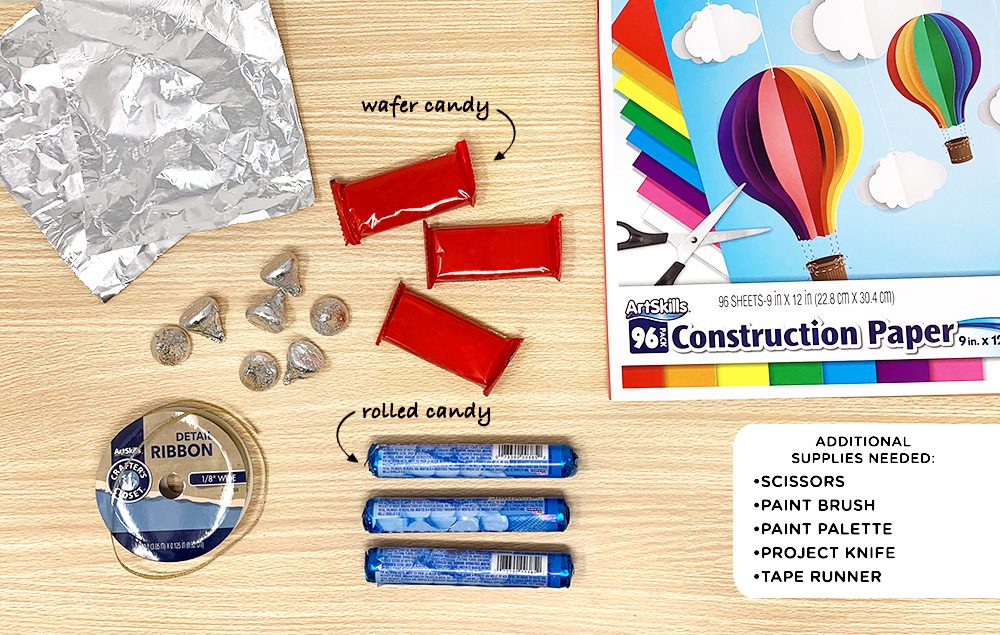
What You'll Need:
- ArtSkills Construction Paper 9"x12"
- Aluminum Foil
- Crafter’s Closet Tape Runner
- Black Pen
- Black Marker
- Crafter’s Closet Precision Scissors
- Crafter’s Closet Gold Ribbon
- Kiss Shaped Candy
- Rolled Candy
- Rectangular Wafer Candy
Let's Do This!
Pencil
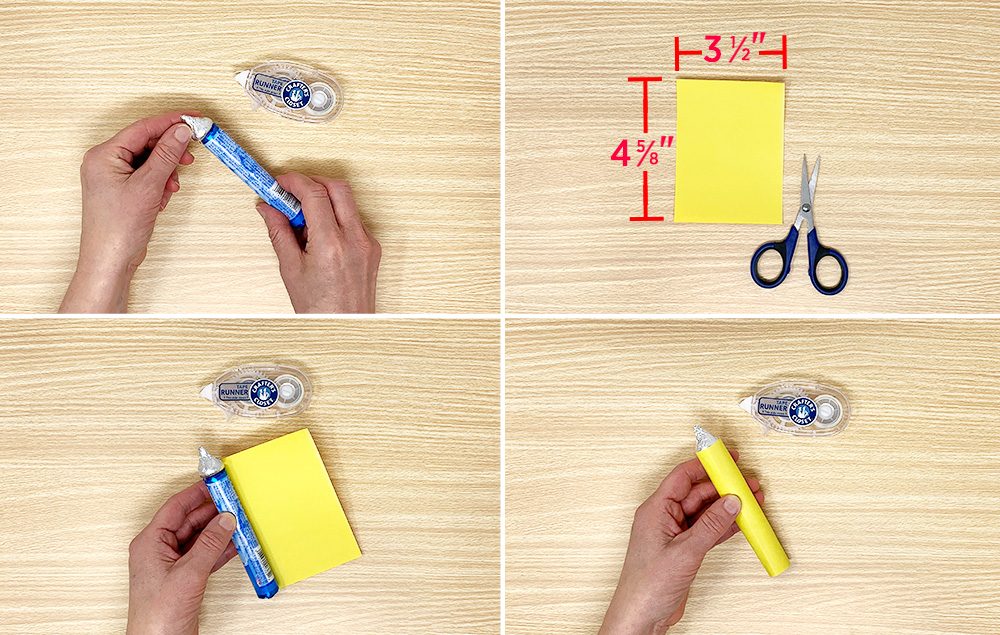
Step 1:
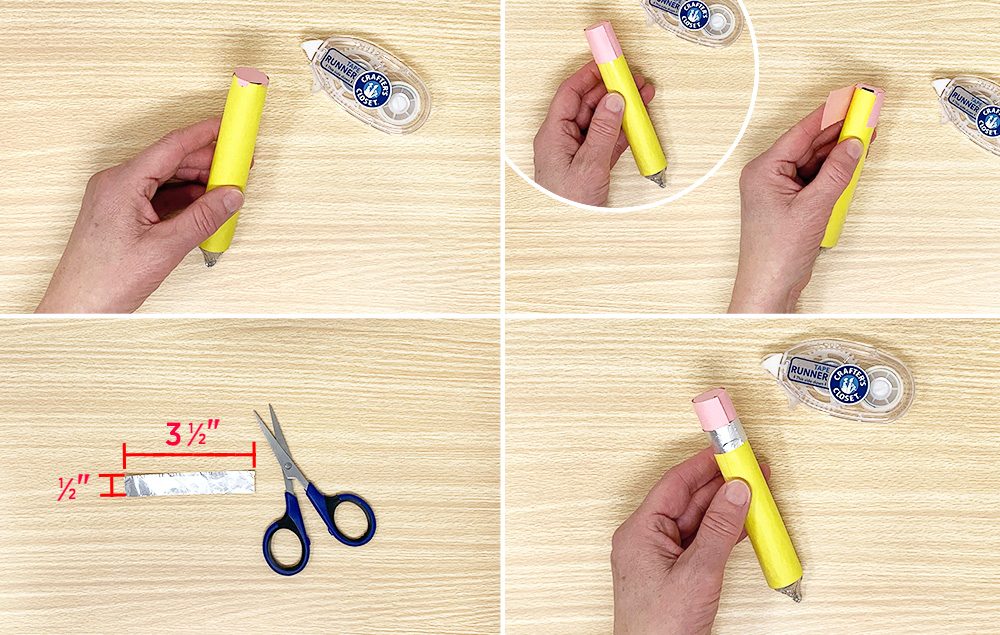
- Use glue dots or the tape runner to adhere Kiss candy to end of your choice of rolled cylindrical candy.
- Measure and cut out a 3 1/2" wide x 4 5/8” length piece of yellow construction paper (length of your candy roll).
- Place candy roll on paper, letting the paper slightly overlap on top of the kiss candy. Adhere to candy using the tape runner or double-sided tape.
- Apply adhesive with tape runner or double-sided tape to the remaining unattached edge of the construction paper. Wrap the yellow paper around the candy pencil, covering it completely.
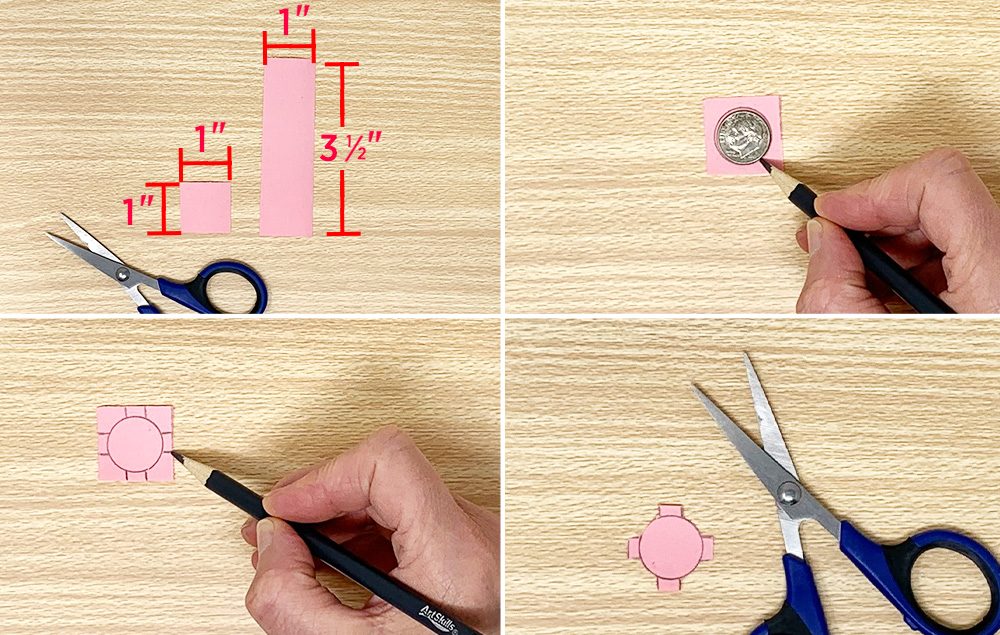
Step 2:
- Measure and cut a 1"x1" square of pink construction paper and a 1" x 3 1/2" rectangle of pink construction paper.
- Trace a dime onto the 1"x1" square.
- Draw 1/4” x 1/4" tabs in a “T” shape along the edges of the traced circle.
- Cut out the circle with the tabs attached.
Step 3:
- Tape the circle with tabs to the end of the candy pencil. Fold down the tabs and adhere them with the tape runner to the sides of the yellow paper.
- Tape and roll the long pink rectangle on the end of the pencil, covering the tabs previously adhered. Tip: for a nicer finish, keep all paper seams on one side of the candy pencil.
- Cut a 1/2” x 3 1/2" strip of aluminum foil.
- Tape and roll foil onto the edge of the pink band. This will make the pink section 1/2” wide like the foil section.
Step 4:
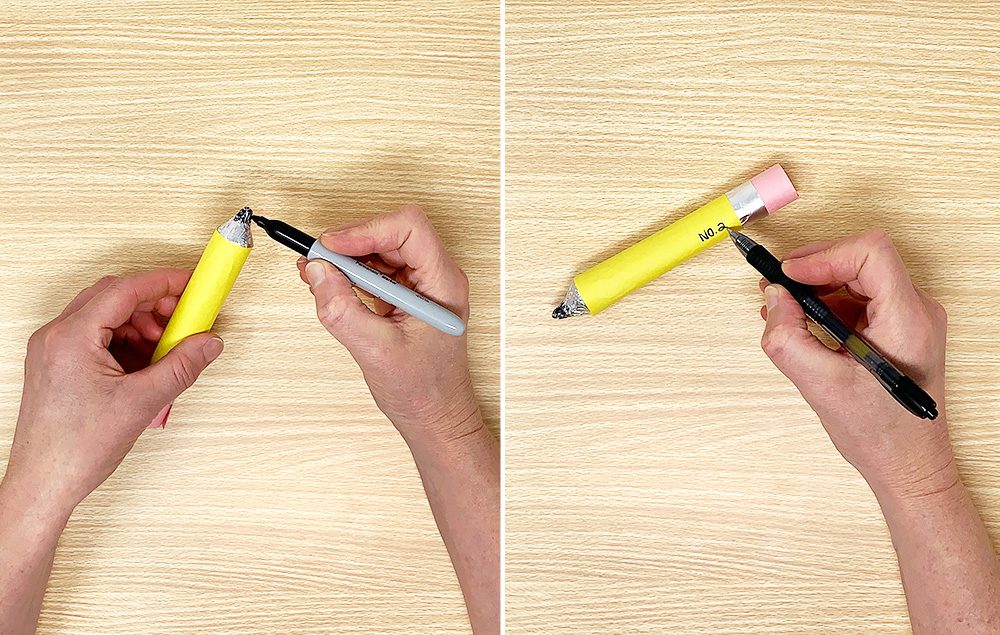
- With a black marker, color the tip of the candy pencil.
- Write “No. 2” on the side of the pencil near the foil edge.
Eraser
Step 1:
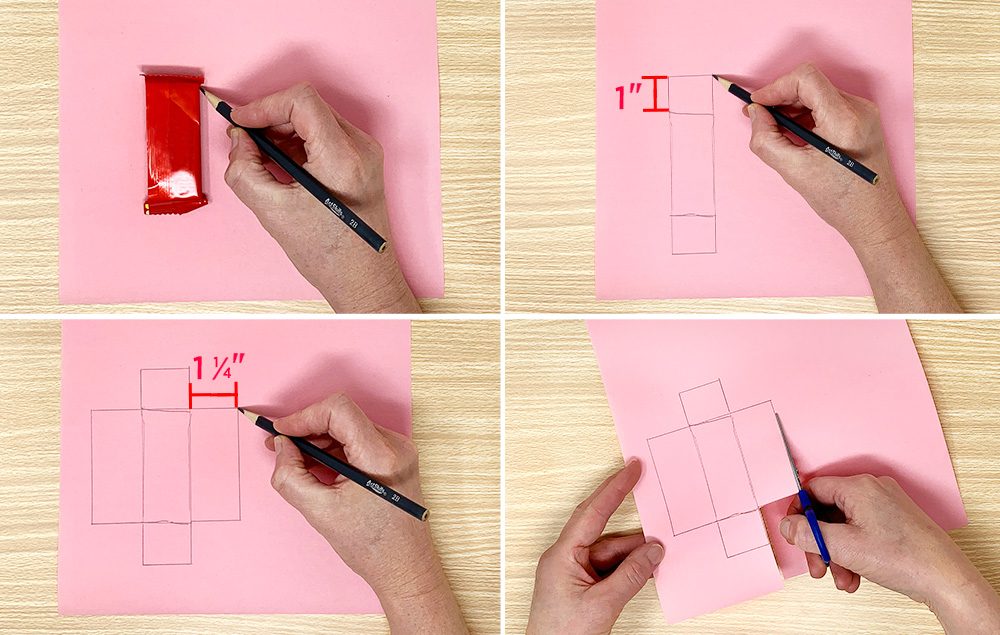
- Trace rectangular wafer candy on pink paper.
- From this traced rectangle, measure and draw a rectangle 1" high above and below.
- Measure and draw rectangle 1 1/4” out from the left and right of the traced rectangle center.
- Cut out the shape, keeping the tabs attached to the center rectangle.
Step 2:
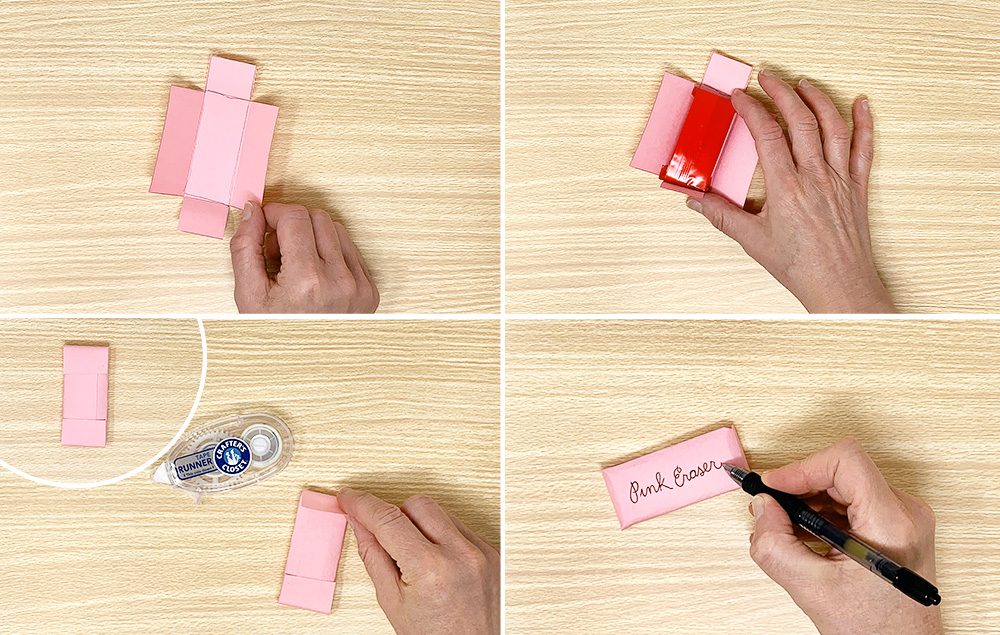
- Fold and crease the tabs on the cut shape.
- Place the rectangular candy in the center.
- Adhere the tab edges with tape runner. Fold tabs inward, keeping all seams to one side.
- Flip candy eraser over and write “Pink Eraser” on the front. Tip: use cursive letters to give it some extra flare.
Packaging & Tag
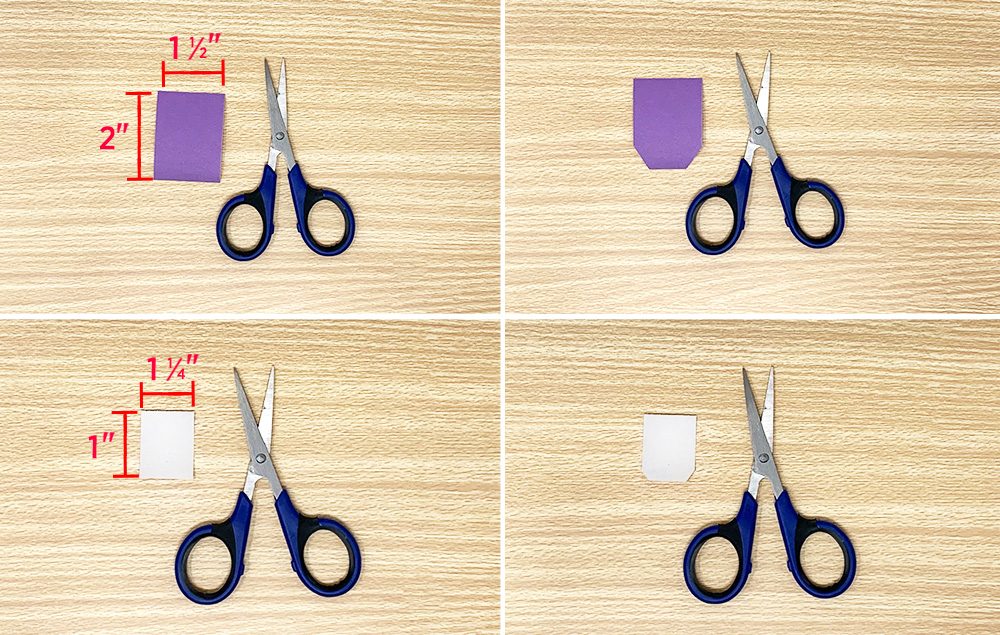
Step 1:
- Measure and cut a 1 1/2" x 2" rectangle from desired construction paper color.
- Pick a side of the rectangle and snip off both corners. Tip: for more symmetrical sides, lightly fold the rectangle directly in half and cut the corners.
- Measure and cut a 1" x 1 1/4” rectangle of white paper.
- Similar as before, pick a side of the white rectangle and snip off both corners. Tip: make these cuts a little further apart from the color rectangle.
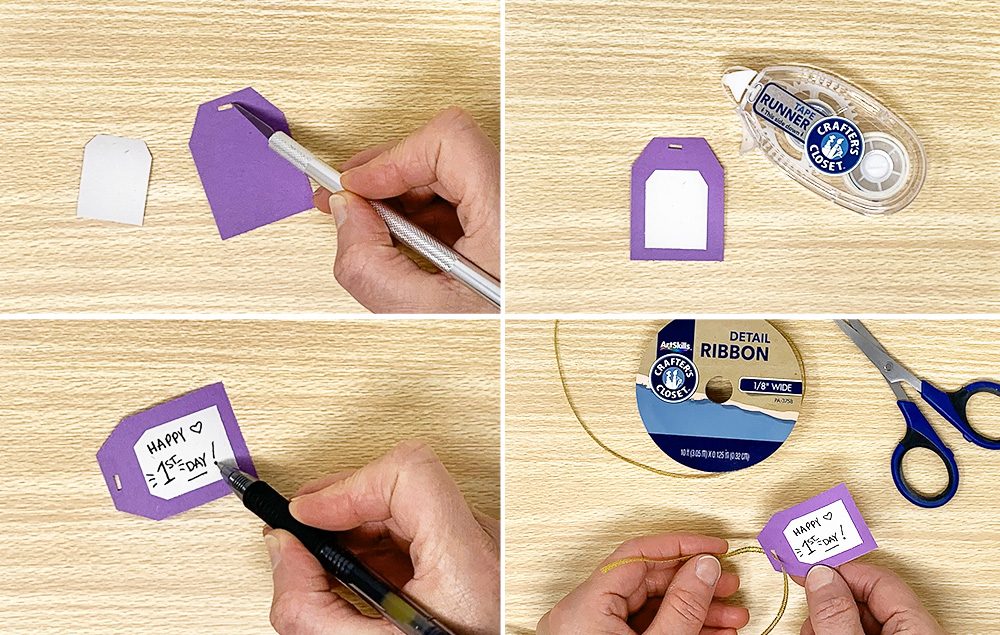
Step 2:
- Make a small cut with a project knife between the two snipped sides on the end of the color rectangle. This will be where the ribbon slides through.
- Use the tape runner to adhere the white tag onto the color tag, keeping both snipped ends facing the same direction.
- Write your message on the tag.
- String tag with approximately 11" of gold ribbon or string.


