

DIY Wood Bead Candle Holder
Level of difficulty: Beginner
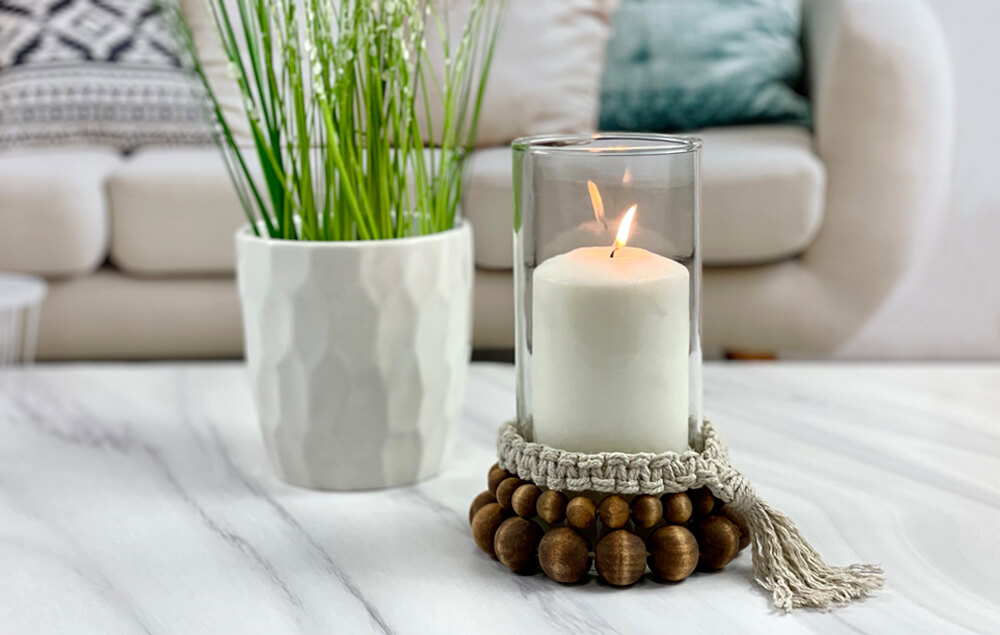
This easy DIY candle holder will make a great year-round home decor piece! Stained wood beads and an elegant macrame braid compliment the simple beauty of a candle jar. Create a gorgeous centerpiece, tablescape or home decor accent!
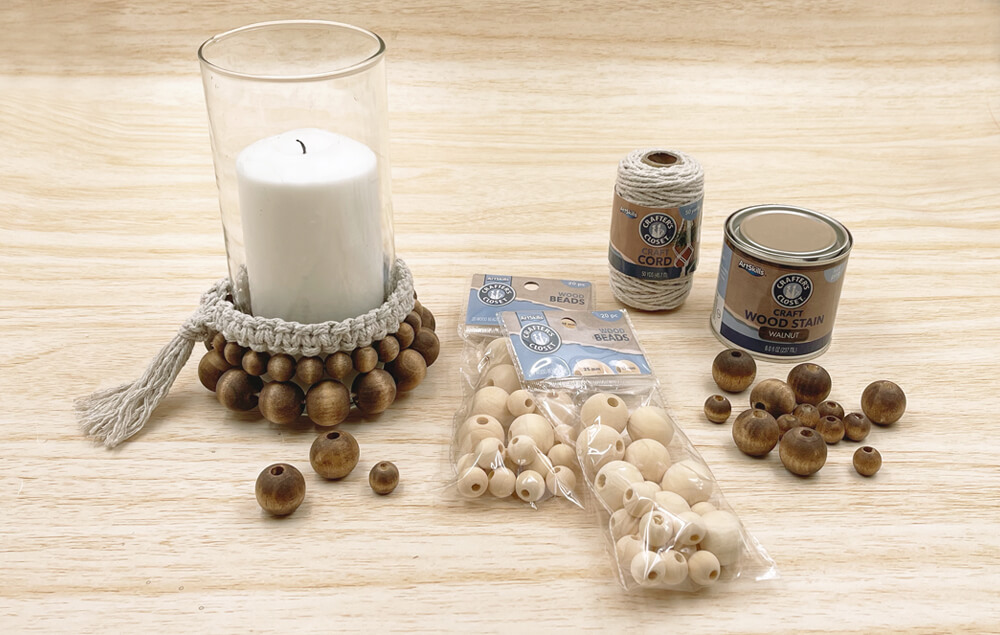
What You'll Need:
- Crafter's Closet Craft Wood Stain Walnut
- Crafter's Closet Wood Beads
- Crafter's Closet Craft Cord
- Crafter's Closet Premium Paint Brush
- Scissors
- Tape
- Paper Towels
- Gloves
- Jar and Candle
Let's Do This!
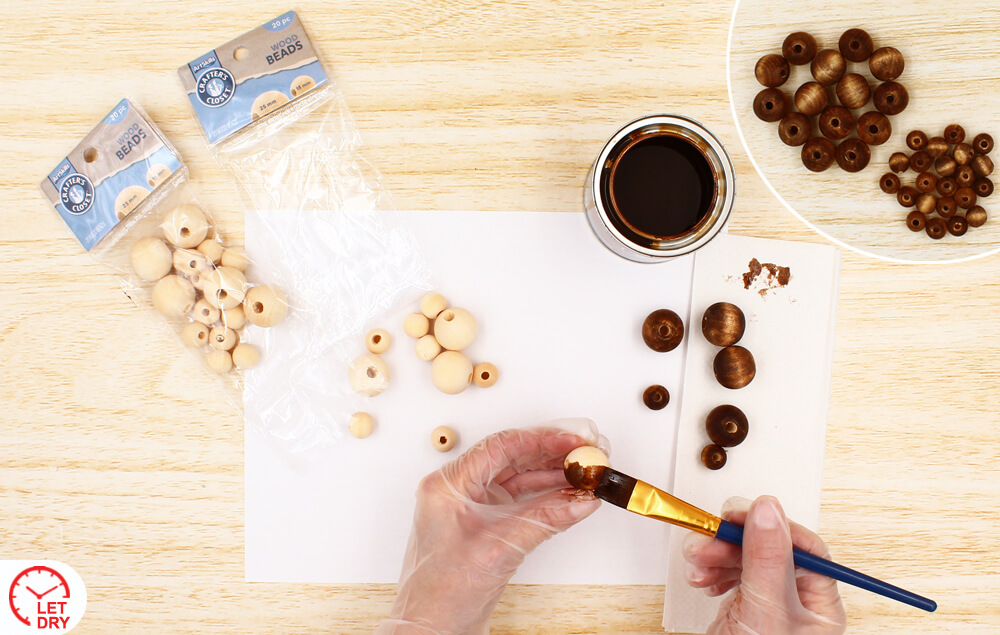
Step 1:
Stain two packs of wood beads. Let dry.
Step 2:
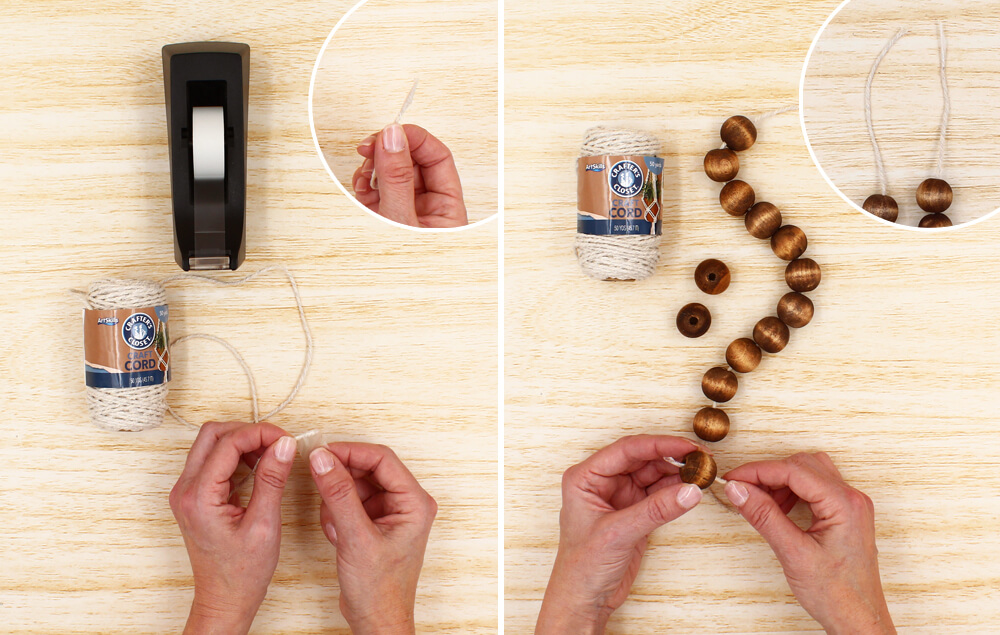
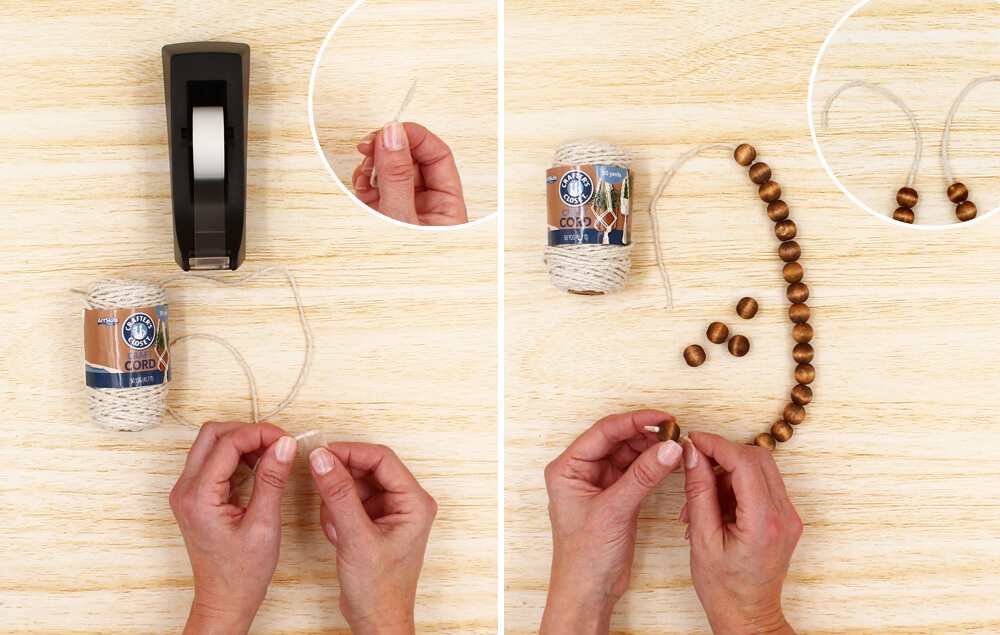
A) Wrap a piece of tape around the end of the craft cord. Tip: This will make it easier to thread the craft cord through the wood beads.
B) Thread the craft cord through the large wood beads. Leave several inches of craft cord on each end of the beads before cutting.
Step 3:
A) Wrap a piece of tape around the end of the craft cord.
B) Thread the craft cord through the small wood beads. Leave several inches of craft cord on each end of the beads before cutting.
Step 4:
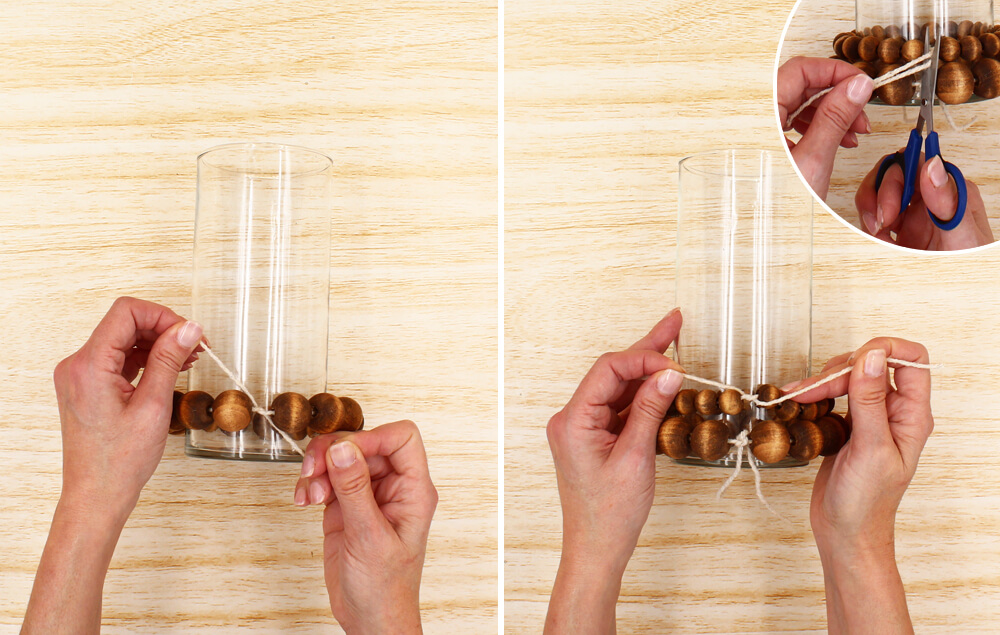
A) Wrap the large strand of beads around the glass jar and tie a knot to secure it. Tip: Remove beads if needed to create a tight fit.
B) Wrap the small strand of beads around the glass jar and tie a knot to secure it. Tip: Remove beads if needed to create a tight fit. Trim excess craft cord from the knots.
Step 5:
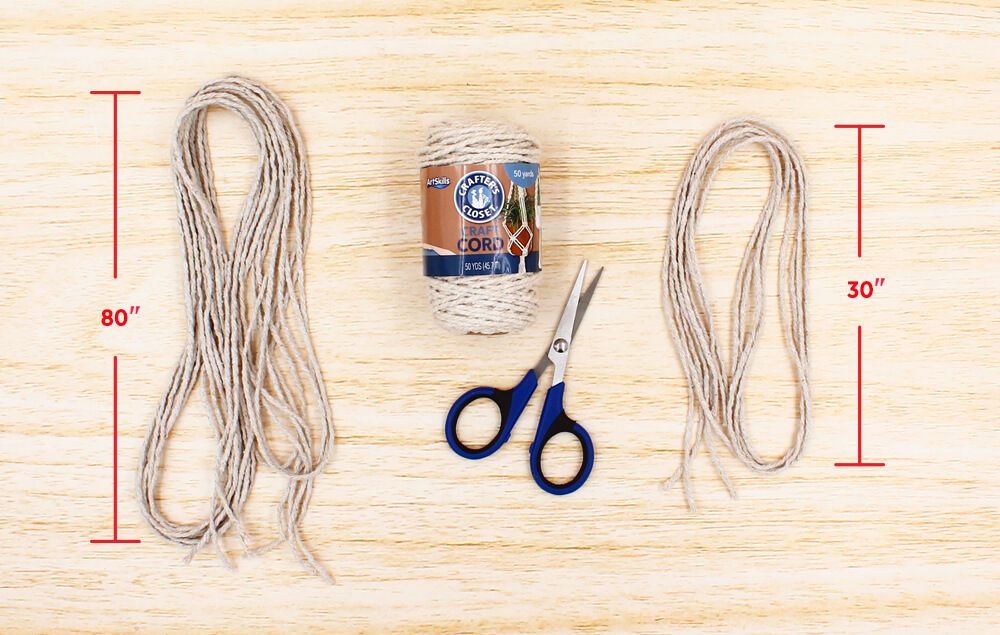
Cut four 30" lengths and four 80" lengths of craft cord.
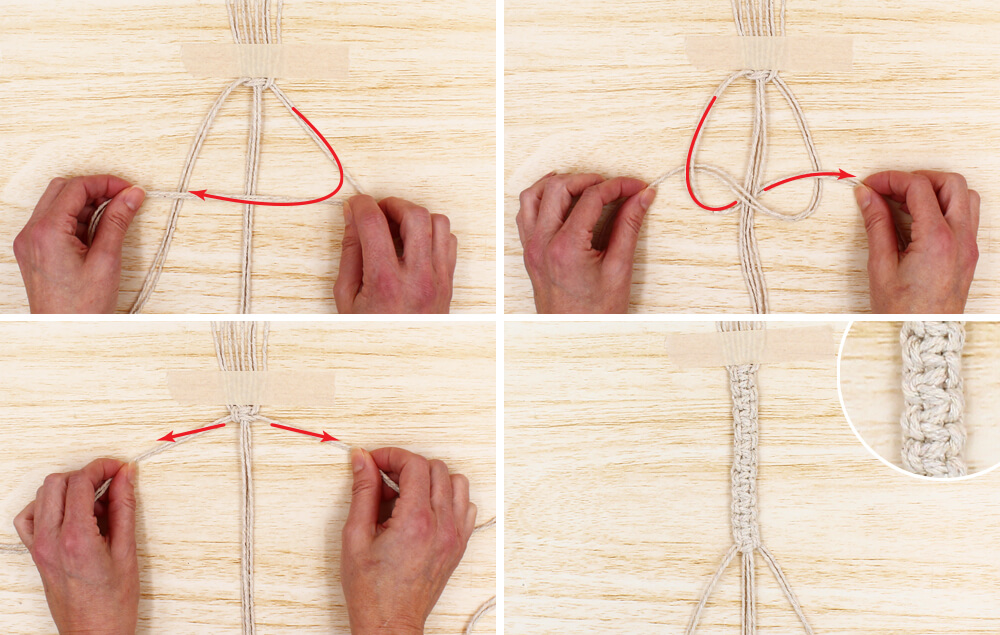
Step 6:
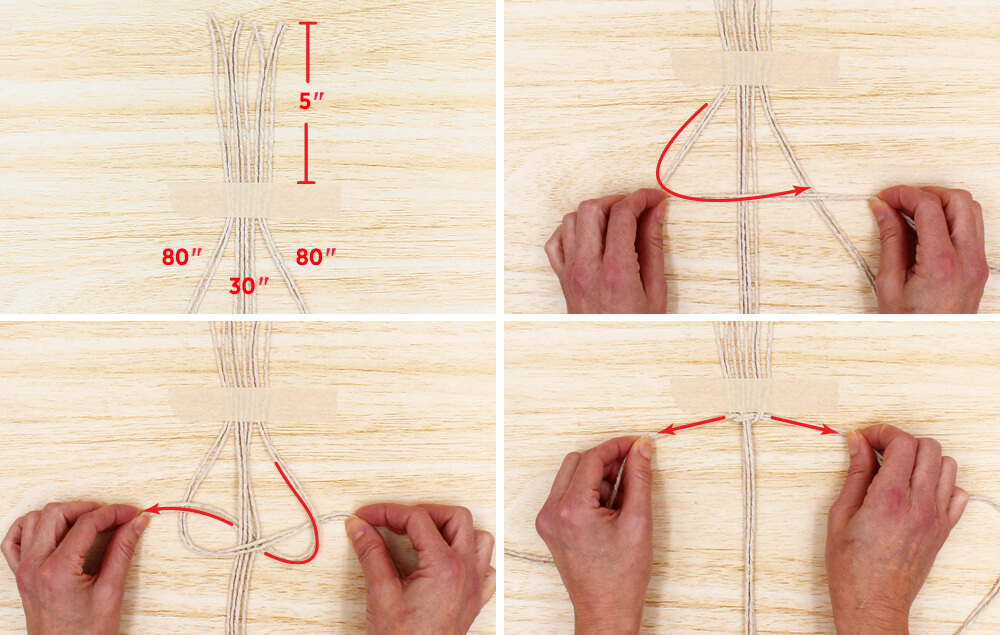
A) Tape the craft cord to a flat surface, as shown. Note: Leave about 5" of each strand above the tape.
B) Lay the two left cords over the four center cords.
C) Tuck the two right cords under the four center cords and bring them out over the two left cords.
D) Pull both sides tight to slide the knot up to the top against the tape.
Step 7:
A) Lay the two right cords over the four center cords.
B) Tuck the two left cords under the four center cords and bring them out over the two right cords.
C) Pull both sides tight to slide the knot up to the top.
D) Continue making knots, alternating from side to side, until the braid is long enough to encircle the jar.
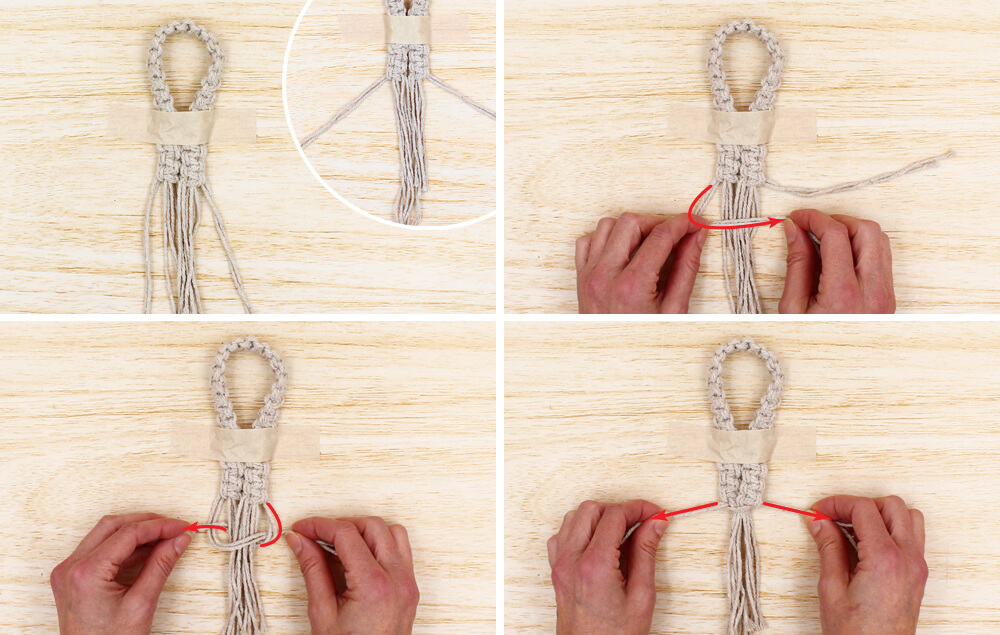
Step 8:
A) Loop the braid so the ends are even. Tape the braid to the work surface and separate two cords on the right and left sides.
B) Using the technique from above, lay two cords from the left over the center cords.
C) Tuck the two right cords under the center cords and bring them out over the two left cords.
D) Pull both sides tight to slide the knot up to the top.
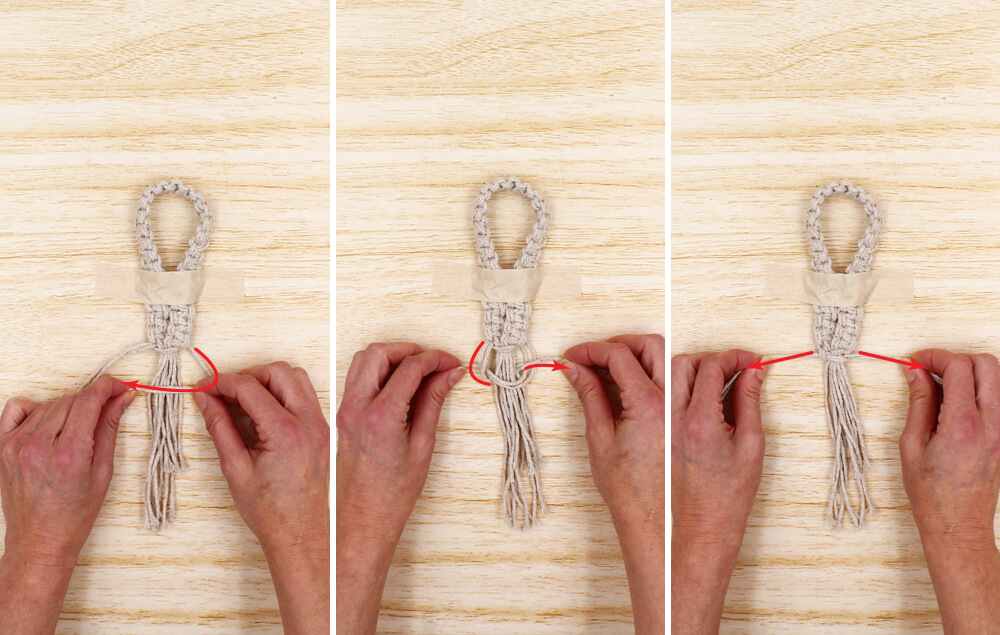
Step 9:
A) Lay the two right cords over the center cords.
B) Tuck the two left cords under the center cords and bring them out over the two right cords.
C) Pull both sides tight to slide the knot up to the top. Note: This will secure the loop together.
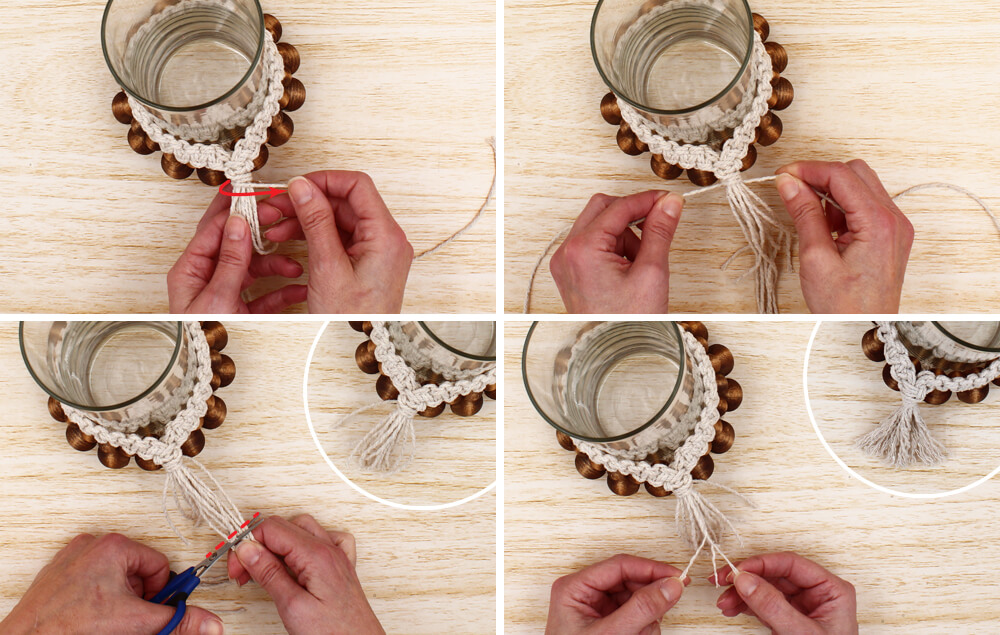
Step 10:
A) Select a cord and wrap it around the other loose cords several times.
B) Grab a second cord and tie a knot underneath. Note: This will secure all the loose cords together.
C) Trim all the ends so they are even.
D) Unravel the cords to create a frayed look.


