

Thanksgiving Place Setting
Level of difficulty: Beginner
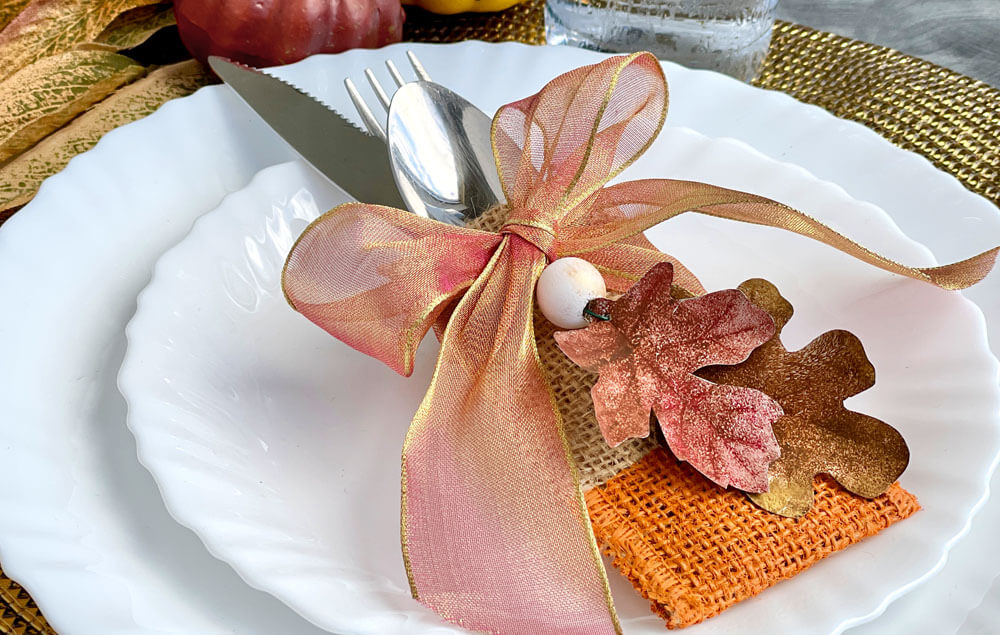
These DIY utensil holders are perfect for your Thanksgiving table! Add homemade, rustic charm to your holiday place settings.
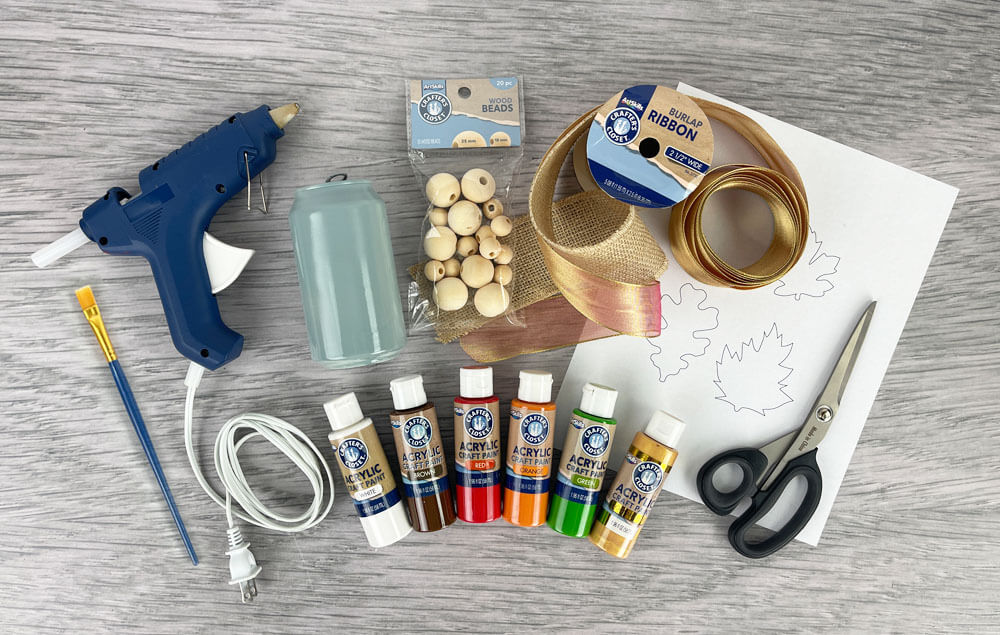
What You'll Need:
- Crafter’s Closet Burlap Ribbon
- Crafter’s Closet Orange Acrylic Paint
- Crafter’s Closet White Acrylic Paint
- Crafter’s Closet Red Acrylic Paint
- Crafter’s Closet Green Acrylic Paint
- Crafter’s Closet Brown Acrylic Paint
- Crafter’s Closet Gold Metallic Paint
- Crafter’s Closet Wood Beads
- Crafter’s Closet Hot Glue Gun
- Crafter’s Closet Hot Glue Sticks
- Soda Can
- Scissors
- Steel Wool
- Ribbon
- Pen
- Tape
- Wire
- Paint Brush
- Template
Let's Do This!

Step 1:
A) Cut a 9" length of burlap ribbon.
B) Apply hot glue halfway down both sides of the burlap ribbon.
C) Fold the burlap ribbon in half, using the hot glue to secure the sides and create a pocket..

Step 2:
A) Use tape to mask off the bottom third of the pocket. Paint the bottom orange. Let dry.

Step 3:
A) Cut apart a soda can. Note: Be careful of the sharp edges.
B) Print out the template.
C) Lay the template over the metal soda can and use a pen to trace the leaf shapes. The pressure of the pen will indent the metal soda can below.
D) Cut out the leaves.

Step 4:
A) Use steel wool to scuff up the metal leaves and remove the printing.
B) Poke a hole through each leaf. Note: You can poke a hole in the metal with a nail, craft knife, or pointy scissors.

Step 5:
A) Paint the metal leaves. We used brown and red for one leaf, and brown and green for the other. Let dry.
B) Paint one small wood bead white. Let dry.
C) Paint the same bead with a light layer of gold paint. Let dry.

Step 6:
A) Thread a 3" piece of wire through the leaf holes. Note: You can also use a twist tie.
B) Bend the wire in half.
C) Thread the wood bead onto the wire.

Step 7:
A) Tie a piece of ribbon around the burlap pocket. Wrap the leaf and bead accent wire around the ribbon.
B) Tie the ribbon in a bow. The bow will hide the wire from the accent piece.
C) Insert silverware into the pocket.
- Filename
- ThanksgivingPlaceSetting_Template.pdf
- Size
- 60 KB
- Format
- application/pdf


