

Fabric Covered Pot
Level of difficulty: Beginner
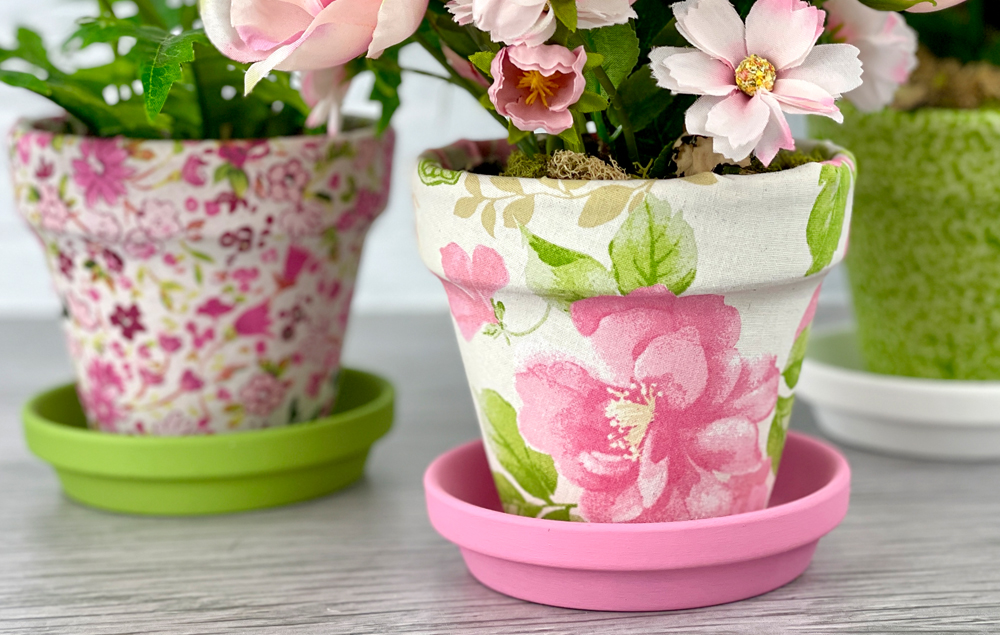
A fun and inexpensive way to add a pop of spring color to your decor is to wrap terra cotta pots with fabric! This DIY craft also makes a great gift idea. Just pop in a pretty potted plant and enjoy!
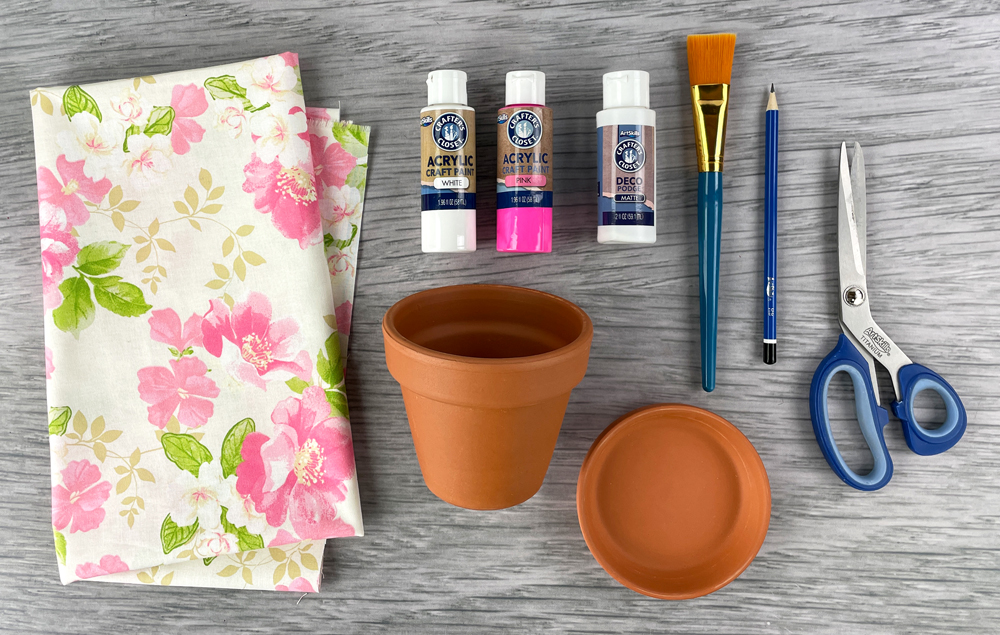
What You'll Need:
Let's Do This!

Step 1:
A) Make a small pencil mark on the bottom of the clay pot.

Step 2:
A) Lay the pot on the edge of the fabric, aligning the pencil mark with the fabric edge. Note: Allow several inches of fabric above the top of the pot.
B) Slowly roll the pot in an arc. Sketch a pencil line about an inch away from the bottom edge of the pot as you roll it. When the pencil mark on the pot has made one complete rotation, stop sketching the line.

Step 3:
A) Make a small pencil mark on the top of the clay pot, directly above the pencil mark on the bottom.

Step 4:
A) Lay the pot on the edge of the fabric again, aligning the pencil marks with the fabric edge.
B) Slowly roll the pot in an arc. Sketch a pencil line about an inch away from the top edge of the pot as you roll it. When the pencil mark on the pot has made one complete rotation, stop sketching the line.

Step 5:
A) Cut out the fabric along the pencil sketch lines.

Step 6:
A) Flip the fabric over and apply a generous amount of deco podge to the back.

Step 7:
A) Wrap the wet, deco-podged fabric around the clay pot.
B) Use your fingers to smooth out the fabric as you form it to the shape of the pot. Wrap the top edge of the fabric over the top lip of the pot. Wrap the bottom edge of the fabric under the bottom of the pot.
C) Apply a top coat of deco podge to seal the fabric. Let dry.

Step 8:
A) Paint the clay saucer to match the fabric pattern.
B) Let the paint dry.
C) Set the fabric pot on the saucer.


