

DIY Burlap Christmas Wreath
Level of difficulty: Beginner
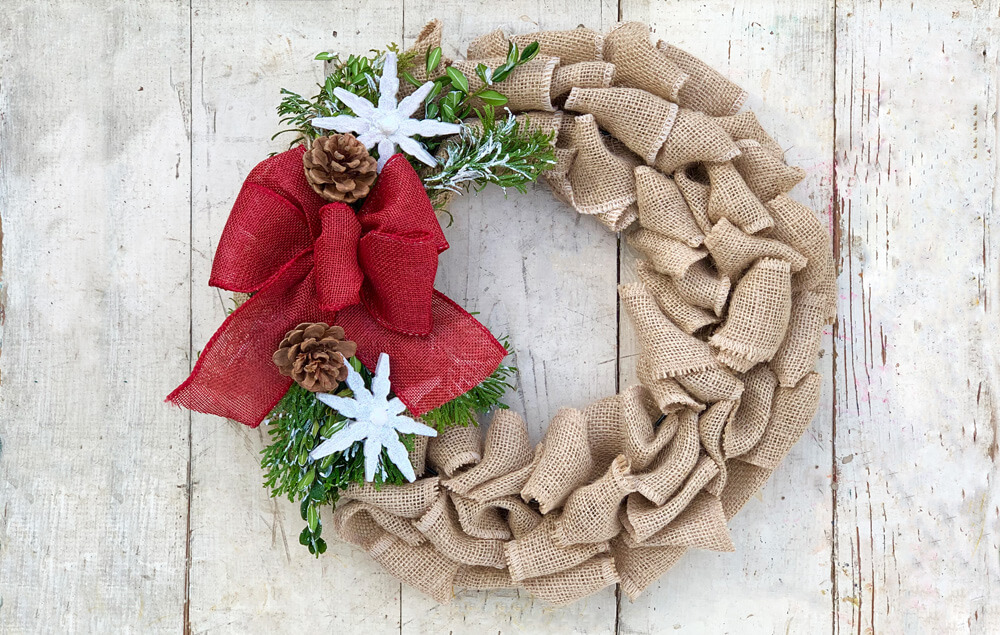
This cozy burlap wreath will add a touch of seasonal charm to your décor! It would be beautiful hung on a door, or displayed above a mantle.
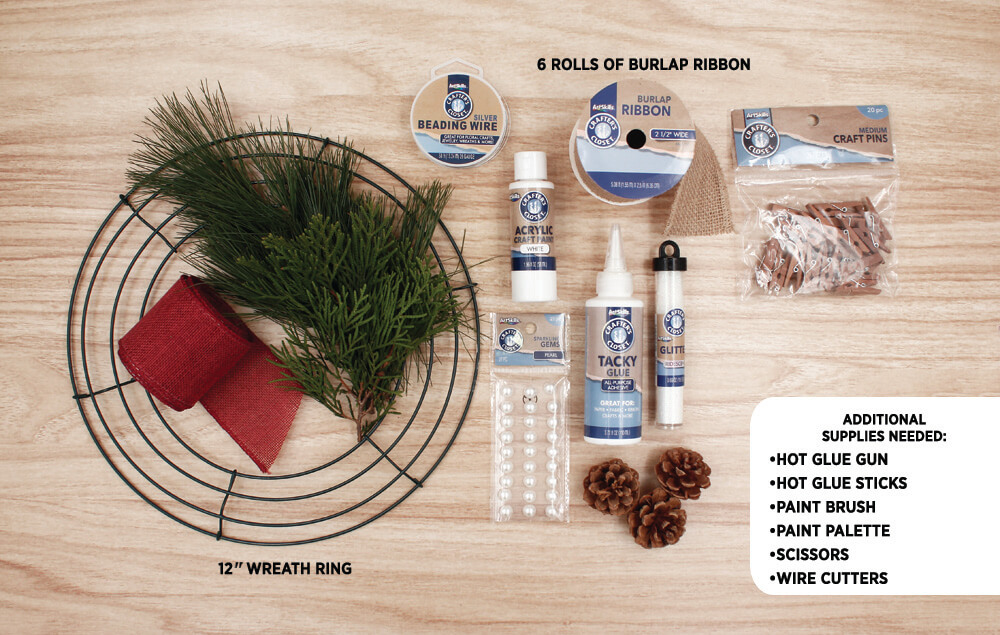
What You'll Need:
- 12" Wire Wreath Ring
- Crafter’s Closet Burlap Ribbon (6 Rolls)
- Crafter’s Closet White Acrylic Paint
- Crafter’s Closet Iridescent Glitter
- Crafter’s Closet Tacky Glue
- Crafter’s Closet Pear Gem Stickers
- Crafter’s Closet Medium Craft Pins
- Crafter’s Closet Beading Wire
- Crafter’s Closet Hot Glue Gun
- Crafter’s Closet Hot Glue Sticks
- Crafter’s Closet Paint Brush Premium
- Crafter’s Closet Palette
- Crafter’s Closet Precision Scissors
- Greens
- Ribbon
- Pinecones
Let's Do This!
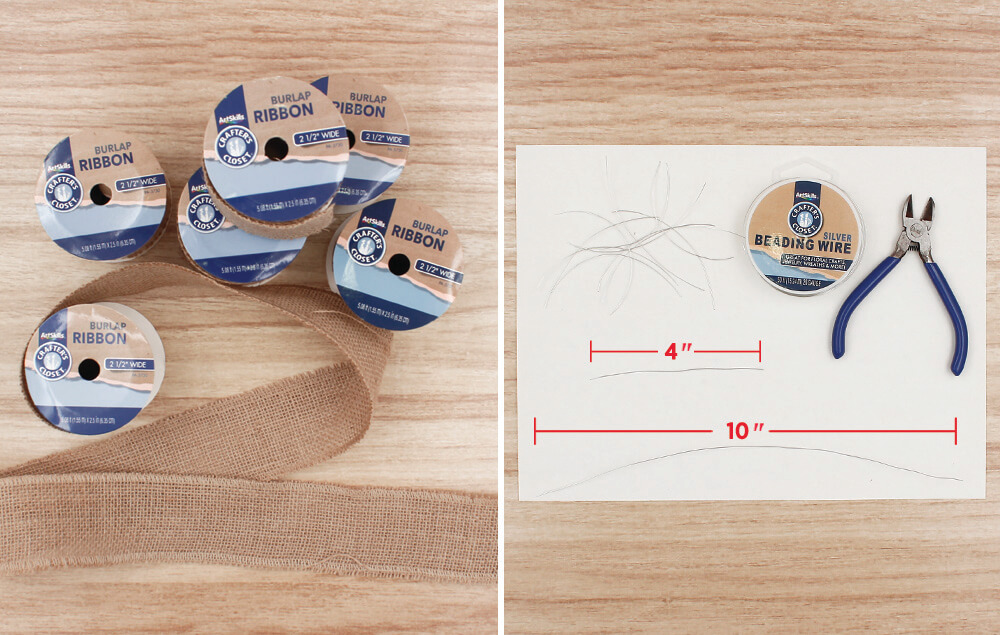
Step 1: Prepping Components
- Unroll burlap ribbon from a roll. You will need six rolls to make this wreath.
- Cut twelve 4" pieces of wire and one 10” piece of wire.
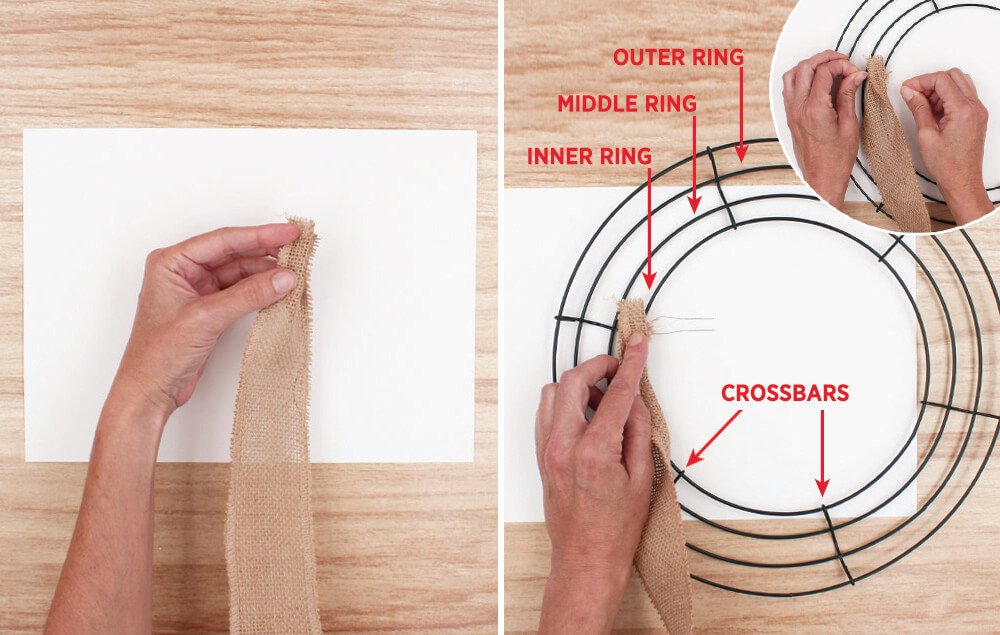
Step 2: Securing Burlap to Frame
- Bunch the end of a piece of burlap ribbon.
- Use one of the 4" pieces of wire to attach the bunched end of burlap ribbon to the back of the wreath ring at a crossbar. Twist the wire to secure the burlap in place.
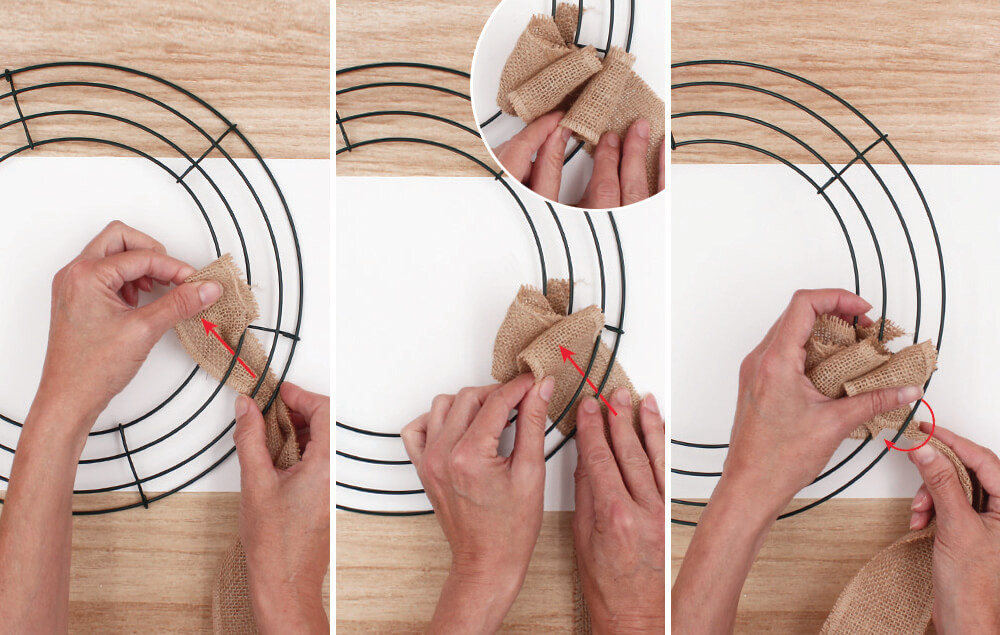
Step 3: Making Loops
- Flip the wreath ring back to the front side. Pull burlap ribbon through the inner ring on the wreath ring, from the back, to make a two inch loop.
- Pull a second burlap ribbon loop through the middle ring on the wreath ring to create another two inch loop. Repeat on the outer ring of the wreath ring to make a third loop.
- After the third loop, twist the burlap ribbon twice.
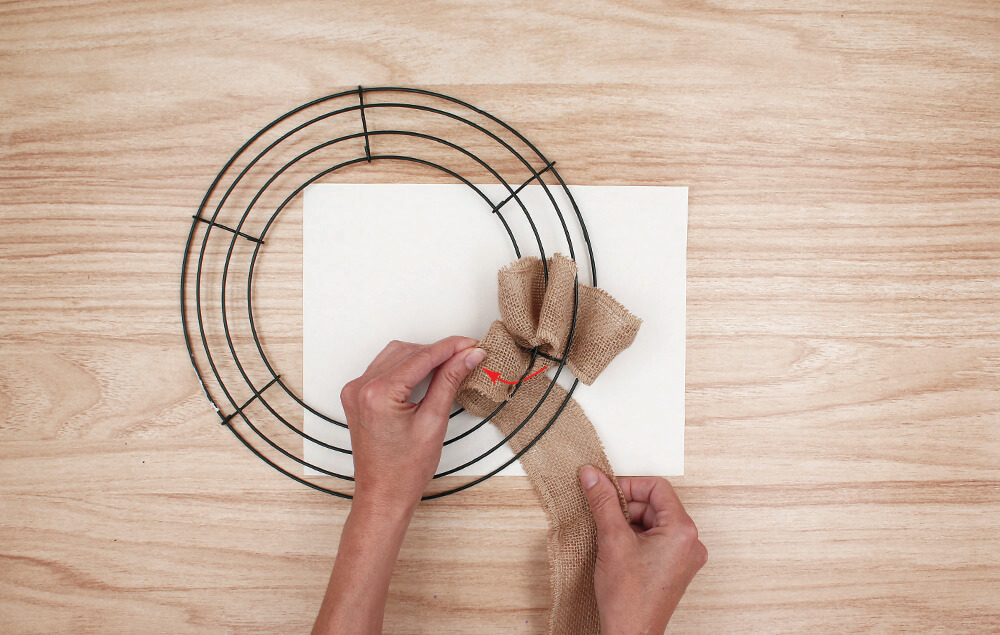
Step 4:
- Pull the burlap ribbon through the inner ring of the wreath ring again to make another loop. Tip: You will follow this pattern: inner ring, middle ring, outer ring, twist, repeat.
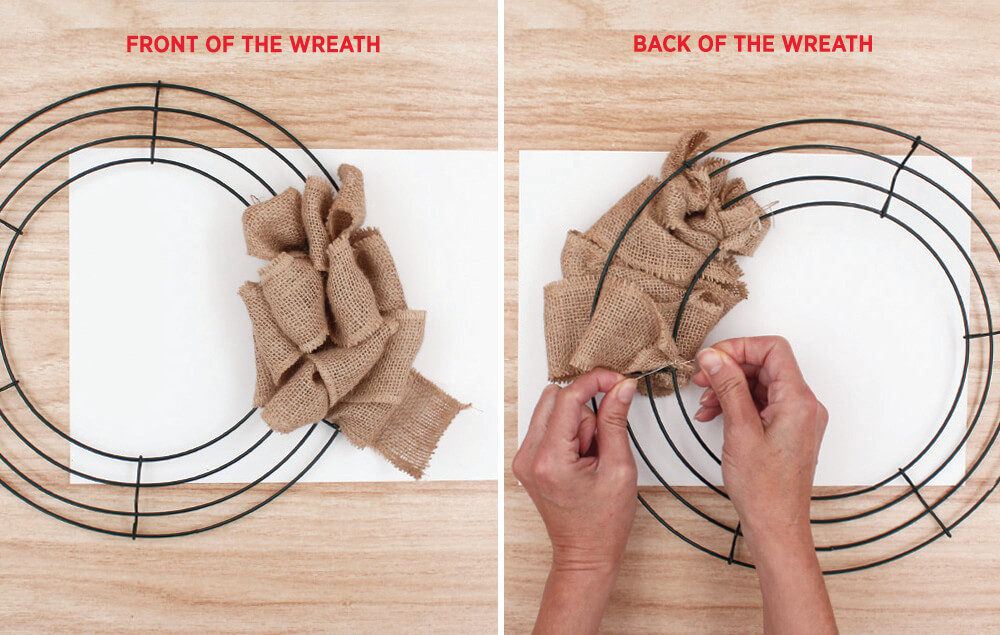
Step 5:
- Repeat process to use the whole roll of burlap ribbon.
- Secure the end of the piece of burlap ribbon to the back of the wreath ring using another 4" piece of wire.
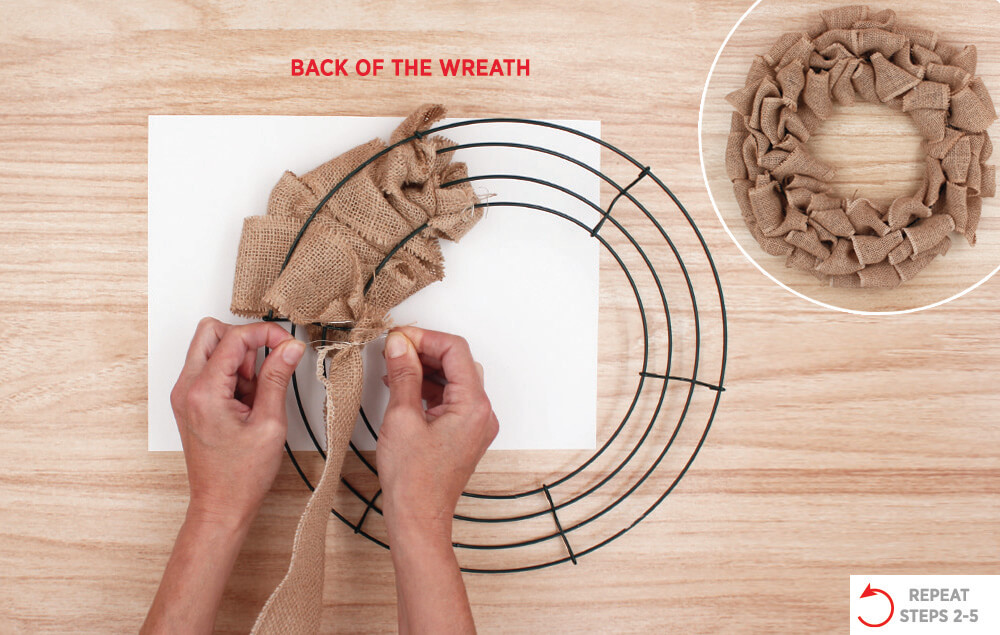
Step 6:
- Repeat steps 2 through 5 to fill the whole wreath ring with burlap ribbon loops. You should be able to fit one roll of burlap ribbon per section of the wreath ring.
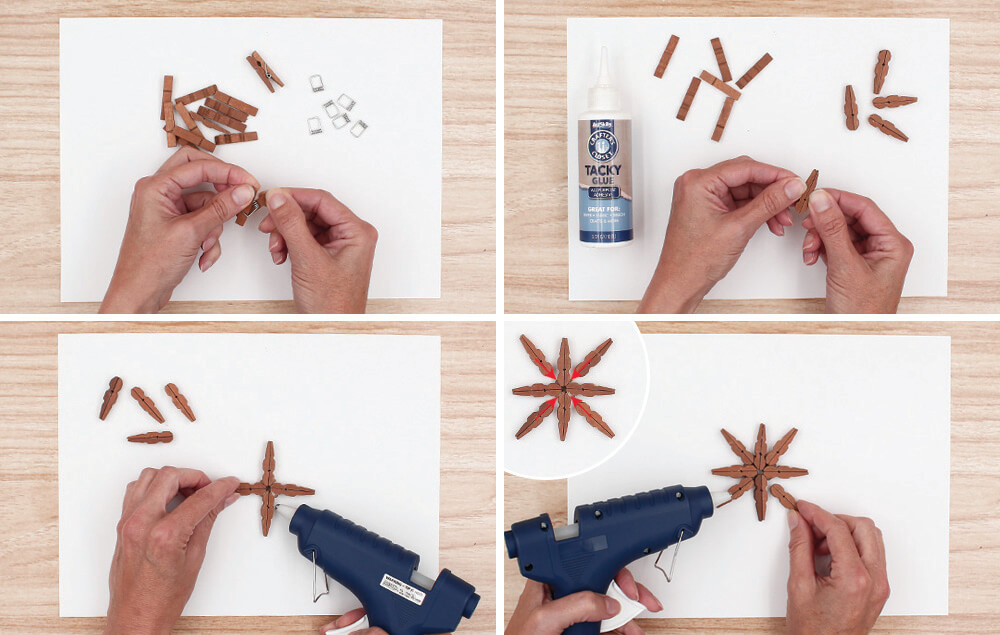
Step 7: Creating Snowflakes
- Pull apart eight craft pins and discard the metal springs.
- Glue two halves of a craft pin together with tacky glue, matching up the flat sides. You’ll need eight sets.
- Use hot glue to attach four of the craft pins together in a cross pattern, as shown.
- Hot glue the other four craft pins to the snowflake, as shown.
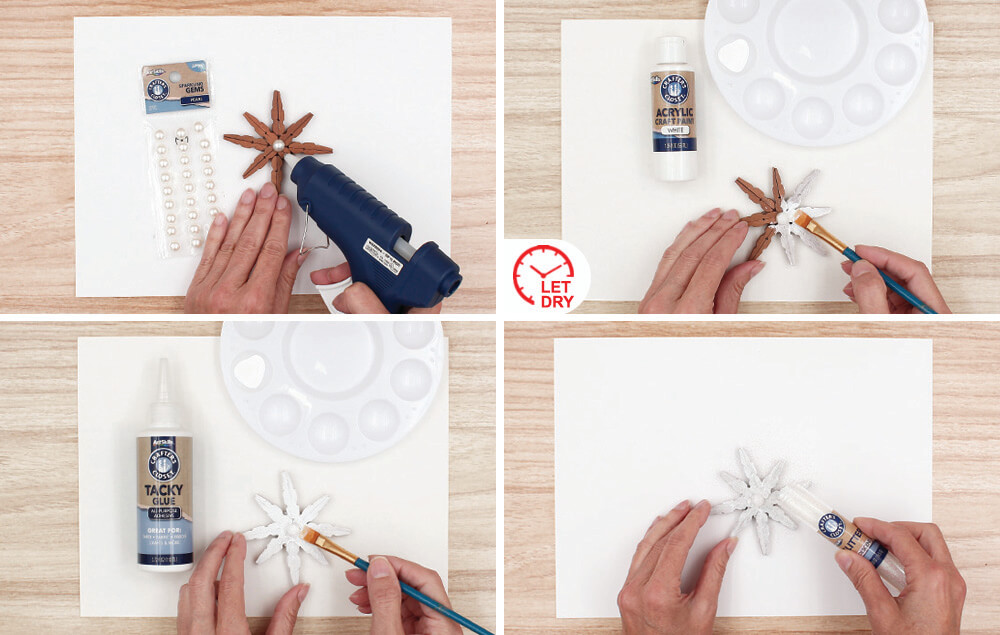
Step 8:
- Hot glue a pearl to the center of the snowflake.
- Paint the snowflake white. Let dry.
- Coat the snowflake with tacky glue.
- Sprinkle the snowflake with glitter.
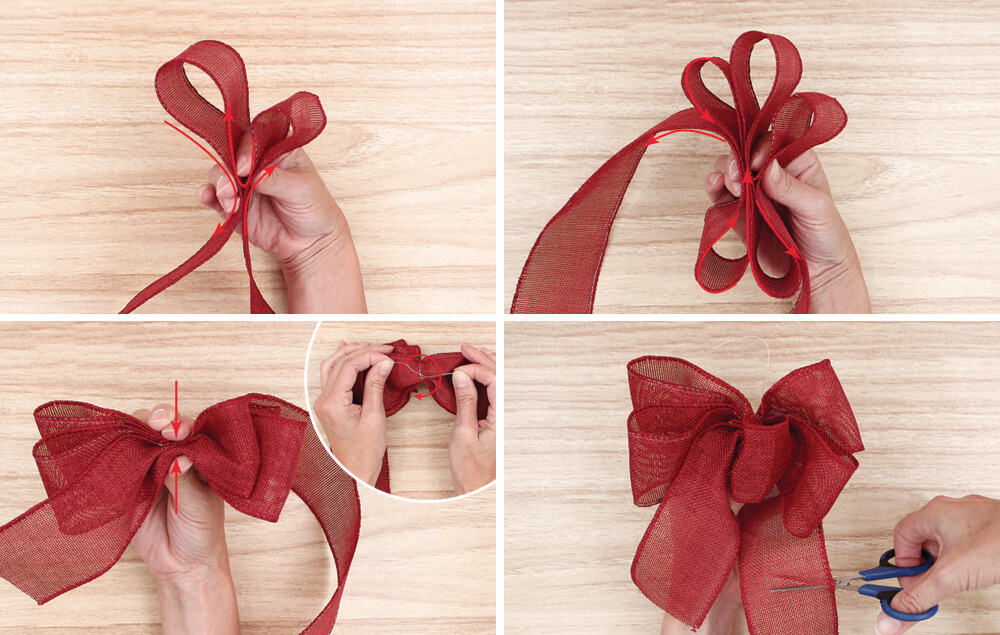
Step 9: Make Bow
- Make the button and first loop of the bow by zig-zagging the ribbon, as shown. The button is a 2" loop and the first loop is a 3 ½" loop. Use your pointer finger and thumb to hold the ribbon.
- Make the second, third, and fourth loops by zig-zagging the ribbon back and forth. Keep those loops at 3 ½" as well.
- Pinch the ribbon in the center and then twist the 10" piece of wire around the center to hold the bow.
- Fluff the loops on the bow and then trim off the excess ribbon from the roll to make the two ribbon tails even.
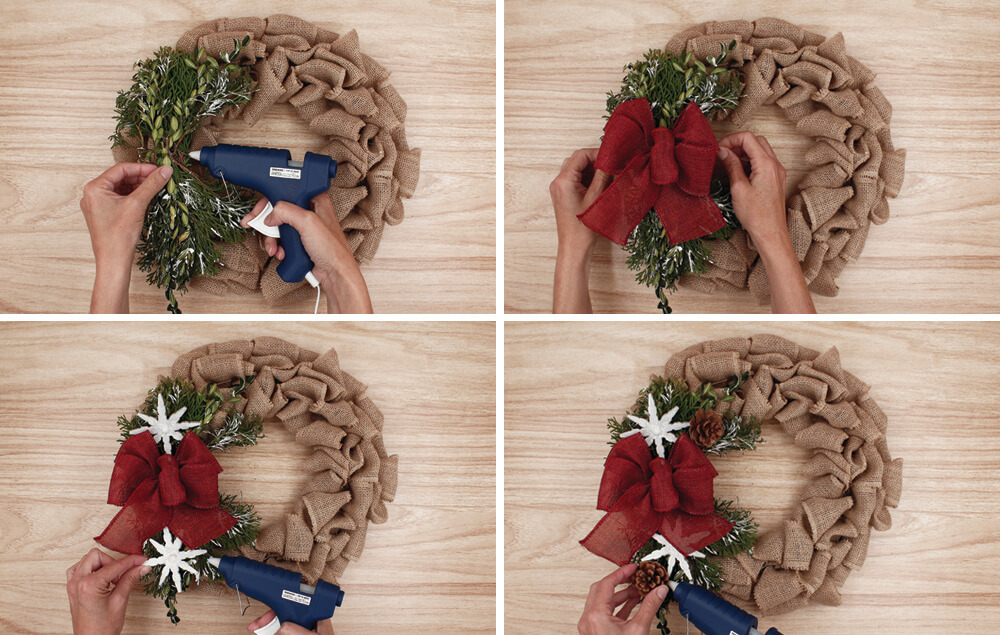
Step 10: Decorating
- Embellish your wreath with fresh or artificial greens. Secure with hot glue or wire.
- Tie the bow around your wreath.
- Add the snowflakes to the wreath with hot glue or wire.
- Add pinecones to the wreath using hot glue or wire.


