

Teacher Desk Name Plate
Level of difficulty: Beginner
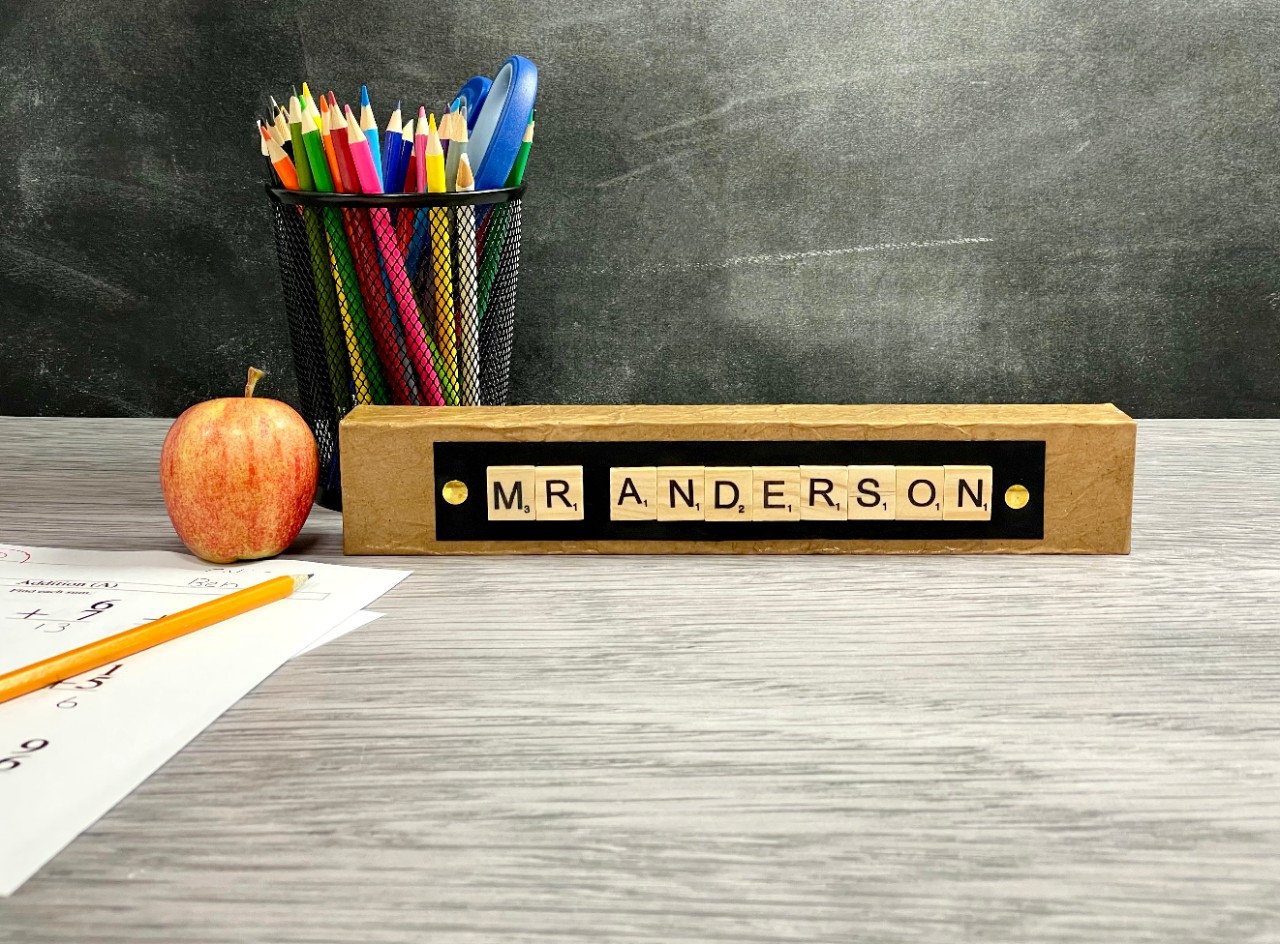
Reminiscent of a paper bag book cover, this personalized nameplate will add old-school charm to any teacher's desk! It makes a thoughtful gift for a new teacher or a great addition to your own classroom.
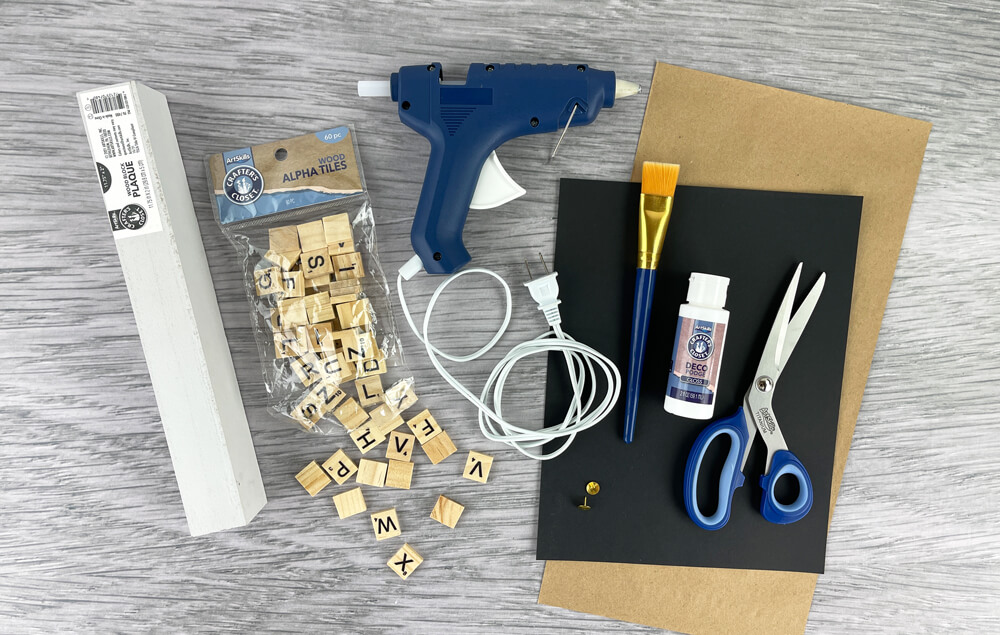
What You'll Need:
- Crafter’s Closet Wood Block Plaque
- Kraft Paper
- Crafter’s Closet Deco Podge Gloss
- Black Paper
- Thumb Tacks
- Crafter’s Closet Wood Alpha Tiles
- Crafter’s Closet Hot Glue Gun
- Crafter’s Closet Hot Glue Sticks
- Scissors
- Paint Brush
Let's Do This!
Step 1:
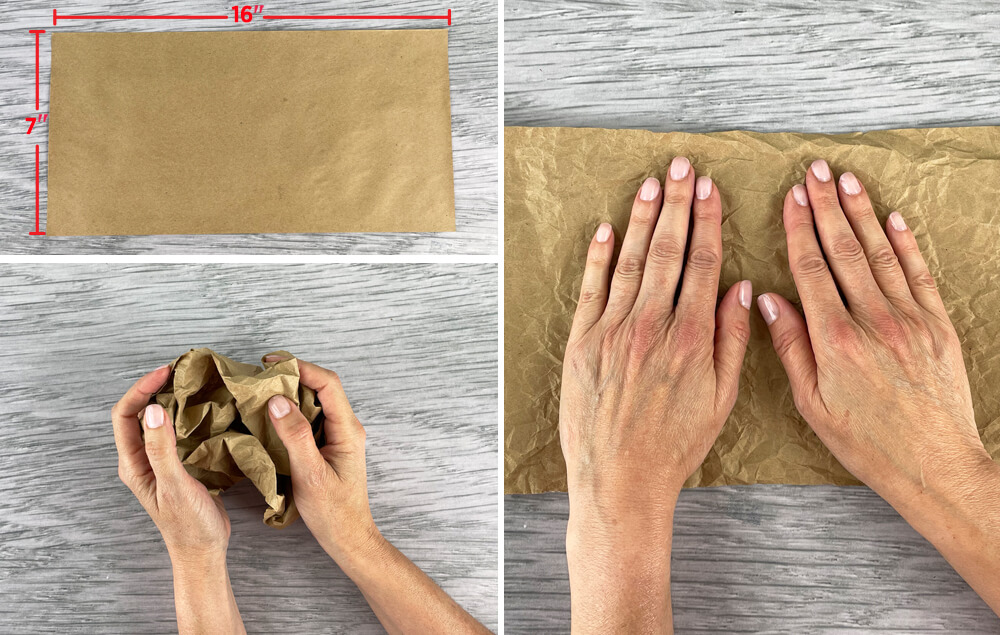
A) Use a piece of kraft paper that is approximately 7" x 16". Tip: You can use a paper bag.
B) Crumple the kraft paper.
C) Smooth out the kraft paper.
Step 2:
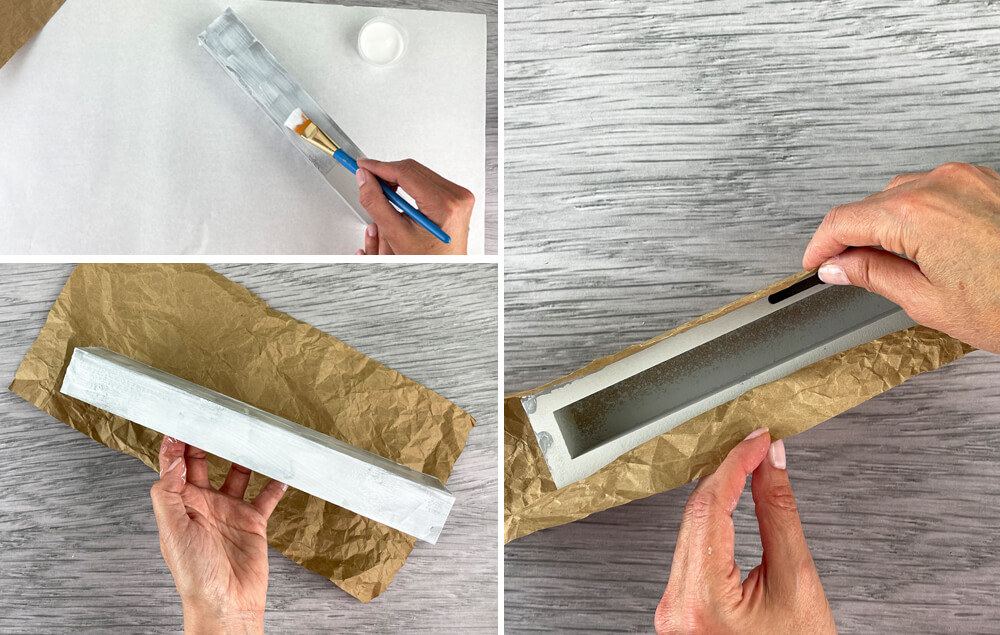
A) Apply deco podge to the entire wood plaque.
B) Press the kraft paper onto the wet deco podge.
C) Wrap it around the long sides of the wood plaque.
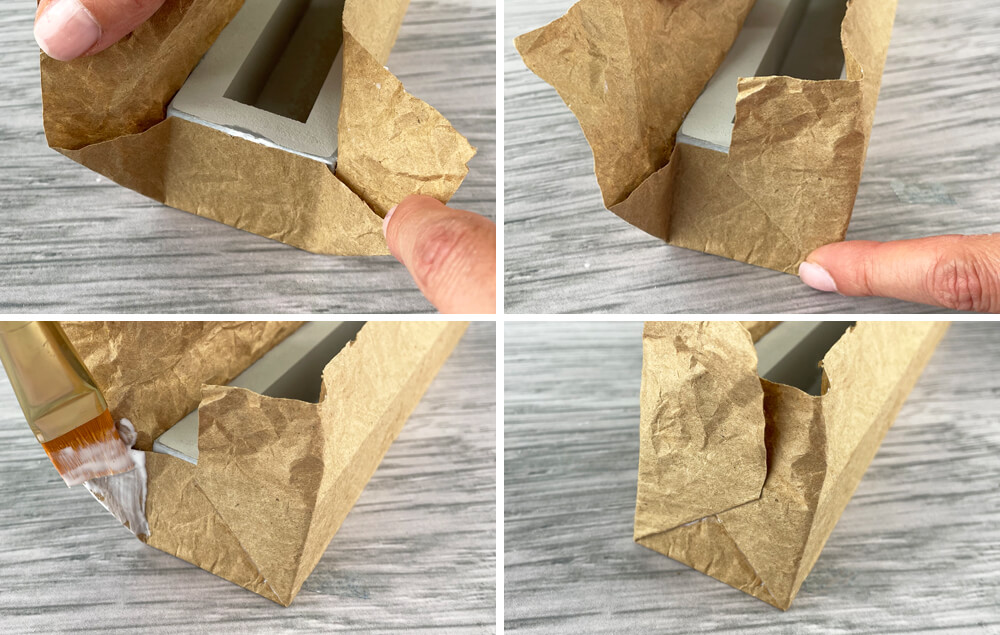
Step 3:
A) Wrap the kraft paper around the end of the wood plaque like you’re wrapping a present.
B) Fold and crease the paper.
C) Apply more deco podge to help hold the corners in place.
D) Finish folding and sealing the corner. Repeat on the other side.
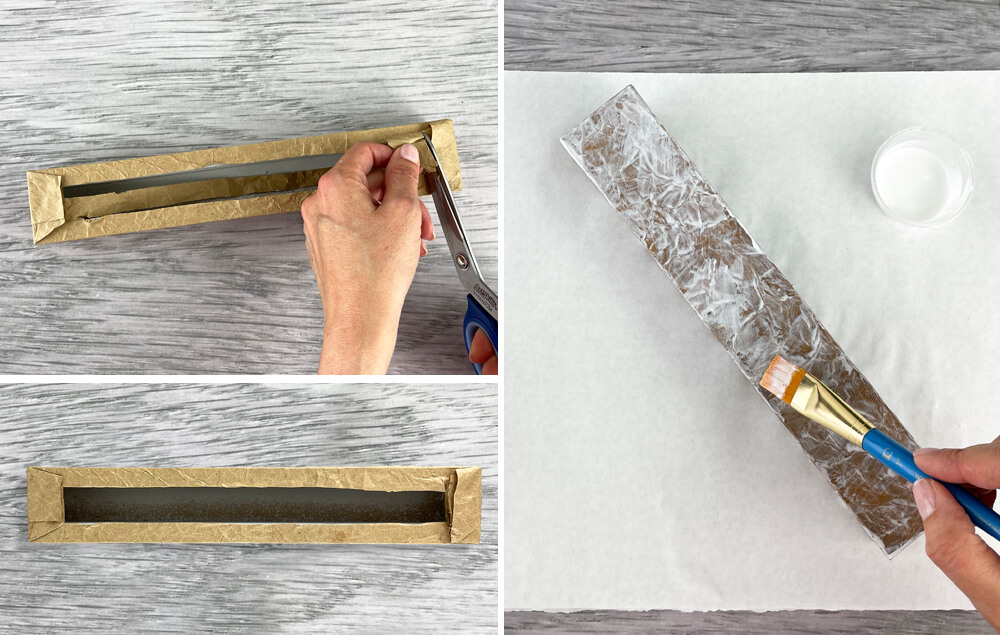
Step 4:
A) Trim excess paper from the bottom of the plaque.
B) Apply a coat of deco podge to the wood plaque to seal the kraft paper.
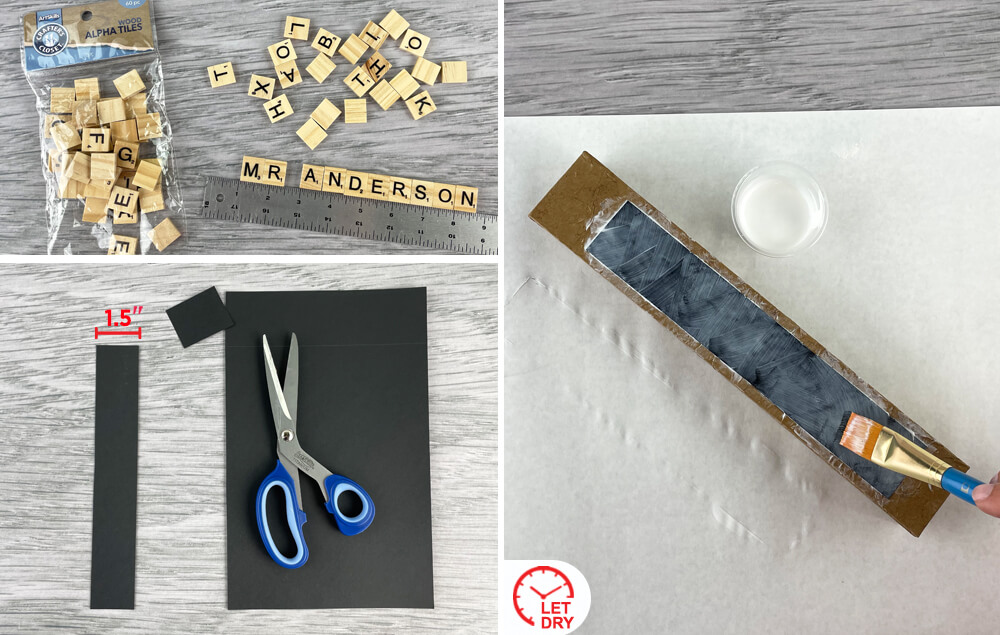
Step 5:
A) Lay out the letter tiles to spell out a name. Measure the length of the name. Add one inch to the total length.
B) Cut a 1 1/2" wide strip of black paper to the length needed.
C) Apply deco podge to the back of the strip and place it on the plaque. Then apply deco podge over the strip to seal it to the plaque. Let dry.
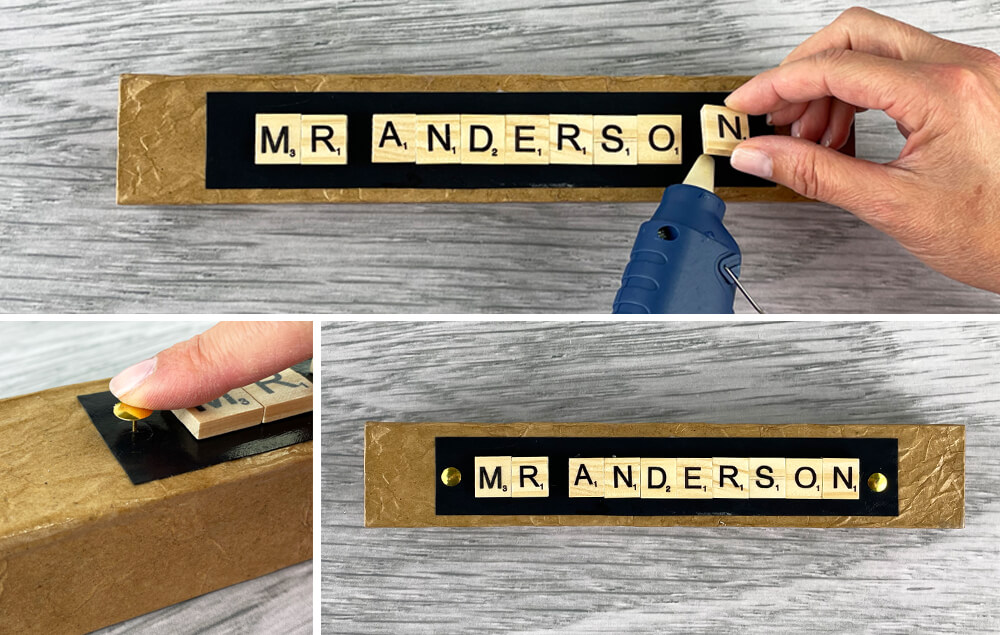
Step 6:
A) Hot glue the letters to the plaque.
B) Press tacks into the ends of the black paper on the plaque.


