

Halloween Pumpkins
Level of difficulty: Beginner
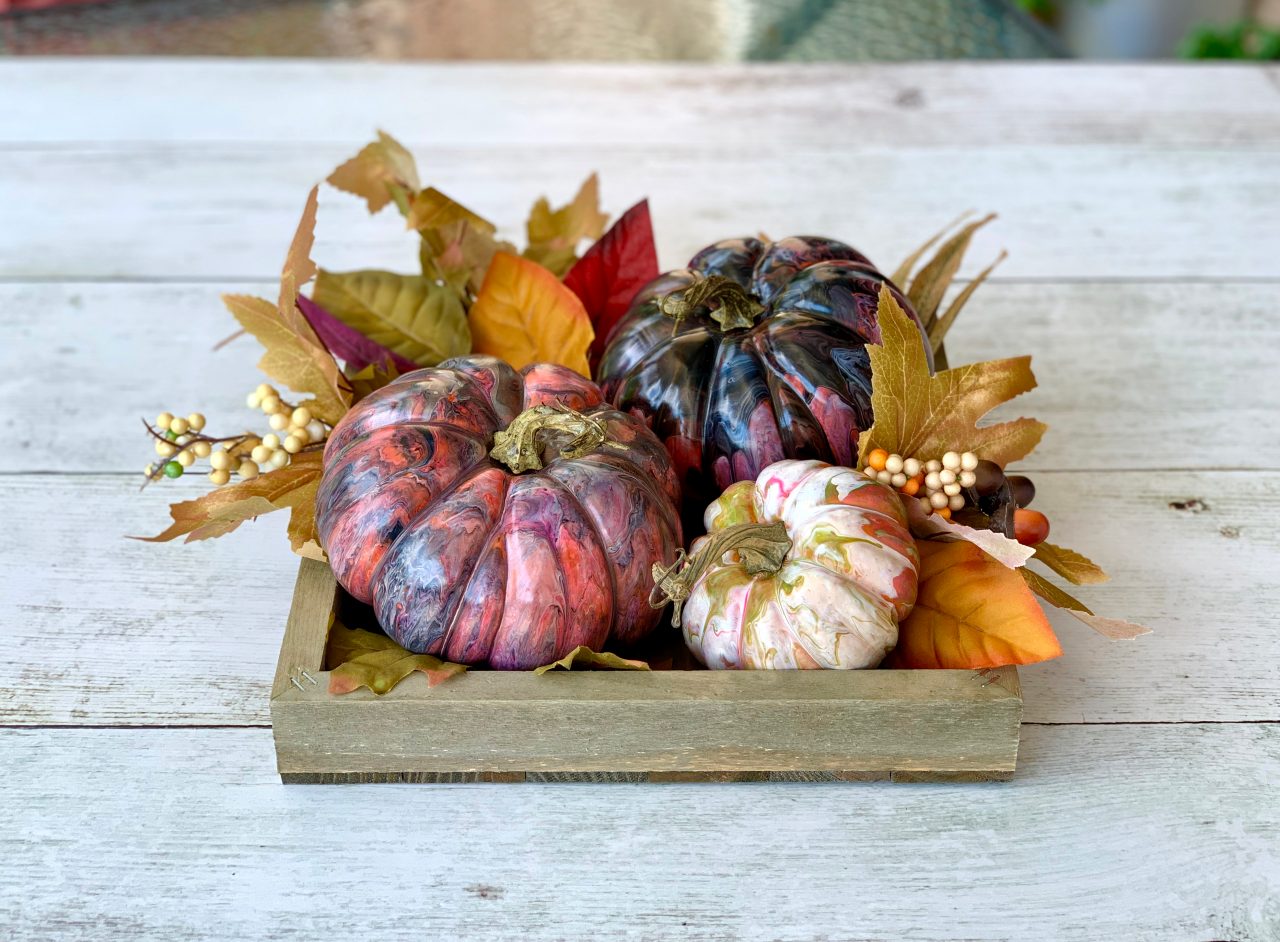
Dress up your décor this fall with these gorgeous paint pour pumpkins. Create custom colors to match your own personal taste and enjoy these pumpkins from Halloween through Thanksgiving!
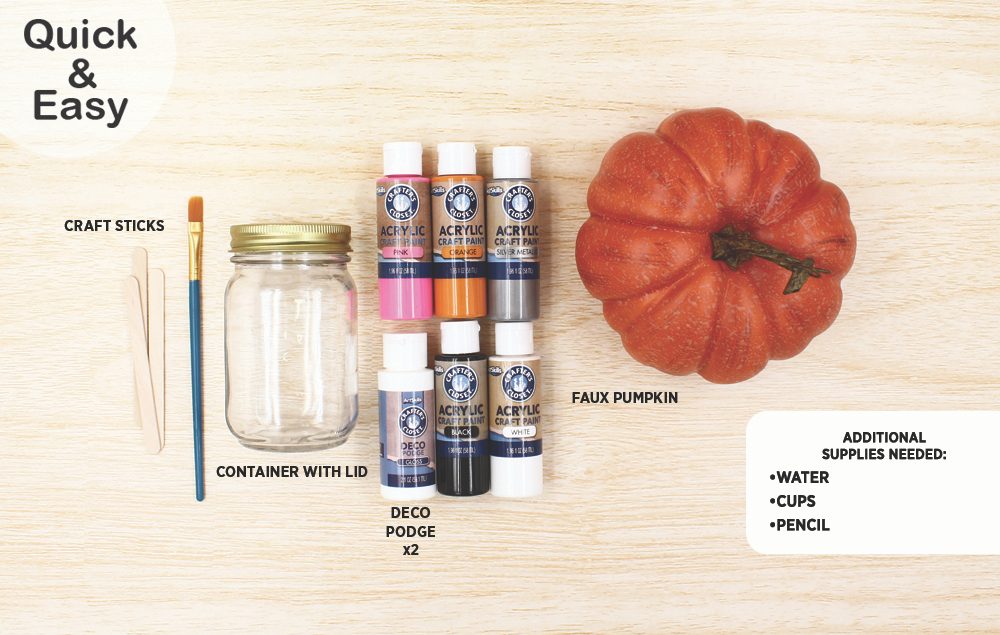
What You'll Need:
- Crafter’s Closet Black Acrylic Paint
- Crafter’s Closet White Acrylic Paint
- Crafter’s Closet Silver Metallic Paint
- Crafter’s Closet Pink Acrylic Paint
- Crafter’s Closet Orange Acrylic Paint
- Crafter’s Closet Premium Paint Brush
- Crafter’s Closet Deco Podge Gloss
- Crafter's Closet Wood Craft Sticks, 70 ct
- Faux Pumpkin(s)
- Cups
- Jar/Container with a Lid
- Water
Let's Do This!
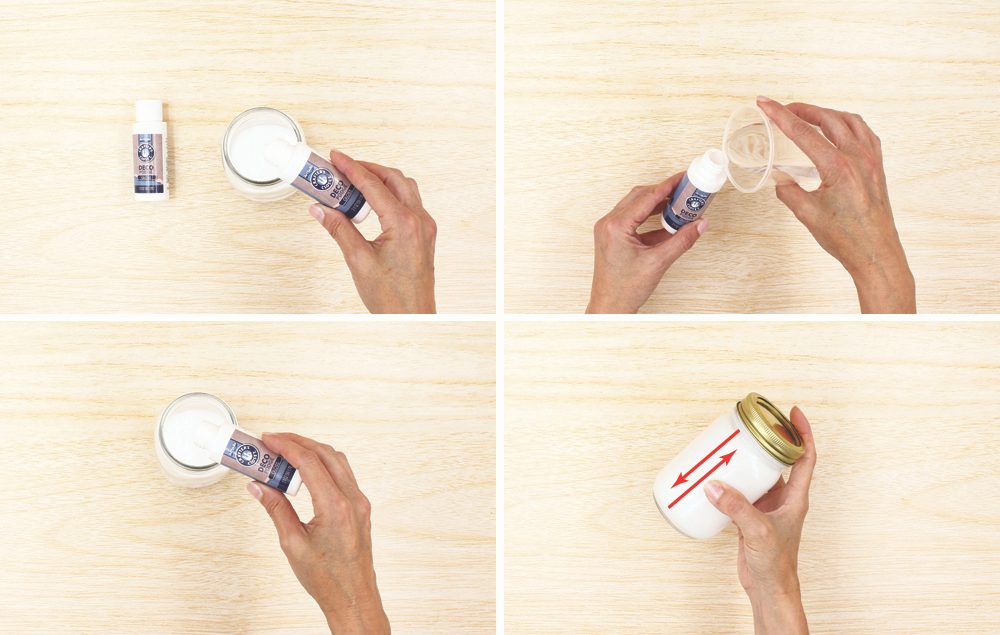
Step 1:
B) Fill an empty deco podge bottle with water until it’s about 2/3 full.
C) Pour the water into the jar containing the deco podge.
D) Put the lid on the jar and shake well to mix the contents.
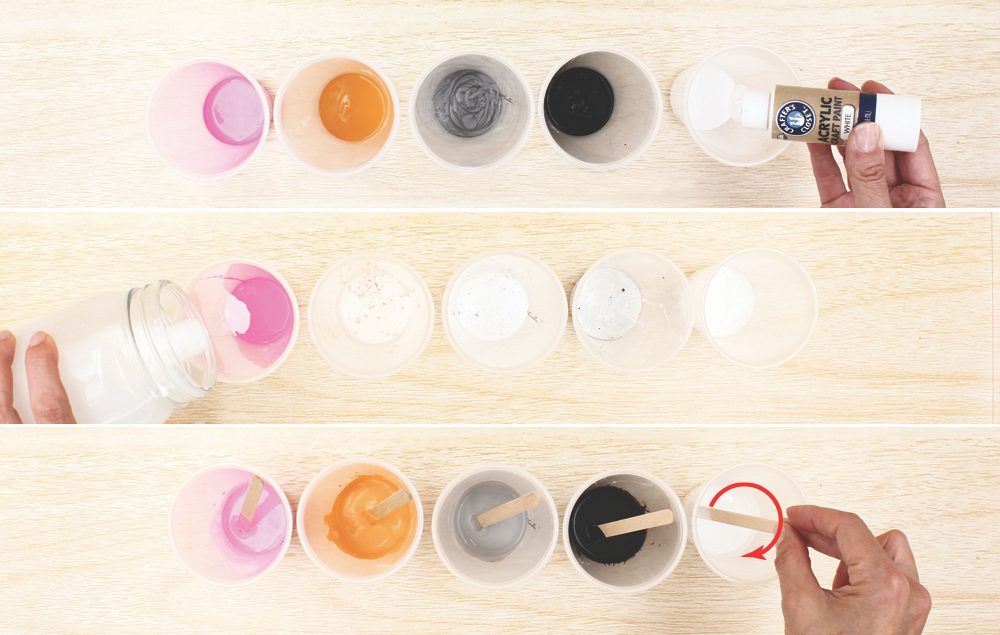
Step 2:
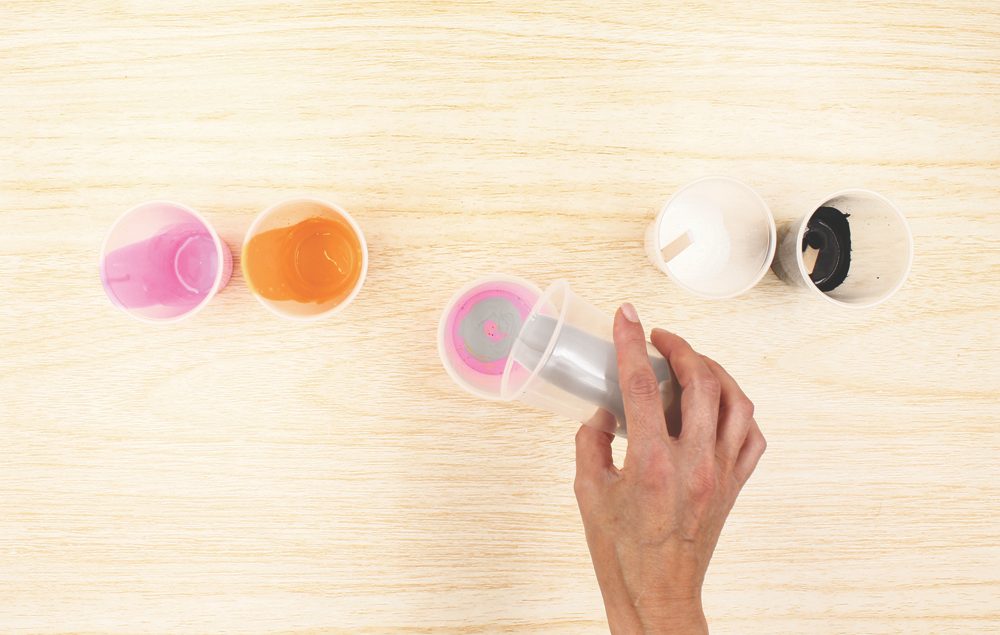
A) Squeeze about three teaspoons of each paint color into individual cups.
B) Remove the lid from the jar and pour a small amount of the deco podge-water mixture into each cup.
C) Stir each cup until the paint and deco podge-water mixture is well blended. The paint mix should have the consistency of honey. You can add more of the deco podge-water mixture to the paint to reach the desired consistency, if needed.
Step 3:
Step 4:
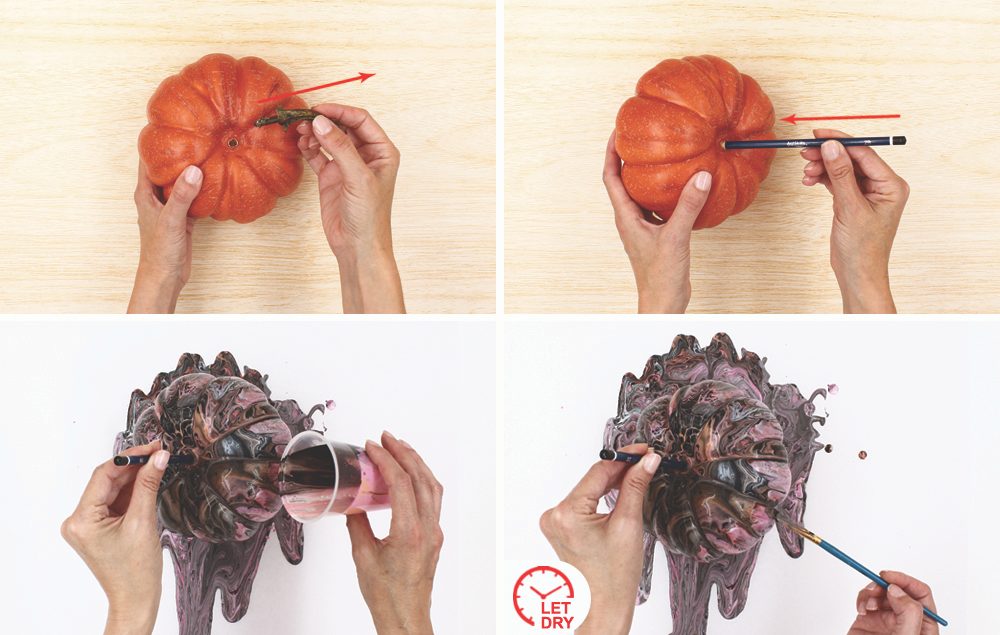
A) Gently remove the stem from a faux pumpkin.
B) Insert a pencil into the top of the pumpkin to use as a handle during the paint pour.
C) Pour your “dirty pour” paint mixture over the pumpkin. Let drip.
D) If the paint doesn’t completely run over the entire pumpkin, you can use a paint brush dipped in the runoff paint below to fill in any gaps. Let dry.
Bonus idea: Place a canvas under the pumpkin to catch the paint mixture runoff. When your pumpkin paint pour is done, set the pumpkin aside to dry and tilt the canvas to make a paint pour piece of art!
Step 5:
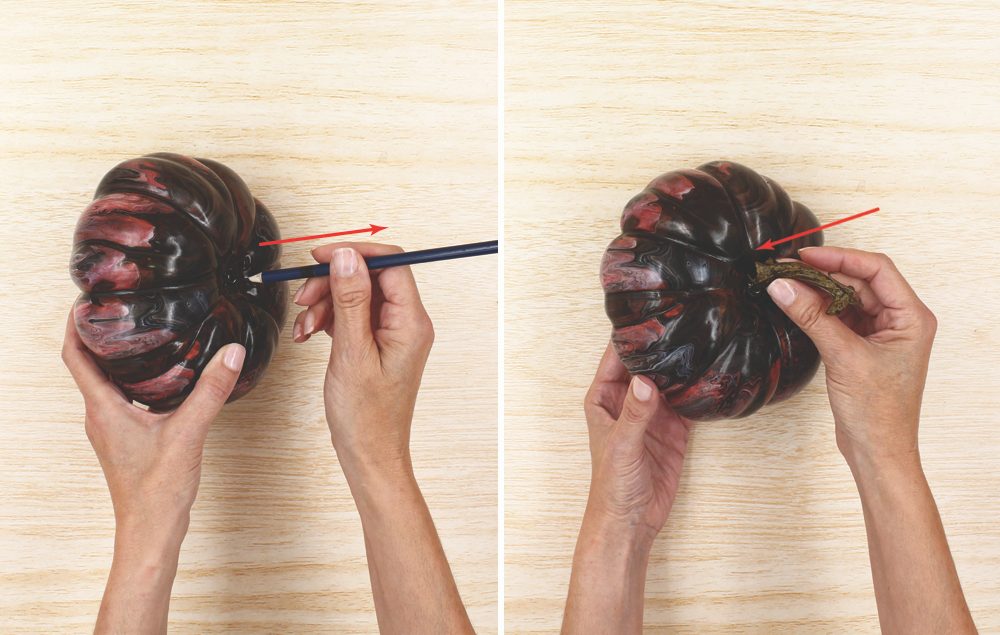
A) Remove the pencil from the pumpkin.
B) Insert the stem back in place.


