

Fall Pumpkin Sign
Level of difficulty: Beginner
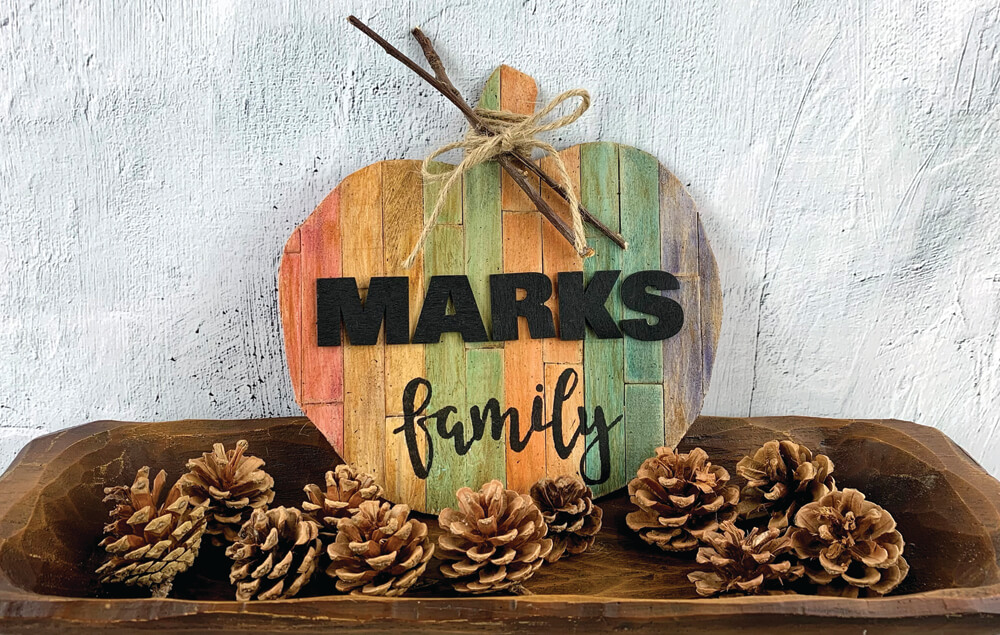
Create this palette wood pumpkin from our colorful craft sticks! Just in time for fall decorating, this rustic pumpkin can adorn your home and proudly display your family’s name.
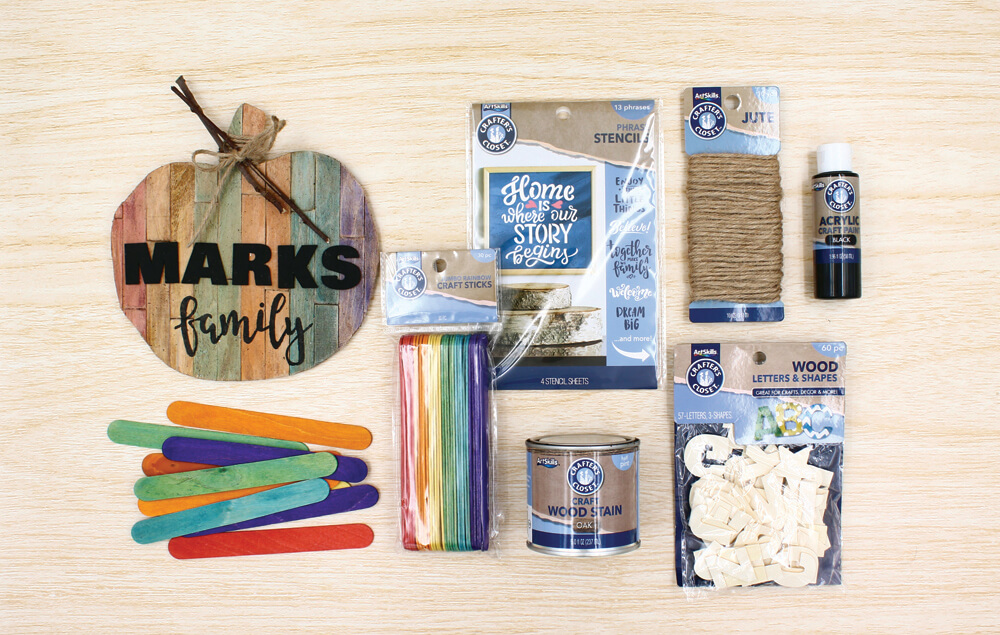
What You'll Need:
- Crafter's Closet Black Acrylic Paint
- Crafter's Closet Jumbo Rainbow Craft Sticks
- Crafter's Closet Hot Glue Gun
- Crafter's Closet Hot Glue Sticks
- Crafter's Closet Premium Paint Brush
- Crafter's Closet Palette
- Crafter's Closet Precision Scissors
- Crafter's Closet Jute
- Crafter's Closet Phrase Stencils
- Crafter's Closet Craft Wood Stain Oak
- DG Hardware Assorted Sandpaper
- ProEssnetial Masking Tape
Let's Do This!
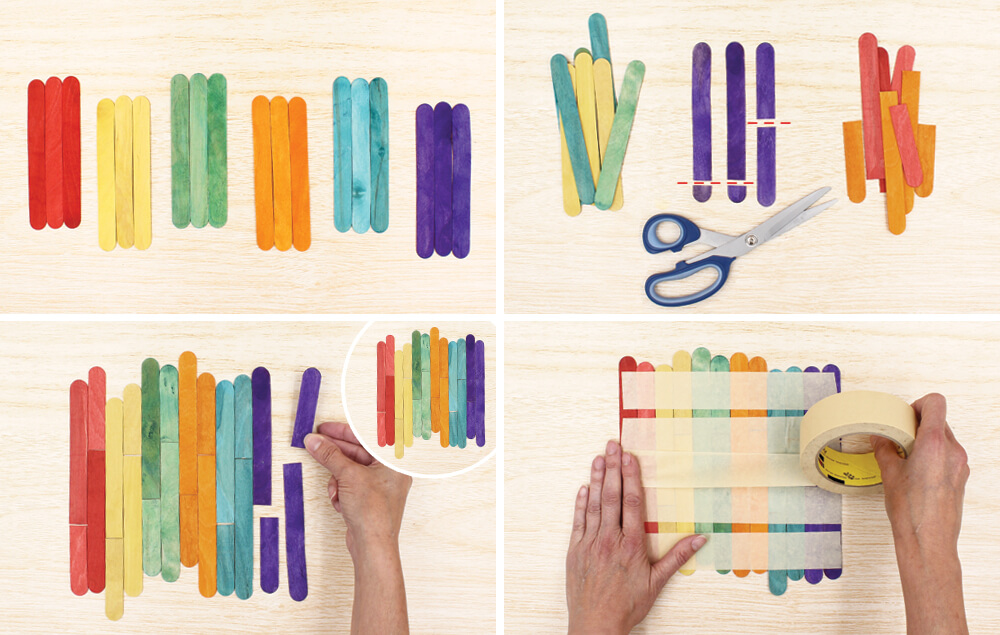
Step 1:
- You will need three craft sticks of each color: red, green, blue, yellow, orange, and purple.
- For each color: Cut the ends off two sticks and then cut the third stick in half.
- Lay out the sticks as shown.
- Completely cover the back of the craft sticks with masking tape.
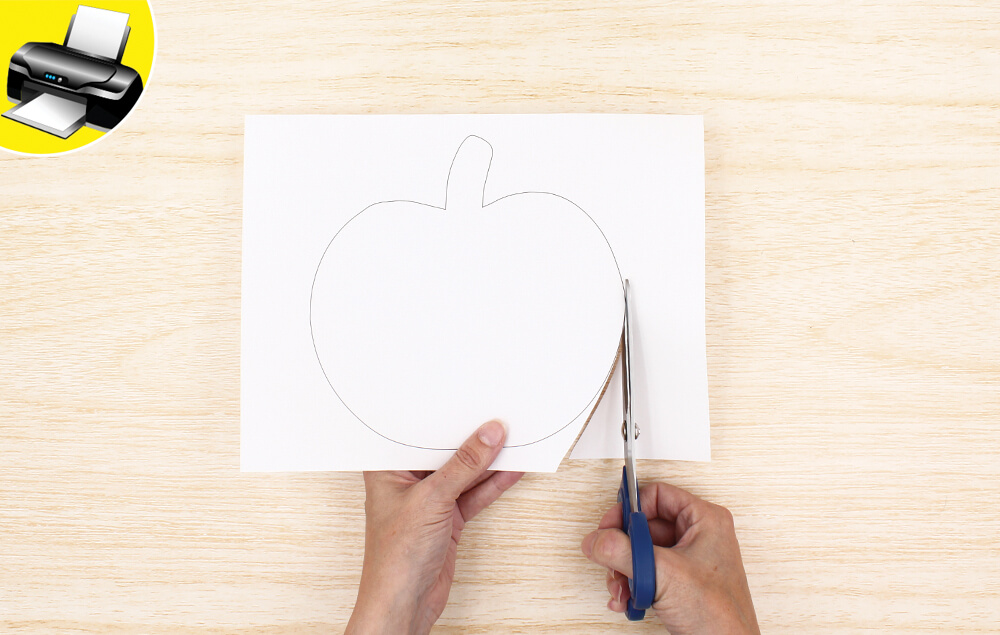
Step 2:
- Print and cut out the pumpkin template.
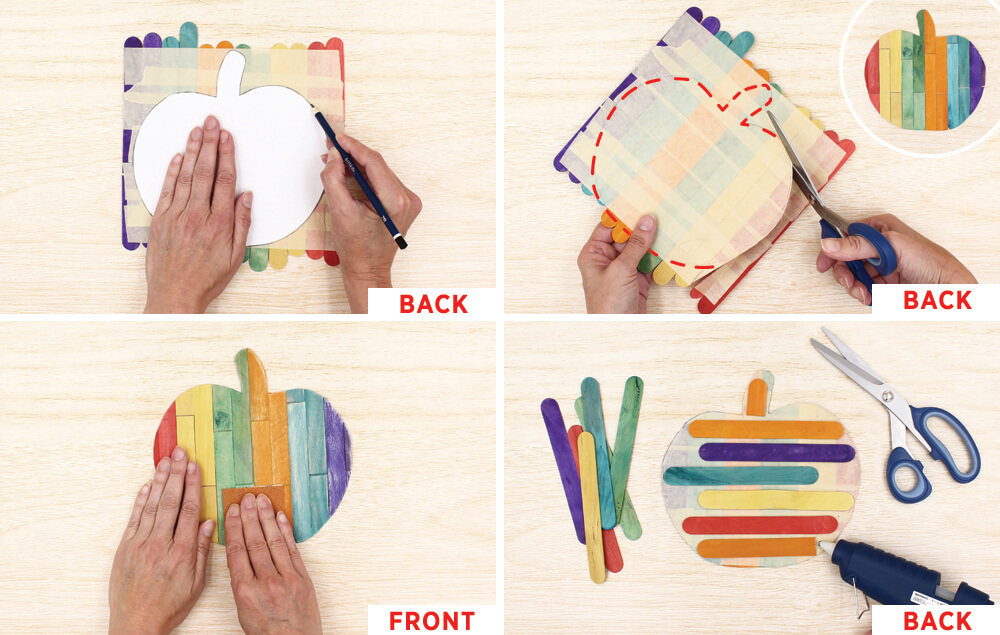
Step 3:
- Trace the pumpkin template onto the craft sticks.
- Carefully cut out the pumpkin.
- Sand the front of the pumpkin to distress the wood.
- Use the remaining craft sticks to strengthen the back of the pumpkin by attaching them with hot glue.
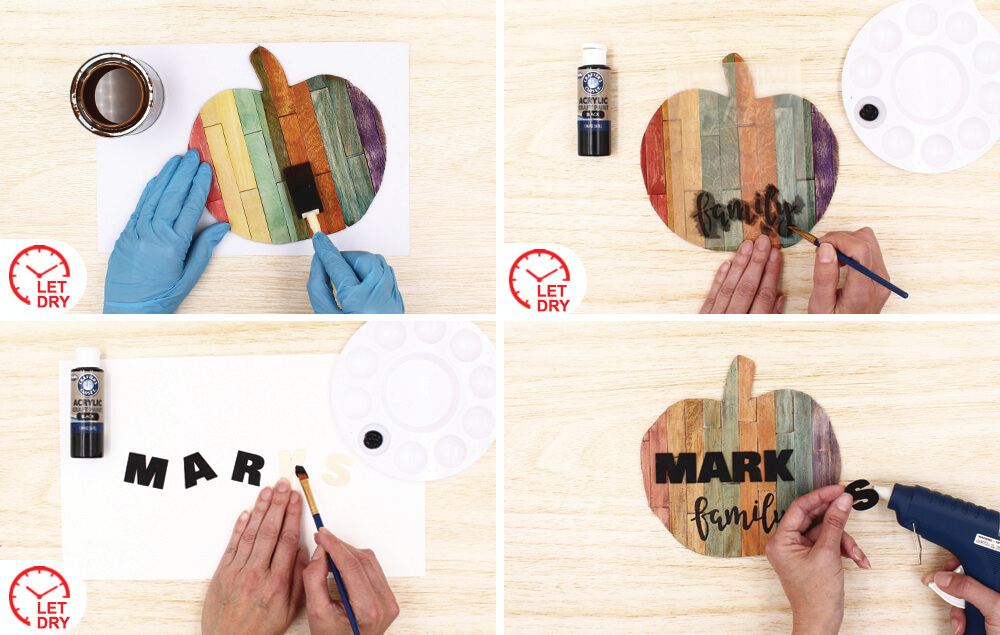
Step 4:
- Apply stain to the front of the pumpkin. Let dry.
- Stencil the word “family” onto the lower portion of the pumpkin with black paint. Let dry.
- Paint the wooden letters black. Let dry.
- Hot glue the letters in place.
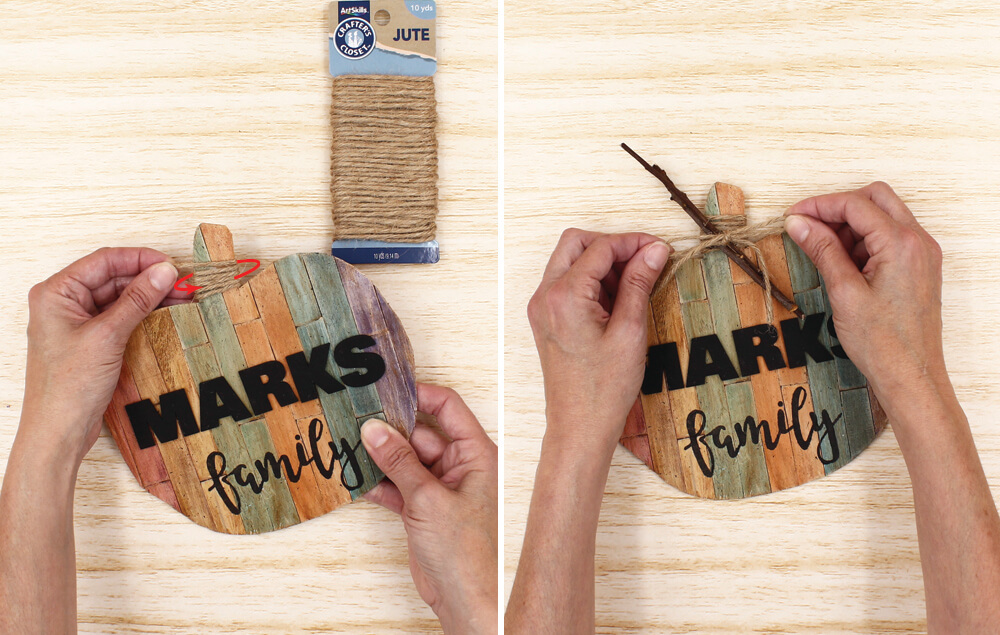
Step 5:
- Wrap jute around the pumpkin stem. Cut and secure the jute with hot glue.
- Tie another piece of jute around the pumpkin stem and make a bow. Add a few sticks for an embellishment.
Download Template
- Filename
- _pumpkin_template.pdf
- Size
- 49 KB
- Format
- application/pdf


