

Fabric Pumpkins
Level of difficulty: Beginner
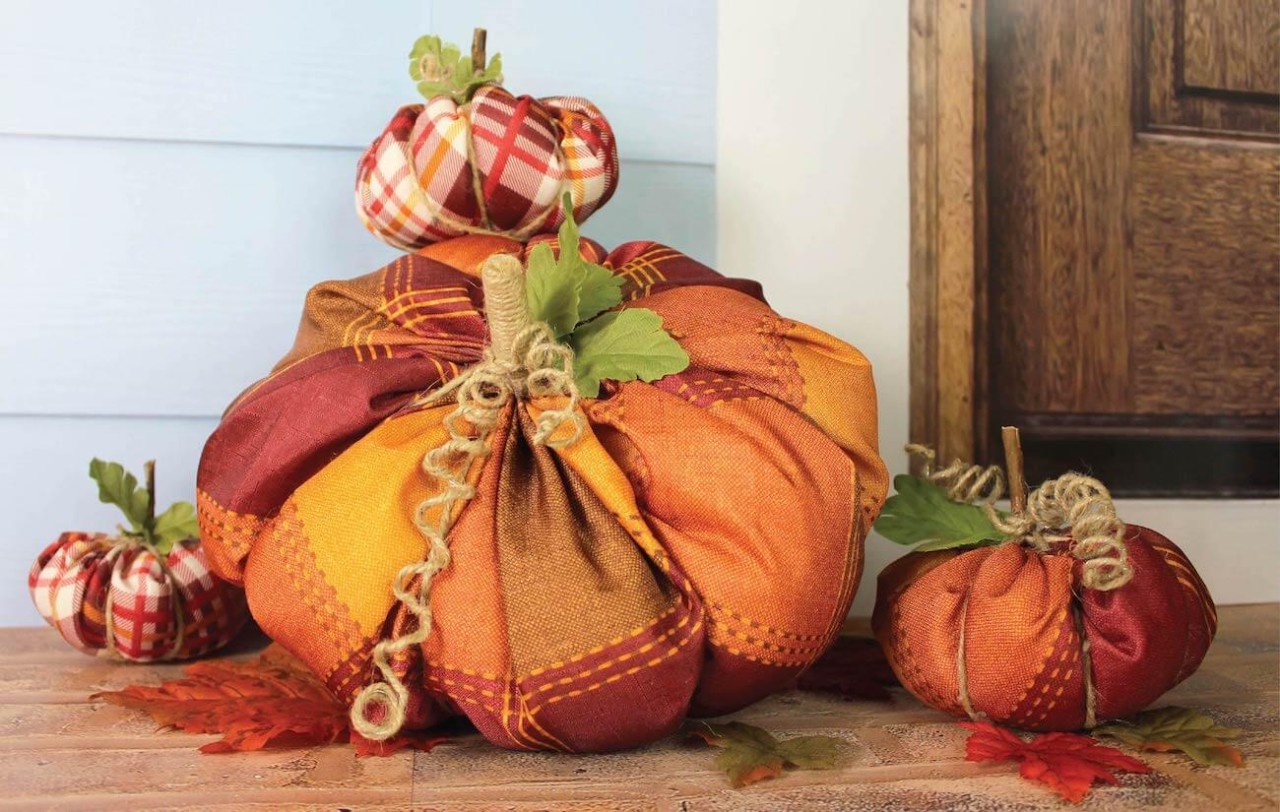
Dress up your front porch with cozy and festive decorations!
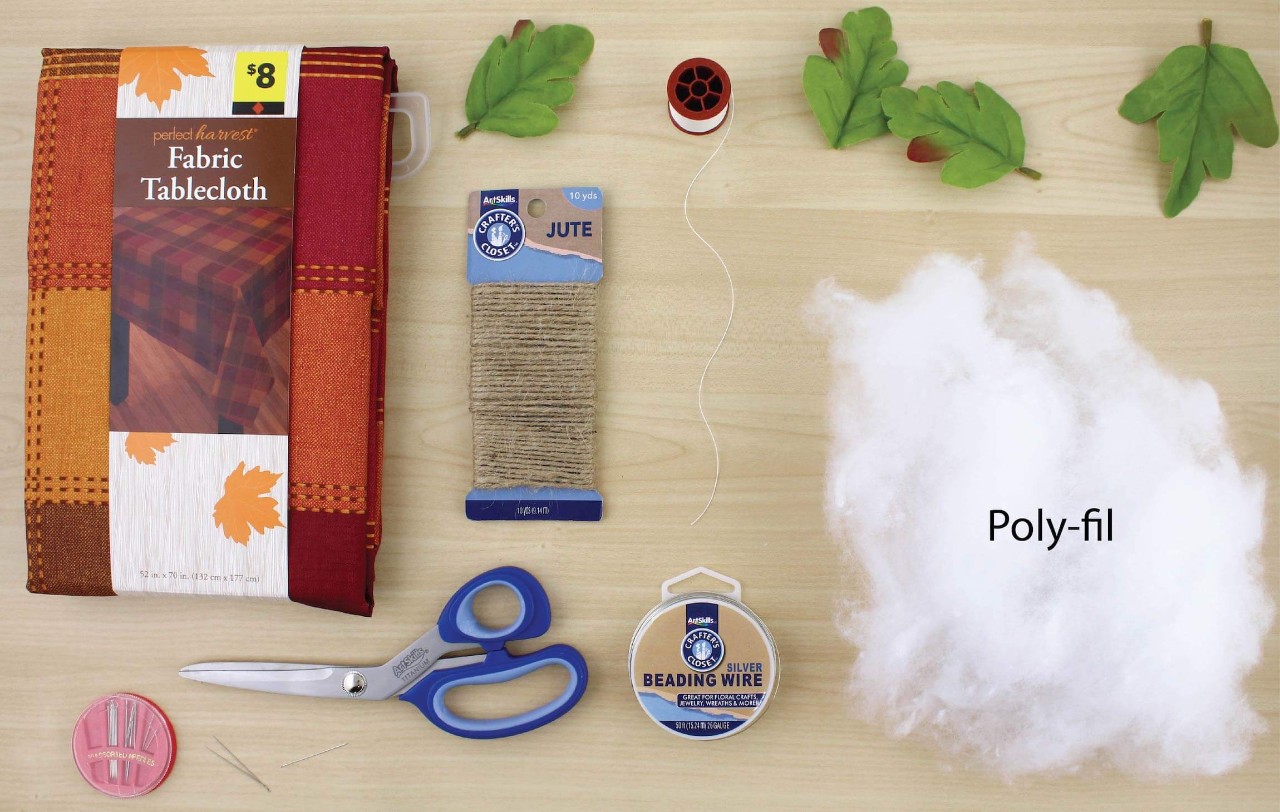
What You'll Need:
- Crafter's Closet Jute
- Crafter's Closet Hot Glue Sticks
- Crafter's Closet Hot Glue Gun
- Crafter's Closet Beading Wire
- Crafter's Closet Fabric Scissors
- Faux Fall Leaves
- Twig/ Branch
- Polyfil
- Fall Plaid Tablecloth/ Fabric
- Needle and Thread
Let's Do This!

Step 1:
- Cut a large square out of your tablecloth. Our recommended size is no smaller then twelve inches.
- Fold the square into quarters and cut in a curve from one corner to the opposite. Be sure to keep the folded edges in tack.
- Open up the fabric to reveal a circle!
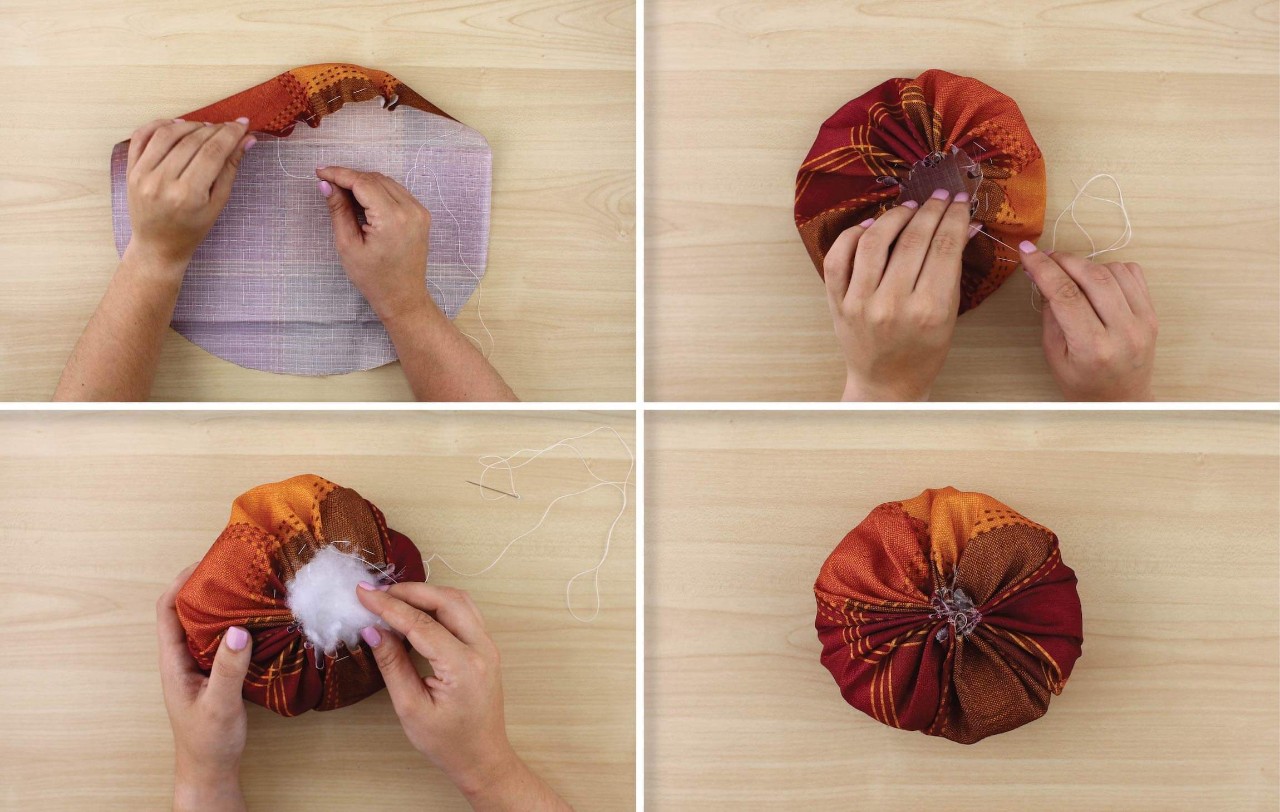
Step 2:
- Turn your fabric upside down.
- Begin to loosely stitch around the edge of the entire circle with the needle and thread.
- Fill the inside with loose poly-fil.
- Pull the thread tight and close up the center of the pumpkin. Tie a knot at the base of the thread to keep the stitches together.
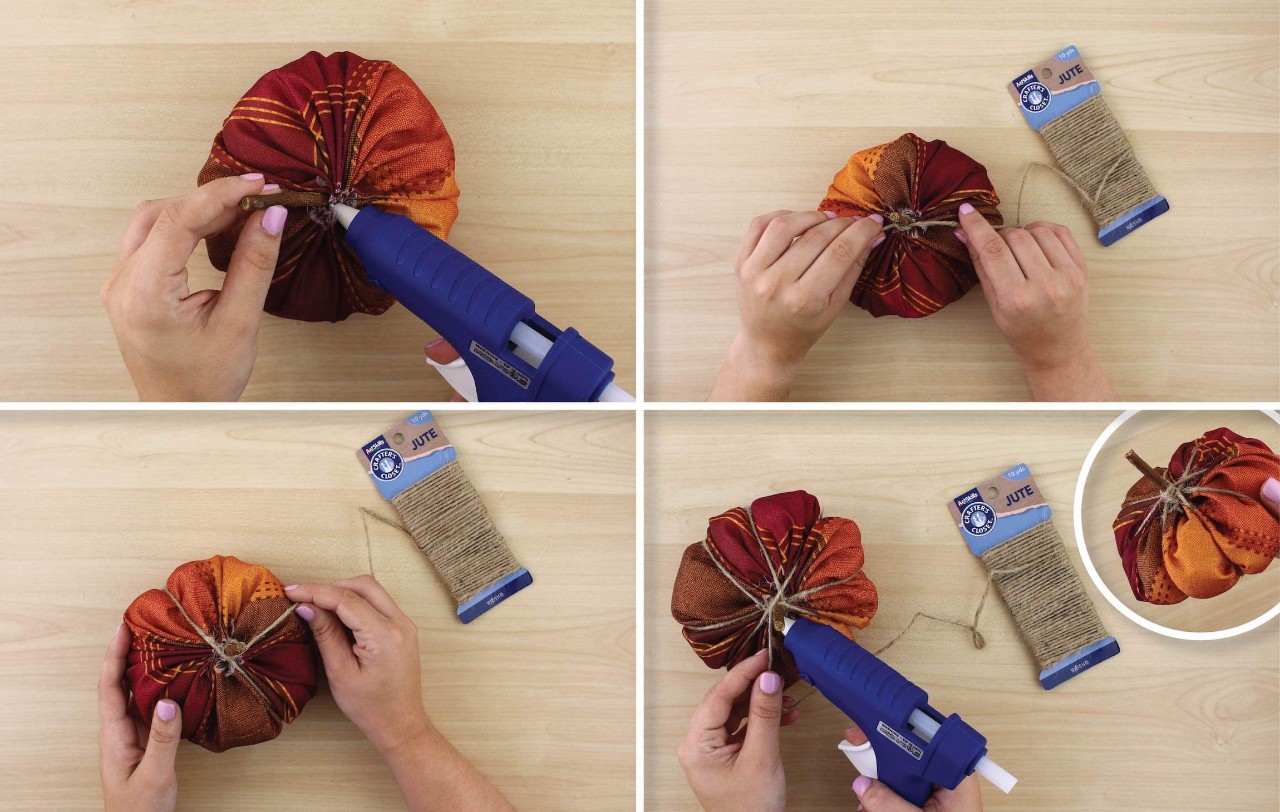
Step 3:
- Grab a small branch or twig from outside and hot glue into the center of the pumpkin.
- Using the Jute, tie a knot around the bottom of the stem and hot glue the loose edge down.
- Begin to wrap the jute around the fabric and create the natural sections that a pumpkin forms.
- Hot glue the end of the twine to the bottom of the stem.

Step 4:
- Twist the Jute and Beading Wire together.
- Add to the stem but tying a knot, a little off center.
- Wrap the Wired Jute around a pen or pencil. Remove the pen to reveal a coiled decoration!
- Spread out the coils and place how you would like.
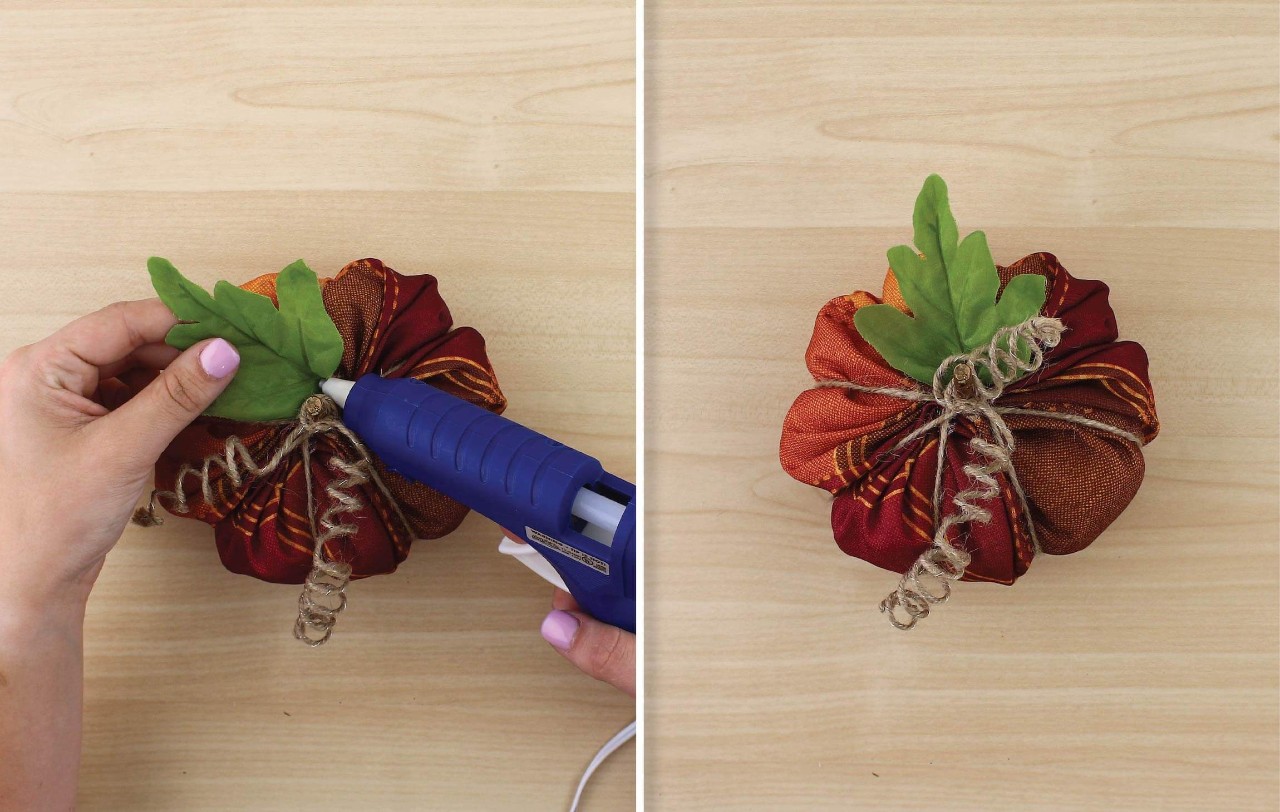
Step 5:
- Hot Glue a leaf to the base of the stem and put on display!


