

Burlap Garland
Level of difficulty: Intermediate
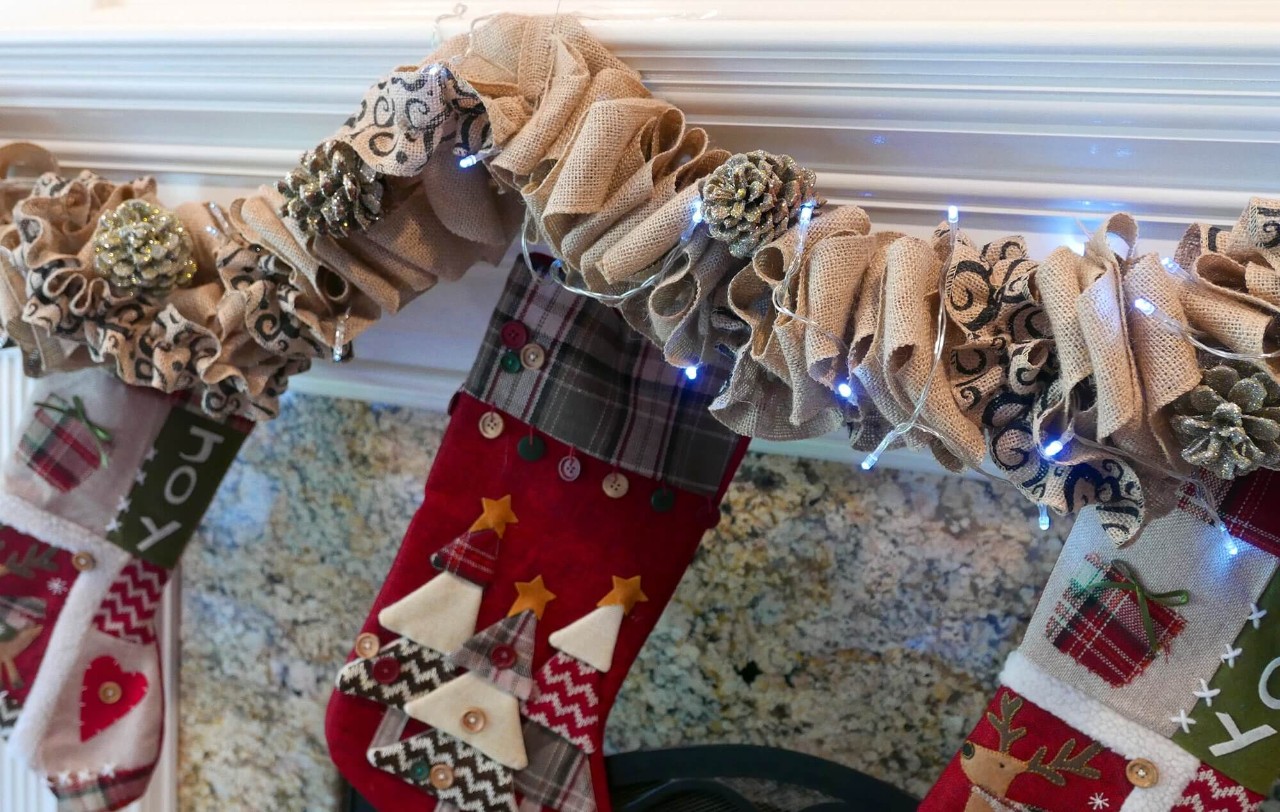
Create your own holiday garland to decorate your home this season! This project is super easy to create and will warm up your mantel for the holidays!
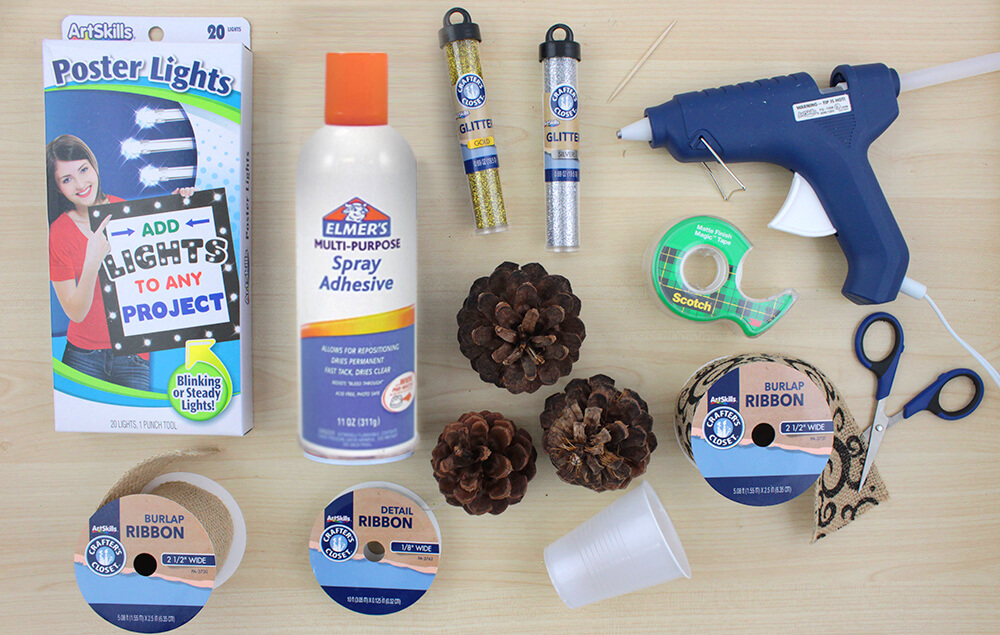
What You'll Need:
- ArtSkills Poster Lights
- Crafter's Closet Plain Burlap Ribbon - 3 Rolls
- Crafter's Closet Burlap Ribbon with Black Pattern - 3 Rolls
- Crafter's Closet Silver Detail Ribbon
- Crafter's Closet Silver Glitter
- Crafter's Closet Gold Glitter
- Crafter's Closet Hot Glue Gun
- Crafter's Closet Hot Glue Sticks
- Crafter's Closet Precision Scissors
- Adhesive Spray
- Pinecones
- Toothpicks
- Clear Tape
- Plastic Cup
Let's Do This!
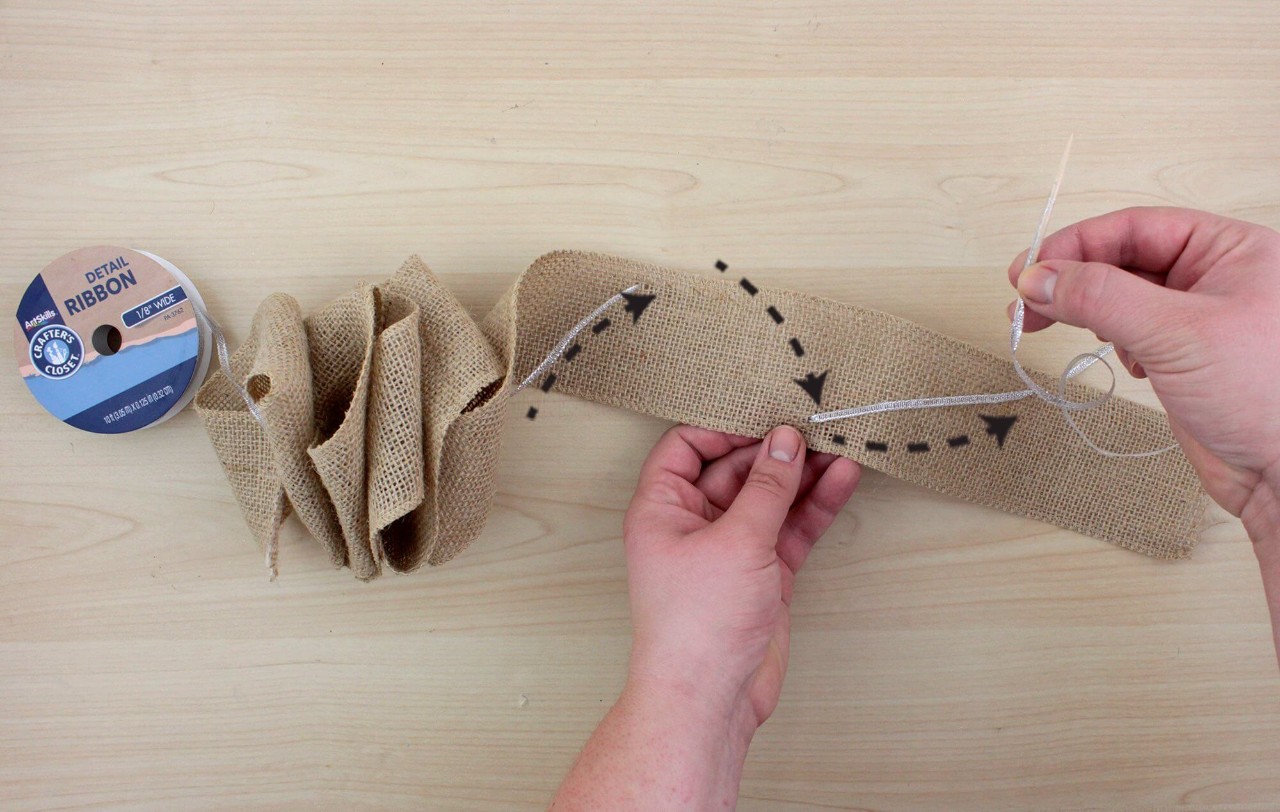
Step 1:
- Create a sewing needle by taping the start of the silver ribbon to a toothpick. Begin weaving the toothpick through the plain burlap ribbon. Instead of a straight line, weave in a zig zag pattern and space the stiches about two inches apart. Continue through all three rolls of burlap ribbon.
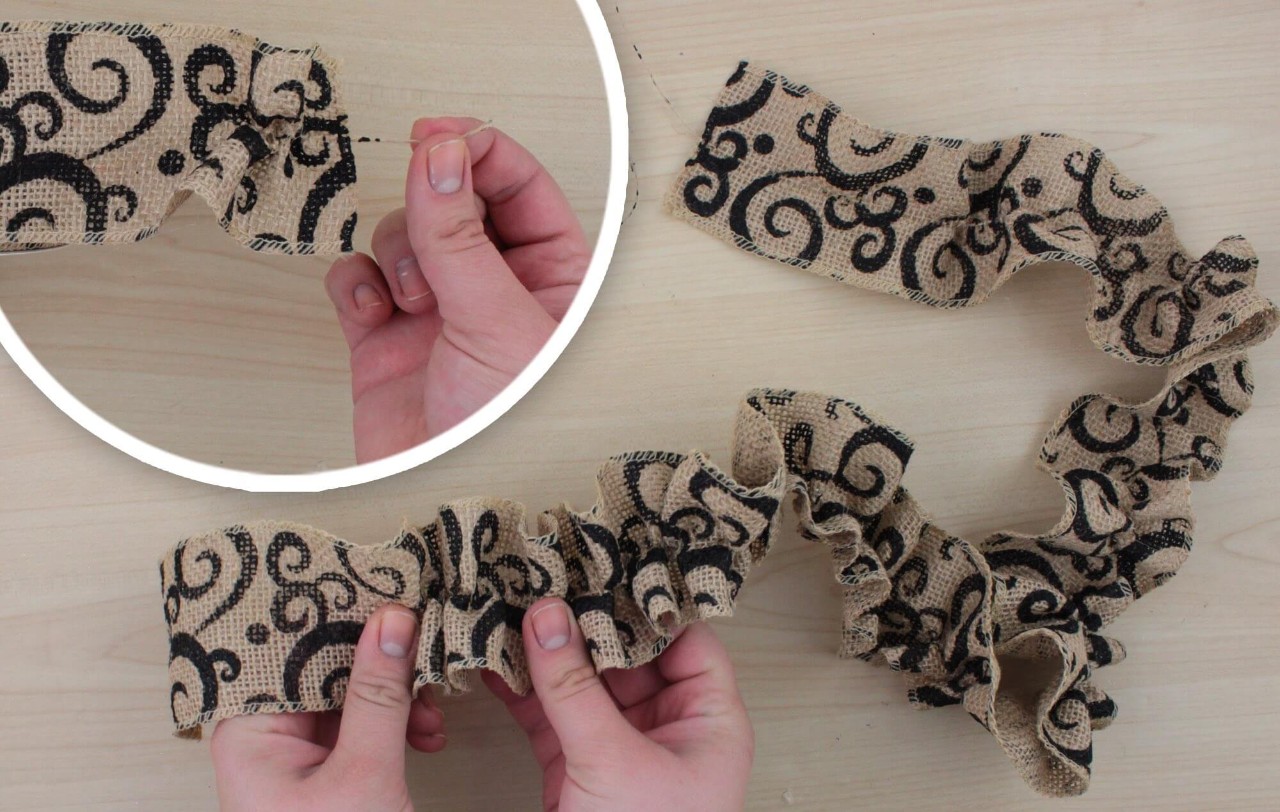
Step 2:
- On the black design burlap ribbon, take the middle stitch strand and begin to pull. This will cinch the burlap and create a ruffle pattern across the entire roll.
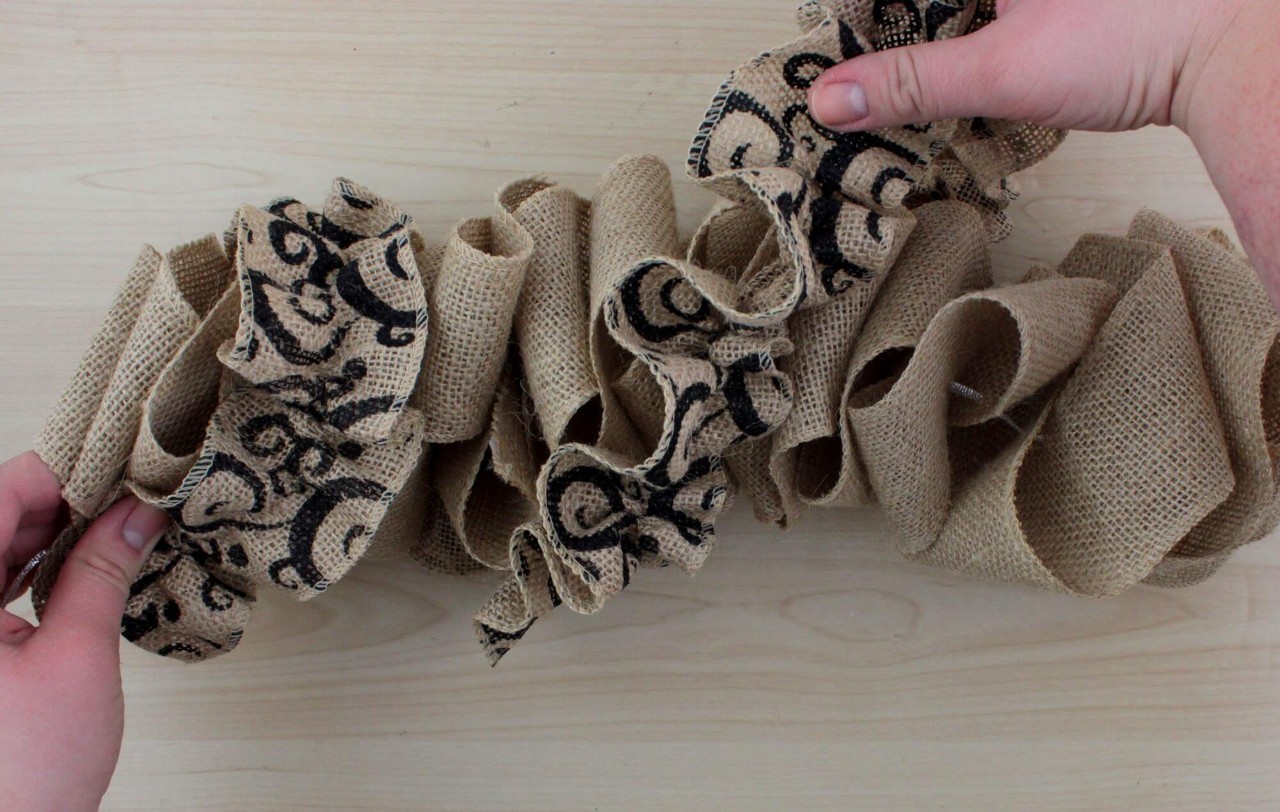
Step 3:
- Wrap the ruffled burlap around the plain burlap garland. Fasten them to one another with hot glue or silver ribbon on either end of the garland.
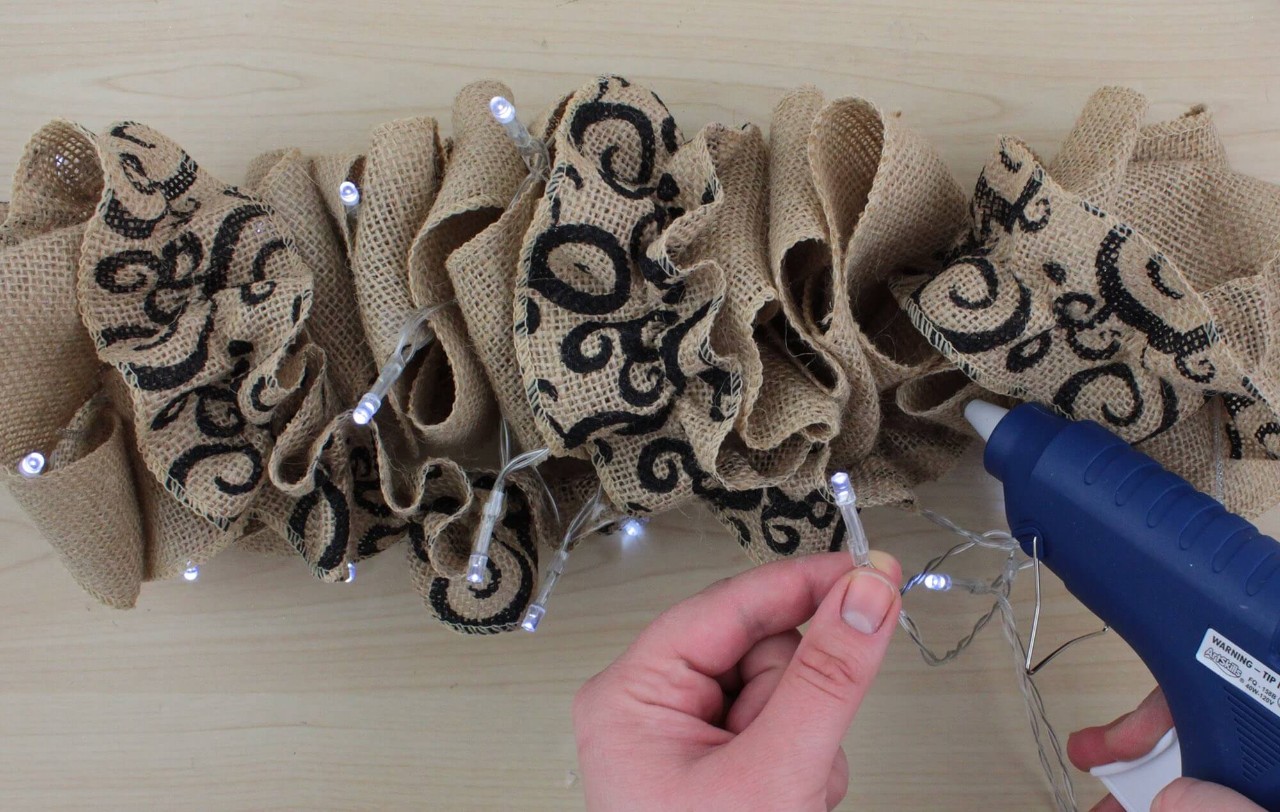
Step 4:
- Attach poster lights across the garland by carefully hot gluing the light into place.
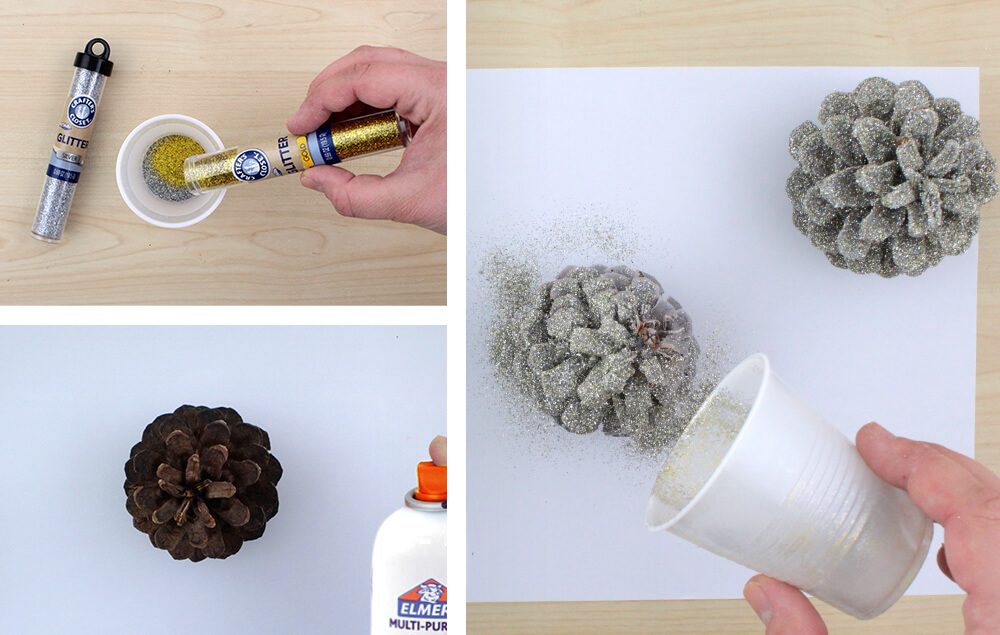
Step 5:
- Mix equal parts gold glitter and silver glitter in the plastic cup. Spray adhesive onto the pinecones then cover in the glitter mix. Let dry.

Step 6:
- Glue pinecones into the garland.


